
How to Measure for a Ring Size at Home
- Luke Zucco
- Sep 6, 2025
- 10 min read

Figuring out your ring size at home is easier than you might think. You don't need fancy tools—just a few common items and the right approach can get you a surprisingly accurate measurement. Getting that perfect fit is key, not just for comfort, but to make sure your ring stays securely on your finger where it belongs.
Why Nailing the Perfect Ring Fit is So Important
Getting the size right from the get-go is about more than just avoiding a trip to the jeweler. A bad fit can ruin the experience of wearing a beautiful ring. Too loose, and you'll live with the constant anxiety of it slipping off. Too tight, and you're dealing with uncomfortable pressure, irritated skin, or even cutting off circulation.
And here's something many people don't realize: not all rings can be resized. Intricate designs, eternity bands with stones all the way around, or rings made from modern metals like tungsten or titanium often can't be altered. That makes your initial measurement mission-critical.
Taking a few minutes to measure correctly ensures your new ring is a joy to wear from day one. I'll walk you through two of the most reliable at-home methods I recommend.
The String or Paper Method: This is the classic, go-to technique. It's simple, quick, and uses things you already have lying around the house.
The Printable Ring Sizer Method: A great visual option that lets you either measure your finger directly or find the size of a ring you already own.
Here's a pro tip I always share: Never measure your fingers when they're cold! They can actually shrink by up to half a size. For a truly accurate reading, measure in the evening when your hands are a bit warmer and slightly swollen from the day.
Once you get the hang of these simple techniques and keep a few key factors in mind, you'll be able to find your size with confidence. Let's dive into how you can get that flawless fit without leaving your house.
Getting Your Tools Ready for a Perfect Fit
Before you start wrapping anything around your finger, let's get organized. The key to getting a reliable measurement at home is having the right—but very simple—tools on hand. You almost certainly have everything you need lying around the house.
Getting an accurate ring size wasn't always this straightforward. Jewelers in ancient times often relied on pure guesswork, which meant a lot of rings had to be resized. The methods we use today are the result of a long journey toward precision, all in the name of finding that perfect, comfortable fit. You can learn more about the fascinating history of ring sizing and how far we've come.
Your DIY Sizing Kit
Find a spot with good lighting where you can work comfortably. Taking a minute to gather these items now will save you from the headache of an ill-fitting ring later.
Something to Measure With: This is the most critical piece. Grab a thin strip of paper, a piece of string, or even some dental floss. The golden rule here is that it must not stretch. A rubber band or a piece of elastic ribbon will absolutely give you a wrong measurement, usually one that's too small.
A Fine-Tipped Pen: You'll need to make a very precise mark. A thick-tipped marker can easily throw off your measurement by a half size or more, so the sharper the point, the better.
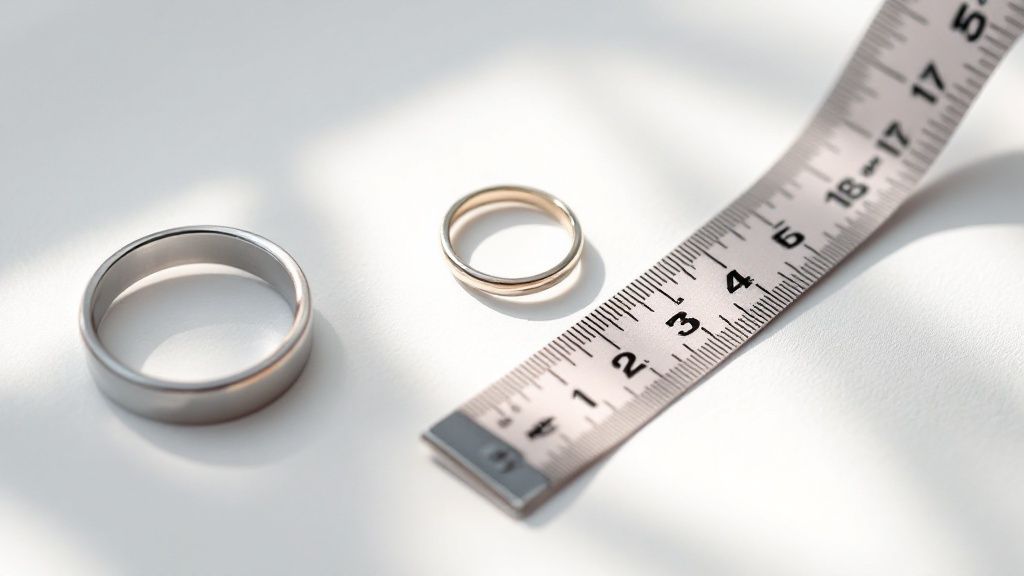
A Ruler with Millimeters: Ring sizes are incredibly specific, often differing by mere fractions of an inch. A ruler that shows millimeters (mm) is non-negotiable for getting this right.
Scissors: Just for cutting a neat strip of paper if that's what you're using.
Expert Tip: When you measure is just as important as how you measure. Your fingers swell and shrink throughout the day due to temperature and activity. For the most accurate reading, measure your finger toward the end of the day when it’s likely to be at its largest.
Try to avoid measuring when you're cold (your fingers will be smaller) or right after a hot shower or intense workout (they'll be swollen). Even a salty meal can throw things off! For the most confidence in your number, measure 2-3 times on different days and average the results.
The String and Paper Method Explained
This is probably the most classic way to find your ring size at home, and for good reason—it’s quick, easy, and you definitely have what you need lying around. Learning how to measure your ring size with a simple piece of string or paper gives you a surprisingly accurate starting point for finding that perfect fit.
First, grab your tool. You'll want a thin strip of paper or a piece of non-stretchy string. Wrap it snugly around the base of the finger you're sizing. The key here is "snug," not "tight." Think about how a real ring feels; you want it secure enough that it won't fall off, but not so tight that it's uncomfortable.
Don't Forget About the Knuckle
Here’s a pro tip that people often miss: you have to get the ring over your knuckle. After you've wrapped the paper or string, gently try to slide it off your finger, just like you would with a real ring. If it gets stuck or you have to force it, your measurement is too tight.
Make sure your little sizing loop can slide over the knuckle without a major struggle. A little resistance is okay, but it shouldn't be a fight.
Marking and Measuring for Accuracy
Once your string or paper is in the perfect spot, use a fine-tipped pen or pencil to mark exactly where the end overlaps. Avoid using a thick marker! I’ve seen this mistake add a whole half-size to a measurement, which can make all the difference. Precision is your best friend here.
This simple visual guide walks you through the key steps.
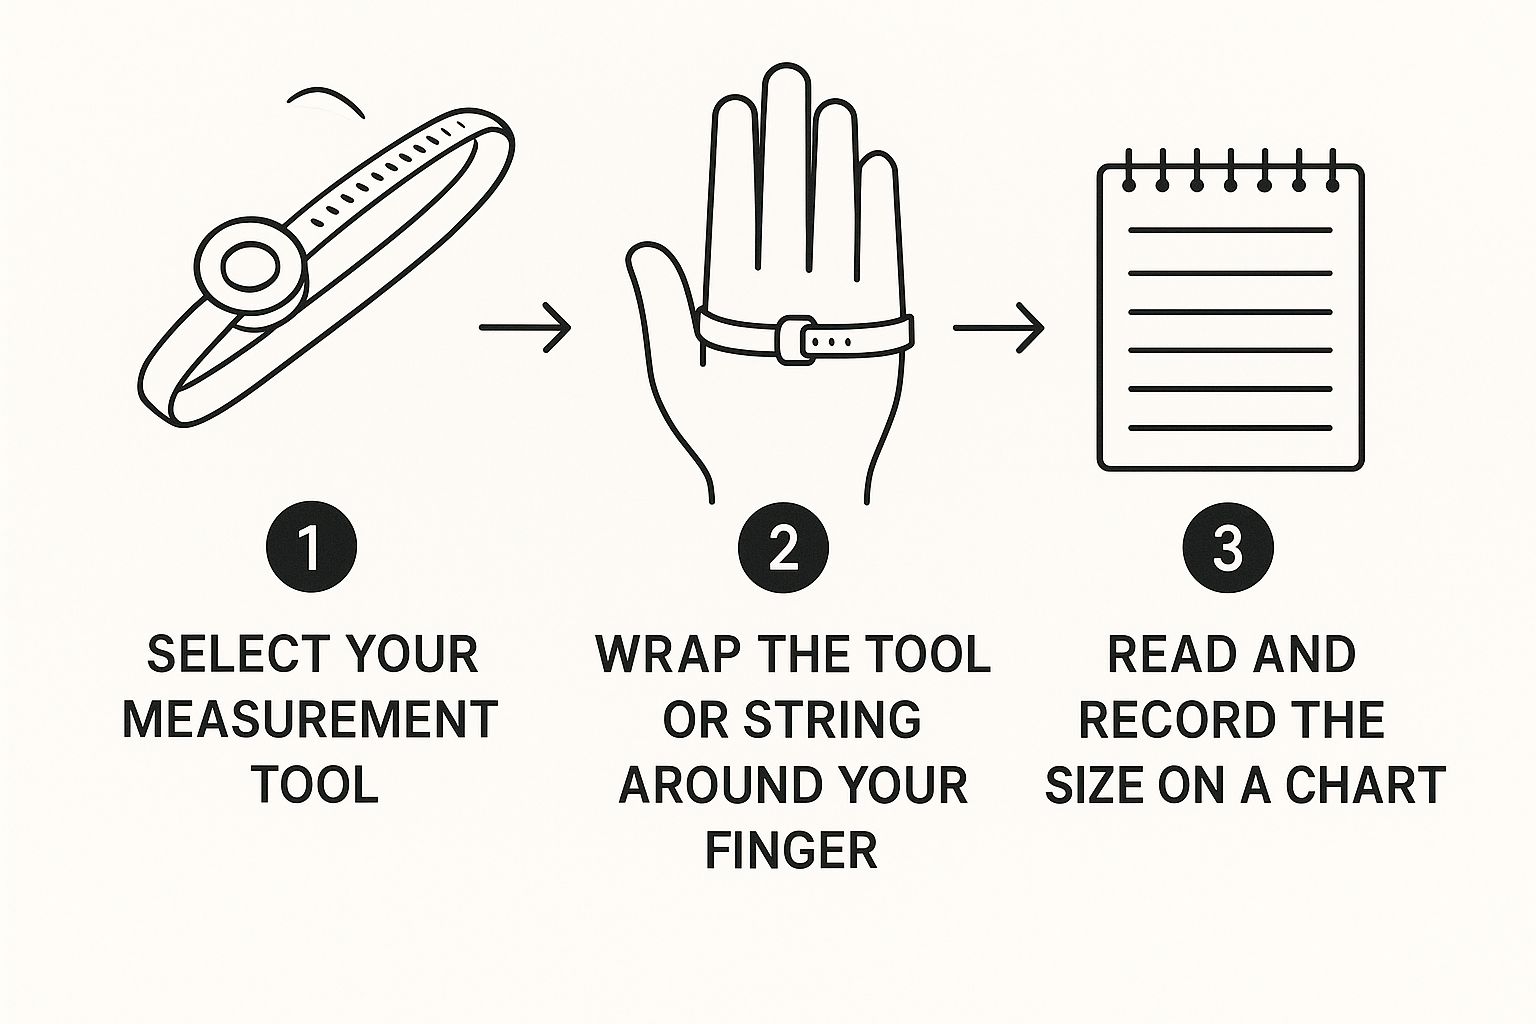
It's a great little cheat sheet for wrapping it correctly and getting that final number.
Now, carefully unwrap your string or paper and lay it flat against a ruler. Make sure you’re using the millimeter side for the most accurate reading. Line one end up with the 0 mark and measure to the point you marked. This measurement, in millimeters (mm), is the circumference of your finger.
The goal is always a comfortable fit. Remember that your fingers can swell slightly depending on the temperature or time of day. A size that has a tiny bit of wiggle room is usually best for long-term comfort.
The last step is to turn that millimeter measurement into a standard US ring size. This is where you translate your number into something you can actually use when shopping.
Millimeter to US Ring Size Conversion Chart
Once you have your finger's circumference in millimeters, you can use a standard conversion chart to find your US ring size. This is a crucial step that connects your at-home measurement to the jeweler's standard sizing.
Circumference (mm) | US Ring Size |
|---|---|
44.2 | 3 |
45.5 | 3.5 |
46.8 | 4 |
48.0 | 4.5 |
49.3 | 5 |
50.6 | 5.5 |
51.9 | 6 |
53.1 | 6.5 |
54.4 | 7 |
55.7 | 7.5 |
57.0 | 8 |
58.2 | 8.5 |
59.5 | 9 |
60.8 | 9.5 |
62.1 | 10 |
63.4 | 10.5 |
64.6 | 11 |
65.9 | 11.5 |
67.2 | 12 |
68.5 | 12.5 |
69.7 | 13 |
Just find your millimeter measurement in the left column to discover your corresponding ring size on the right. If you fall between two sizes, it's often best to choose the larger one for comfort.
How to Use a Printable Ring Sizer Correctly
If fiddling with string and a ruler feels a little too DIY, a printable ring sizer is your next best bet. These handy charts give you two reliable ways to figure out your size right at home. But before you start, there's one crucial step that makes all the difference.
Getting the printout right is everything. When you go to print the chart, dive into your printer settings and make sure the scale is set to 100%. Avoid any settings like "fit to page," because that will shrink the sizer and throw off your measurement entirely. Most good printables have a small ruler on the page you can double-check with a real ruler to confirm you printed it at the correct size.
The Cut-Out Method
The first approach turns the paper into a makeshift ring. You’ll see a section that looks like a small belt—carefully cut it out, including the little slit marked on one end.
Wrap the paper sizer around the base of your finger and slide the pointed end through the slit. Pull it until it feels snug but not tight. Just like any ring, you need to be able to slide it back over your knuckle. The number the arrow points to? That’s your ring size. It's a surprisingly effective little tool.
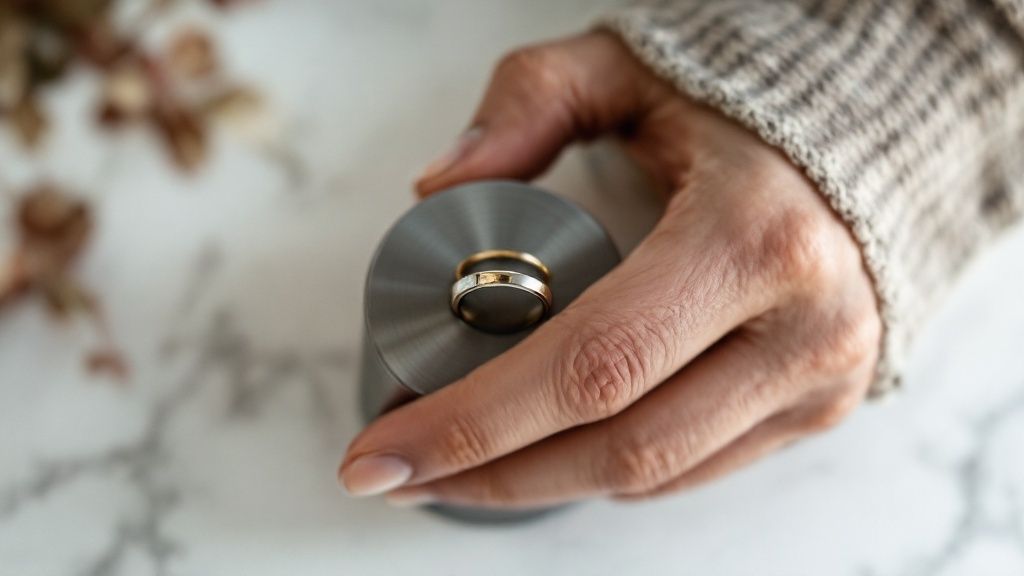
Using an Existing Ring
The second method is a lifesaver if you already own a ring that fits perfectly. All you have to do is place that ring on top of the circles printed on the chart.
Your goal is to find the circle that lines up exactly with the inside edge of your ring. You shouldn't see any of the paper circle outside the ring, nor should the metal of your ring cover the printed line. It should be a perfect match.
Expert Tip: Try to use a ring with a similar band width to the one you want to buy. A chunky, wide band fits much tighter than a delicate, thin one, so matching the style will give you a far more accurate size.
Getting this right ensures you’re measuring the true inner diameter. For a deeper dive into this and other techniques, our complete guide on how to determine ring size at home easily has even more pro tips.
Common Sizing Mistakes and How to Avoid Them
Knowing the steps to measure your ring size is half the battle. The other half? Sidestepping the common mistakes that can throw your results way off. I've seen it all, and even tiny errors can mean the difference between a perfect fit and a ring that's painfully tight or, even worse, one that could slip off and get lost.
Let's talk about the biggest mistake I see: measuring at the wrong time. Your fingers are constantly changing throughout the day, swelling and shrinking with temperature changes, what you've eaten, and your activity level. Measuring a cold finger, for instance, can easily give you a measurement that's a full half-size too small.
Another classic blunder is using something stretchy to measure. A rubber band or a piece of ribbon might seem convenient, but they'll stretch as you pull them taut, leading to an inaccurate, smaller size every single time.
Here's the best piece of advice I can give you: measure the same finger 3-4 times on different days and at different times of the day. This simple trick helps you find a true average that accounts for those natural fluctuations, giving you a much more reliable size to work with.
The Knuckle and Band Width Dilemma
It’s completely natural to focus on where the ring will actually sit at the base of your finger, but don't forget it has to get there first! That means clearing your knuckle. If you have a larger knuckle, you need to make sure the measurement is just loose enough to slide over it. A little twisting and a bit of resistance are fine, but it should never be a painful struggle.
The width of the ring band itself is another crucial detail that often gets overlooked. A wide band—say, anything over 6mm—takes up more real estate on your finger. This creates more friction and feels much tighter than a delicate, thin band of the exact same size.
For those chunkier, statement-making rings, a good rule of thumb is to go up a quarter or even a half size for a comfortable fit. If you find yourself with a ring that's just a little off, don't panic. Our guide on how to resize a ring at home using safe DIY methods can point you in the right direction for minor adjustments.
Navigating International Sizing Differences
Found the perfect ring from an overseas artist? That’s fantastic, but be prepared for a different sizing system. The lack of a universal standard is a huge source of confusion for online shoppers.
For example, a US size 7 isn't the same as a 7 in Japan. The UK uses letters instead of numbers, and many European countries simply use the ring's inner circumference in millimeters as the size. It's a bit of a minefield if you're not paying attention.
To give you an idea of how much they can differ, here’s a quick comparison:
US & Canada | UK & Australia | Europe (ISO 8653) | Japan |
|---|---|---|---|
6 | L ½ | 51.9 | 11 |
7 | N ½ | 54.4 | 14 |
8 | P ½ | 57 | 16 |
9 | R ½ | 59.5 | 18 |
Before you click "buy" on a piece from an international seller, always confirm which country's sizing standard they're using. Then, find a reliable conversion chart—like the one above—to make sure you're ordering the right size. This one extra step can save you a lot of hassle. You can also learn more about the complexities of global ring sizing standards to feel even more confident in your purchase.
Common Questions About Finding Your Ring Size
Even after you've measured carefully, some questions tend to linger. I get it—you want to get it right the first time! Let's walk through some of the most common things people ask, so you can feel totally confident in your choice.
What Is the Average Ring Size for Women and Men?
Knowing the general averages can be a decent starting point, especially if you're trying to buy a surprise gift.
In the United States, the most popular ring size for women is a 7, though most fall somewhere in the 6 to 8 range. For men, the average is around a size 10, with the common range being between 9 and 11.
But remember, these are just numbers. A person's height, build, and even knuckle size can change things dramatically. There is no substitute for getting an actual measurement.
Does the Ring Band Width Change the Size I Need?
Absolutely. This is one of those inside tips that can make a huge difference in how a ring feels.
A wide band (think 6mm or more) covers more of your finger. Because it takes up more real estate, it will feel much tighter than a delicate, thin band of the exact same size. It’s all about the surface area and friction.
Here's a solid rule of thumb: for those chunkier, statement-style rings, you'll want to go up a quarter to a half size from what you normally wear. That little bit of extra room ensures it slides on comfortably and doesn't feel constricting throughout the day.
So, always keep the ring's style in mind. If you're eyeing a wide band, plan for that extra snugness. And if you're shopping internationally, things get even more complex—you can convert ring sizes with our global guide to make sure you're getting the right fit no matter where you buy.
Can a Ring Be Resized If I Get It Wrong?
In many cases, yes, but it’s not always a simple fix. Most rings made from precious metals like gold, silver, and platinum can be resized by a jeweler. Typically, they can adjust it up or down by about two sizes.
However, there are some major exceptions. Eternity bands, with gemstones wrapping all the way around the finger, are notoriously difficult or impossible to resize without ruining the design. The same goes for rings made of alternative metals like tungsten or titanium—those generally can't be resized at all.
To save yourself the headache and extra cost, it's always best to double-check your measurement and look into the store’s resizing policy before you commit.
Ready to find your next favorite piece? Explore the stunning and unique collections at Panther De Luxe Shop and discover jewelry that truly speaks to you. Find your perfect fit and style today at https://www.pantherdeluxe.com.
Comments