
How to Resize a Ring at Home: Safe DIY Methods That Work
- seanmawhinney
- Jun 5, 2025
- 12 min read
Understanding Ring Resizing Before You Start
Resizing a ring at home might seem simple, but understanding the nuances of ring construction is essential. Different materials respond differently to resizing, and some rings aren't suitable for DIY adjustments. Knowing these distinctions can prevent irreversible damage and frustration. You might be interested in learning how to determine your ring size at home.
Material Matters: Why Some Rings Resize Better Than Others
The ring's material is a key factor in determining whether at-home resizing is feasible. Softer metals like gold and silver are generally more malleable, making them potentially suitable for some DIY methods.
However, even with these metals, the ring's design complexity matters. A plain band is much easier to adjust than a ring with intricate settings or engravings.
Harder metals like platinum and tungsten are extremely difficult to resize at home. Their durability, while beneficial for everyday wear, makes DIY resizing challenging. These metals often require specialized tools and techniques. Attempting to resize them yourself could lead to cracking or breakage.
Ring Structure and Resizing Limitations
Beyond the material, the ring's structure also dictates what's possible with DIY resizing. Rings with prong settings or channel settings, especially those with precious stones, are generally not good candidates for home adjustments.
The pressure applied during resizing can loosen the stones or damage delicate settings. This means caution is advised even with softer metals if your ring has intricate details.
The amount of resizing needed is also critical. Minor adjustments might be possible with some DIY methods, but significant size changes almost always require professional help. Trying to force a large adjustment can weaken the ring's structure, making it prone to damage.
Historically, ring resizing was a skill honed by jewelers, costing between $50 and $100. The traditional method involves cutting and re-soldering the band. Modern laser resizing offers a non-invasive alternative. Learn more about traditional and modern ring resizing methods.
Setting Realistic Expectations for DIY Resizing
Before starting, honestly assess your ring and your skills. DIY resizing is best for minor adjustments on simple rings made of softer metals. Understanding the limitations of home methods is crucial.
While some DIY techniques can be effective, they won’t achieve the same precision and durability as professional resizing. This helps avoid disappointment and protects your valuable jewelry.
Making Your Ring Smaller: DIY Methods That Actually Work

This infographic compares three common DIY ring resizing methods: paper sizers, plastic ring adjusters, and metal mandrels. It considers cost, ease of use, and accuracy. Plastic adjusters offer a good balance of affordability, simplicity, and reasonable precision. While mandrels provide the greatest accuracy, their higher cost and complexity might not suit everyone.
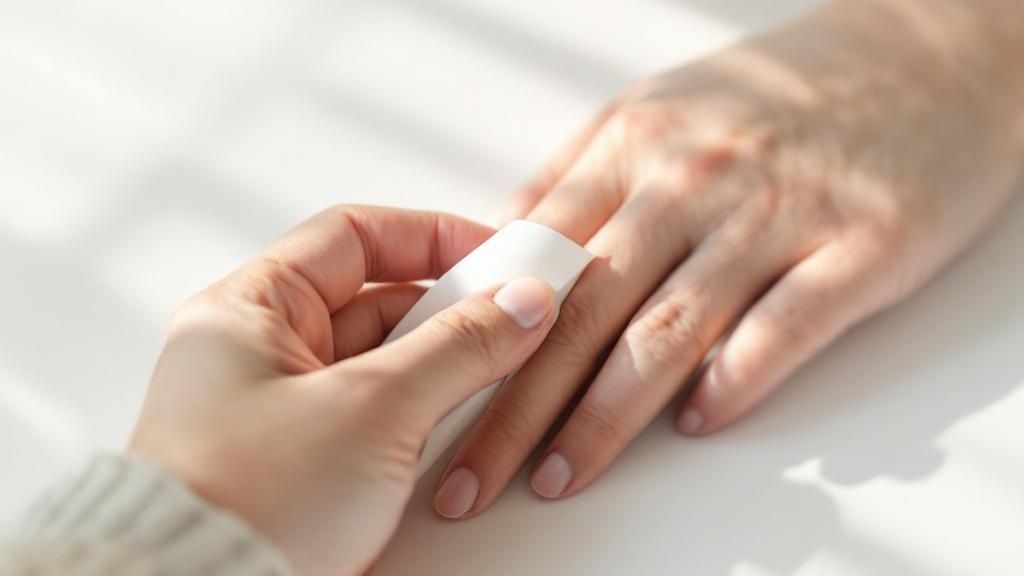
Plastic Ring Adjusters: A Simple and Effective Solution
Plastic ring adjusters are small, flexible pieces of plastic that attach to the back of your ring shank (the band). They decrease the ring's inner circumference for a snugger fit. These adjusters are easy to apply and remove, offering a temporary fix for rings that are a little too big. They're especially helpful for those with fluctuating finger sizes.
Benefits: Affordable, easy to use, reusable, suitable for most ring styles.
Drawbacks: May feel bulky on thinner bands, potentially unsuitable for intricate ring designs.
Sizing Beads: A More Permanent Adjustment You Can Do Yourself
Sizing beads provide a more lasting solution. Jewelers typically attach these small metal beads to the inside of the ring band. However, some DIY kits allow for at-home application. Sizing beads decrease the interior diameter, improving the ring's security. This is a good semi-permanent option.
Benefits: More discreet than adjusters, offering a longer-term solution.
Drawbacks: Requires more dexterity than adjusters and may not work for every ring type.
To help you choose the right DIY method, let’s take a look at a comparison of the different techniques:
DIY Ring Sizing Methods Comparison: A detailed comparison of different home ring resizing methods, their effectiveness, durability, and suitability for different ring types.
Method | Size Reduction | Durability | Cost | Best For |
|---|---|---|---|---|
Plastic Adjusters | Minor | Temporary | Low | Fluctuating sizes, quick fixes |
Sizing Beads | Minor to Moderate | Semi-Permanent | Moderate | Long-term solutions, discreet adjustments |
Professional Resizing | Any | Permanent | High | Significant size changes, intricate rings, valuable rings |
As you can see, the various DIY approaches each offer unique advantages and disadvantages. Selecting the best method depends on your specific needs and the type of ring you want to adjust.
Understanding the Limitations of DIY Ring Resizing
While DIY methods offer convenient at-home solutions, it’s important to understand their limitations. They are best for minor adjustments. For more extensive resizing or rings with complex designs or harder metals like platinum, consulting a professional jeweler is recommended. Learn more about the intricacies of ring resizing.
Choosing the Right Method for Your Ring
The ideal DIY method depends on your ring’s style, the material, and how much resizing is needed. Plastic adjusters or DIY sizing beads can provide a short-term solution for slight adjustments on simple rings made of gold or silver. For significant changes, intricate designs, or harder metals, a professional jeweler is the best choice. This preserves the ring’s structure and appearance, which is especially important for rings with gemstones or delicate features.
Making Your Ring Larger: Safe Expansion Techniques
Making a ring larger at home presents more challenges than making it smaller. Adding material to a ring isn't a practical DIY task. Instead, you're limited in the techniques available, and understanding these limitations is crucial to avoiding damage to your ring.
Stretching: A Risky Method for Minor Increases
One method is to carefully stretch the ring. This involves specialized jeweler's tools called a ring stretcher or a mandrel. By applying gradual, controlled force, a ring can be stretched a small amount, usually no more than a half size. This process, however, comes with a high risk of warping the ring, especially with thinner bands or intricate designs.
Benefits: Potential for a slight size increase.
Drawbacks: High risk of damage, limited size increase, requires specialized tools.
Temporary Solutions for Special Occasions
Ring extenders offer a temporary solution. These small, adjustable inserts clip onto the shank of the ring, providing a temporary size increase. They are ideal for short-term situations like swelling during pregnancy or for special occasions when a larger size is needed. They are not, however, a permanent fix for everyday wear.
Benefits: Non-destructive, readily available, ideal for short-term use.
Drawbacks: Not for permanent resizing, may be visible depending on the ring's style.
Recognizing When Professional Resizing Is Necessary
While some at-home methods exist for making a ring smaller, increasing a ring's size at home is often too risky. For increases greater than half a size or for rings made of harder metals, consulting a professional jeweler is highly recommended. Jewelers have the necessary expertise and specialized tools to safely adjust ring sizes. They can add metal to the band, ensuring a proper, lasting resize that preserves the ring’s integrity. This is especially important for valuable rings or those with intricate stone settings.
Identifying Damage and Knowing When to Stop
If you attempt any at-home method to make your ring larger, watch for signs of damage. If you notice any warping, thinning of the band, or loosening of stones, stop immediately. Continuing could lead to irreversible damage, particularly with softer metals like gold or silver. Professional repair might then be necessary. Resizing a ring, especially to make it larger, alters its structural integrity. Excessive adjustments can compromise the ring's strength and durability. Success in resizing a ring at home depends on understanding these limitations and prioritizing the safety of your jewelry.
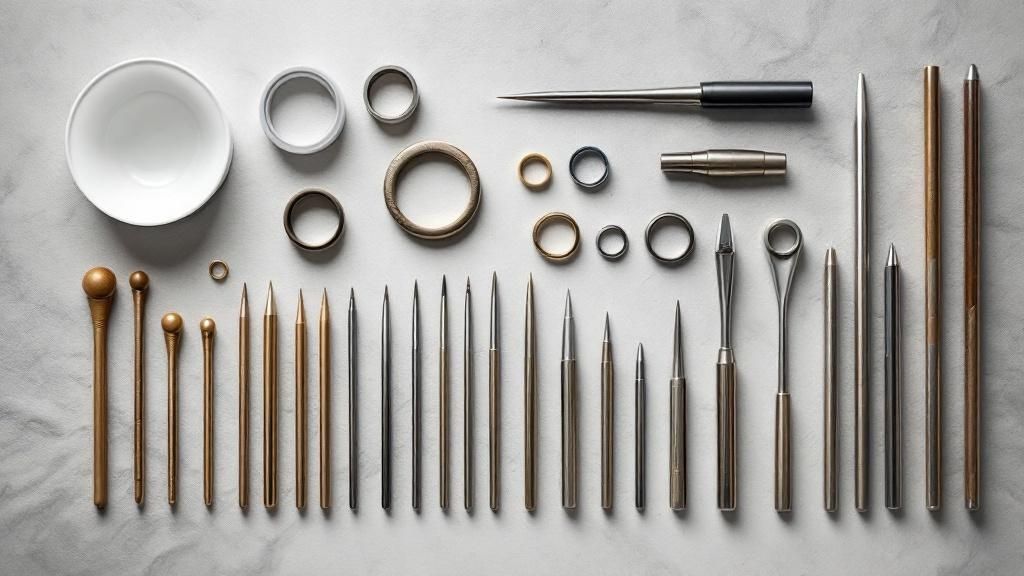
Essential Tools And Materials For Success
Successfully resizing a ring at home depends heavily on having the right tools and materials. From everyday household items to specialized jewelry tools, the correct equipment is paramount. This guide outlines everything you'll need for at-home ring resizing.
Basic Tools For Simple Adjustments
For minor ring adjustments, a few basic tools will do. A ring sizer is crucial for accurately measuring your ring size before and after any adjustments. Plastic ring adjusters are a cost-effective and simple solution for temporary fixes. If you’re working with sizing beads, a pair of tweezers will simplify placement. For further information on jewelry care, you might find this article helpful: How to master jewelry cleaning at home.
Ring Sizer: This tool provides precise ring size measurements.
Plastic Adjusters: These offer a temporary way to reduce ring size.
Tweezers: These assist with the accurate application of sizing beads.
Advanced Tools For More Precise Work
For more permanent and precise alterations, investing in specialized tools is a good idea. A mandrel, which is a tapered metal rod, is used for both measuring and shaping rings. A ring stretcher allows you to carefully enlarge a ring. Durable, high-quality jewelry adhesive is vital for securing sizing beads or other additions.
Mandrel: This tool accurately measures and shapes rings.
Ring Stretcher: This tool enlarges rings by carefully stretching the band.
Jewelry Adhesive: This secures any added elements to the ring.
Sourcing And Evaluating Materials
Finding quality materials is essential for successful ring resizing. Reputable jewelry supply stores stock tools and materials designed specifically for this purpose. Look for durable materials that can withstand regular wear. As you gain more experience with at-home ring resizing, consider gradually expanding your collection of tools.
Maintaining Your Tools And Materials
Proper maintenance will ensure your tools last longer and perform consistently. Keep your tools clean and store them in a dry, organized area. This prevents rust and damage, protecting your investment. A dedicated tool box or organizer can help keep everything easily accessible. Proper tool care saves you money and ensures accurate results every time you resize a ring at home.
Avoiding Common Mistakes That Ruin Rings
Even with the best intentions, DIY ring resizing can easily go awry. Understanding the most common mistakes will help safeguard your precious rings and prevent potential damage. This section explores those pitfalls, from incorrect tool usage to applying excessive force, offering preventative strategies and guidance on when to seek professional assistance.
Wrong Tools, Wrong Results: Choosing Appropriate Equipment
One of the most frequent mistakes is using inappropriate tools. Improvised tools like pliers or hammers can easily scratch, dent, or even break the ring band. This is particularly true for delicate metals like gold or rings with intricate settings.
Using the correct jewelry tools is paramount. Ring mandrels and ring stretchers are specifically designed for resizing. They apply even pressure, minimizing the risk of damage and preserving the ring's structural integrity. Investing in the proper equipment is a worthwhile investment for protecting your valuable jewelry.
Too Much Force, Too Much Damage: Applying Gentle Pressure
Applying excessive force during resizing is another common error. Forcing a ring onto a mandrel or stretching it too quickly can warp the ring, thin the band, or even cause it to crack.
Think of it like bending a paperclip. Gentle pressure allows for flexibility, while too much force leads to permanent damage. When resizing a ring at home, always apply slow, steady pressure. Patience is essential to avoid costly repairs.
Heat and Jewelry: A Dangerous Combination
Unless you have professional training and specialized equipment, avoid using heat to resize a ring at home. Attempting to solder or melt metal without the necessary expertise can quickly ruin a ring.
High temperatures can damage the metal, alter its color, or even melt gemstones. Rings with settings are especially vulnerable, as heat can loosen the stones or compromise the prongs holding them in place. Opals, for instance, are particularly sensitive to heat and can easily crack or discolor.
Recognizing Damage: When to Seek Professional Help
Knowing when to seek professional help is crucial. If you notice any signs of damage, such as warping, cracks, or loosened stones, stop immediately. Trying to fix the damage yourself can often exacerbate the problem.
Consult a professional jeweler for assessment and repair. While some DIY methods are suitable for minor adjustments, they have limitations. Recognizing these limitations and seeking expert help when necessary is the best way to protect your valuable jewelry.
When DIY Isn't Enough: Recognizing Professional Needs
Resizing a ring at home might seem like a quick fix, but knowing when to call in a professional is essential. This protects your precious jewelry and prevents potential mishaps. This section helps you identify situations where professional resizing is the safer and smarter option.
Complex Ring Designs: Beyond DIY Capabilities
Intricate ring designs often incorporate delicate settings, pavé diamonds, or other embellishments that demand specialized skills. DIY attempts can easily damage these delicate features, potentially dislodging stones or warping the metal. For example, a ring with a halo setting, where smaller stones encircle a center stone, is particularly vulnerable. Applying pressure during a DIY resizing could loosen these small stones. A professional jeweler possesses the tools and expertise to resize such rings without compromising the setting's integrity.
Valuable Materials and Heirloom Pieces: Protecting Your Investment
Rings crafted from platinum or adorned with valuable gemstones require expert handling. These materials can react unpredictably to DIY methods, increasing the risk of damage. Heirloom pieces carry sentimental value that transcends their monetary worth. Entrusting them to a professional jeweler ensures these cherished rings receive the utmost care and precision during resizing.
Significant Size Changes: The Limits of Home Methods
DIY methods might be suitable for minor adjustments, but significant changes – typically more than one full size – are best left to the professionals. Attempting a large adjustment at home can weaken the ring's structure, making it susceptible to breakage or warping. Professional jewelers use specialized tools and techniques to add or remove metal, ensuring a structurally sound resize even with substantial changes. Interestingly, lifestyle factors like weight fluctuations and pregnancy can necessitate ring resizing. Learn more insights about ring resizing statistics. This underscores the importance of reliable resizing options.
Structural Concerns: Ensuring Long-Term Durability
If your ring already exhibits structural weaknesses, such as thin bands or previous repairs, DIY resizing can exacerbate these issues. A professional jeweler can assess the ring’s condition and recommend the best resizing technique. They might even suggest reinforcing the band during resizing to enhance its durability. This proactive approach safeguards your investment and prevents future problems.
Professional Expertise: Precision, Durability, and Peace of Mind
Professional jewelers bring a level of expertise and specialized tools to ring resizing that DIY methods simply can't match. They can achieve a precise fit for maximum comfort and minimal risk of future issues. They also employ advanced techniques like laser welding and soldering to create a seamless and durable resize. Ultimately, investing in professional expertise offers peace of mind, knowing your valuable ring is in capable hands.
Long-Term Care And Maintenance After DIY Resizing
Successfully resizing your ring at home is a satisfying accomplishment. But how do you keep that perfect fit? Maintaining a DIY ring resizing requires ongoing care. This section covers essential maintenance practices, from regular inspections to proper cleaning and storage, to extend the life of your resized ring.
Regular Inspection: Catching Problems Early
Just like a car needs regular tune-ups, your resized ring needs periodic inspections. These checks help identify potential problems before they become major headaches. The frequency of inspection depends on the resizing method used. For temporary solutions like plastic ring adjusters, daily checks are recommended. This ensures the adjuster stays in place and remains comfortable. For more permanent methods, such as sizing beads, weekly inspections are usually sufficient.
Daily (for adjusters): Ensure secure placement, check for wear and tear, and assess comfort.
Weekly (for sizing beads): Inspect the beads’ security and look for any changes in the ring's shape.
These simple checks can help you monitor the ring's fit and catch any loosening or damage early.
Cleaning Your Resized Ring: Maintaining Sparkle and Security
Proper cleaning is essential for any ring. However, consider your resizing method when choosing your cleaning approach. Harsh chemicals can degrade plastic adjusters, so gentle methods are best. A soft cloth and mild soap are generally sufficient. For rings with sizing beads, ensure your cleaning process doesn't affect the adhesive. Avoid soaking the ring for extended periods, as this might weaken the bond. For more tips on jewelry care, check out this helpful guide: How to master preventing jewelry from tarnishing.
Plastic Adjusters: Clean gently with a soft cloth and mild soap.
Sizing Beads: Avoid harsh chemicals and prolonged soaking.
These targeted cleaning approaches help maintain the ring’s beauty and the integrity of the resizing.
Storage: Protecting Your Ring and Your Resizing Work
Proper storage is vital for protecting your ring and preserving your DIY resizing efforts. Store your ring in a soft pouch or lined jewelry box to prevent scratches. Avoid contact with other jewelry that could cause damage. If your ring has plastic adjusters, avoid storing it in extreme temperatures to prevent warping.
Knowing When to Re-adjust or Upgrade
Over time, your ring size might change again, or your DIY solution might show signs of wear. Don't hesitate to re-adjust the ring at home if possible, using your original method. However, it’s important to recognize when a DIY solution might need an upgrade, or even professional resizing. For example, if you initially used a temporary solution like a plastic ring adjuster, consider switching to a more permanent fix like sizing beads or professional resizing for long-term wear.
To help you keep track of your ring’s maintenance, here's a handy schedule:
DIY Ring Resizing Maintenance Schedule
A practical timeline showing when and how to inspect and maintain different types of DIY ring resizing solutions.
Time Period | Inspection Items | Maintenance Tasks | Warning Signs |
|---|---|---|---|
Daily (Plastic Adjusters) | Adjuster placement, signs of wear, comfort level | Gentle cleaning with soft cloth and mild soap | Adjuster slipping, discomfort, visible wear |
Weekly (Sizing Beads) | Bead security, ring shape | Check for adhesive integrity | Loose beads, changes in ring shape, exposed adhesive |
Regular maintenance ensures your resized ring stays in top condition. This schedule offers a simple guide to keep your ring looking its best.
DIY ring resizing can be a great solution, but maintaining those adjustments is key. By following these care and maintenance tips, and knowing when to seek professional help, you can enjoy a perfectly fitting ring for years to come.
Ready to explore more beautiful jewelry? Visit Panther De Luxe Shop and discover a collection of stunning pieces.
Comments