
Create Your Own Jewelry A Beginner's Guide To Handmade Designs
- Luke Zucco
- Jan 11
- 16 min read

Turning an idea into a piece of jewelry you can actually wear is one of the most satisfying creative feelings out there. It’s about more than just owning another accessory; it's about crafting something that holds a piece of your story.
Whether you're drawn to the simple rhythm of beading or the intricate twists of wire wrapping, the path from a few raw materials to a finished piece is more accessible than you think.
Your First Steps Into Custom Jewelry Design
Welcome to the vibrant world of handmade jewelry. That desire to create something totally unique is a powerful one, and jewelry is the perfect outlet. It’s a craft that’s part art, part skill, letting you produce stunning pieces that are 100% you.
This guide is here to pull back the curtain on the whole process. We’ll show you that you don't need a fancy studio or years of training to get going. Honestly, some of the most striking designs come from the simplest techniques, which is what makes this hobby so great.
Finding Your Creative Path
There are so many ways to approach jewelry making, each with its own vibe and skillset. The best part is you can pick whatever feels most natural to you, which makes the whole experience way more fun from the start.
Most people get their start with one of these:
Beading and Stringing: This is the classic entry point for a reason. It’s all about arranging beads on materials like elastic cord or flexible wire to create bracelets and necklaces. It's a fantastic way to play with color, patterns, and textures.
Wire-Wrapping: This technique is pure magic—using wire to cage stones or beads into pendants and earrings without a single drop of solder. You’ll get really good with your pliers and develop a feel for how metal moves.
Simple Assembly: Love the idea of instant gratification? This is for you. It’s all about connecting pre-made components like cool charms, chains, and clasps to build a finished piece. It’s the fastest way to bring your design ideas to life.
The real beauty of making your own jewelry is that the final product is more than just an accessory; it's a story you can wear. Each component you choose and every loop you turn becomes part of a narrative that is uniquely yours.
Your Partner in Creation
No matter which route you take, high-quality materials are everything. This is where your vision starts to become a reality. Finding reliable components—from sparkling stones to sturdy chains and clasps—is the key to making pieces that don’t just look beautiful but are also built to last.
At Panther De Luxe Shop, we live for this stuff and provide a curated selection of components to back you up on your creative journey. As you get more comfortable, it helps to understand the big picture of how a piece comes together. For a great overview, check out our post that breaks down the entire jewelry design process explained from idea to finish.
This kind of knowledge will give you the confidence to tackle bigger projects, turning simple ideas into polished, professional-looking jewelry you’ll be proud to wear or gift.
Building Your Essential Jewelry Making Toolkit
Every maker needs their tools, and when you’re creating your own jewelry, having the right equipment makes all the difference. It’s what turns a potentially frustrating process into a fluid, creative experience. Instead of buying a massive, pre-packaged kit with tools you’ll never touch, I always recommend building a small, high-quality collection that actually serves your needs.
This thoughtful approach not only saves money but ensures every item in your toolkit has a real purpose. The goal is to feel empowered, not overwhelmed. Trust me, a few great tools will take you much further than a drawer full of mediocre ones.
The Three Essential Pliers
You’ll quickly discover that not all pliers are created equal. For jewelry making, precision is everything. Those bulky household pliers from the garage just won't cut it—their serrated jaws will scratch and mar your delicate wire and components.
Your core setup should include three specific types of pliers, each with a distinct job:
Round-Nose Pliers: These are your absolute go-to for creating loops and curves. Their tapered, conical jaws allow you to make consistent, smooth bends in wire, which is essential for forming things like earring hooks or wire-wrapped dangles.
Chain-Nose Pliers: Think of these as your all-purpose jewelry pliers. With jaws that are flat on the inside and rounded on the outside, they are perfect for gripping tiny components, opening and closing jump rings, and neatly tucking in wire ends.
Flat-Nose Pliers: As the name suggests, these have broad, flat jaws. They are ideal for making sharp, angular bends in wire and for securely holding flat components without leaving any marks.
Once you have these three, you'll need something to cut your wire. A pair of flush cutters is non-negotiable. They create a clean, flat cut on one side of the wire, which is crucial for pieces that need to sit flush against the skin or fit snugly against another component.
Choosing Your Core Materials
With your tools ready, it’s time for the fun part: selecting the materials that will become your creations. This is where your personal style truly begins to shine. From gleaming metals to colorful beads, the options are endless, but starting with a few basics will get you off on the right foot.
The trend toward personalization is a huge force in the jewelry world right now. The global jewelry market, valued at around USD 366.79 billion, is increasingly driven by people who want unique pieces. In fact, surveys show that up to 60% of younger buyers prefer customized designs, from choosing their own metals to being part of the whole design process. You can learn more about these fascinating global jewelry industry trends on carattrade.com.
This demand for individuality is great news for hobbyists like us, as it validates the very essence of making your own jewelry. To help you navigate your first choices, I’ve put together a simple breakdown of common materials to get you started.
Beginner's Guide To Jewelry Metals And Beads
Choosing your first materials can feel a bit daunting, but it doesn't have to be. This table breaks down some of the most common options for beginners, highlighting what they're good for and what to watch out for.
Material Type | Best For | Pros | Cons |
|---|---|---|---|
Sterling Silver | Timeless earrings, pendants, and rings | Classic look, durable, hypoallergenic | Can tarnish over time, higher cost |
Copper Wire | Wire-wrapping practice, rustic designs | Inexpensive, easy to manipulate, warm color | Tarnishes quickly, can discolor skin |
Glass Beads | Colorful bracelets and necklaces | Huge variety of colors and shapes, affordable | Can be fragile and may chip or break |
Gemstone Beads | Meaningful, higher-end pieces | Unique natural patterns, symbolic meaning | Can be expensive, requires careful handling |
Think of this as a starting point. The real magic happens when you start mixing and matching to see what combinations you fall in love with.
Remember, the materials you choose tell a story. A rustic copper wire paired with a raw turquoise bead has a completely different feel than a polished sterling silver chain with a faceted glass crystal. Experiment to find the combinations that speak to you.
Understanding the properties of different metals is a huge advantage as you grow your skills. For a deeper dive into what makes each metal unique, from sterling silver to gold-filled options, check out our helpful guide on the different types of jewelry metals. This knowledge will help you select the perfect foundation for every single piece you design. By starting with a solid toolkit and a thoughtful selection of materials, you're setting yourself up for success.
Mastering Core Jewelry Making Techniques
With your toolkit ready, it’s time to bring your creative ideas to life. This is where the magic really happens—turning a handful of separate components into a beautiful, wearable piece of art. We’ll focus on three fundamental techniques that form the backbone of many handmade jewelry designs.
Each method offers a different creative outlet, from the rhythmic process of beading to the instant gratification of assembling pre-made parts. Mastering these will give you the confidence to tackle almost any beginner or intermediate project you can dream up.
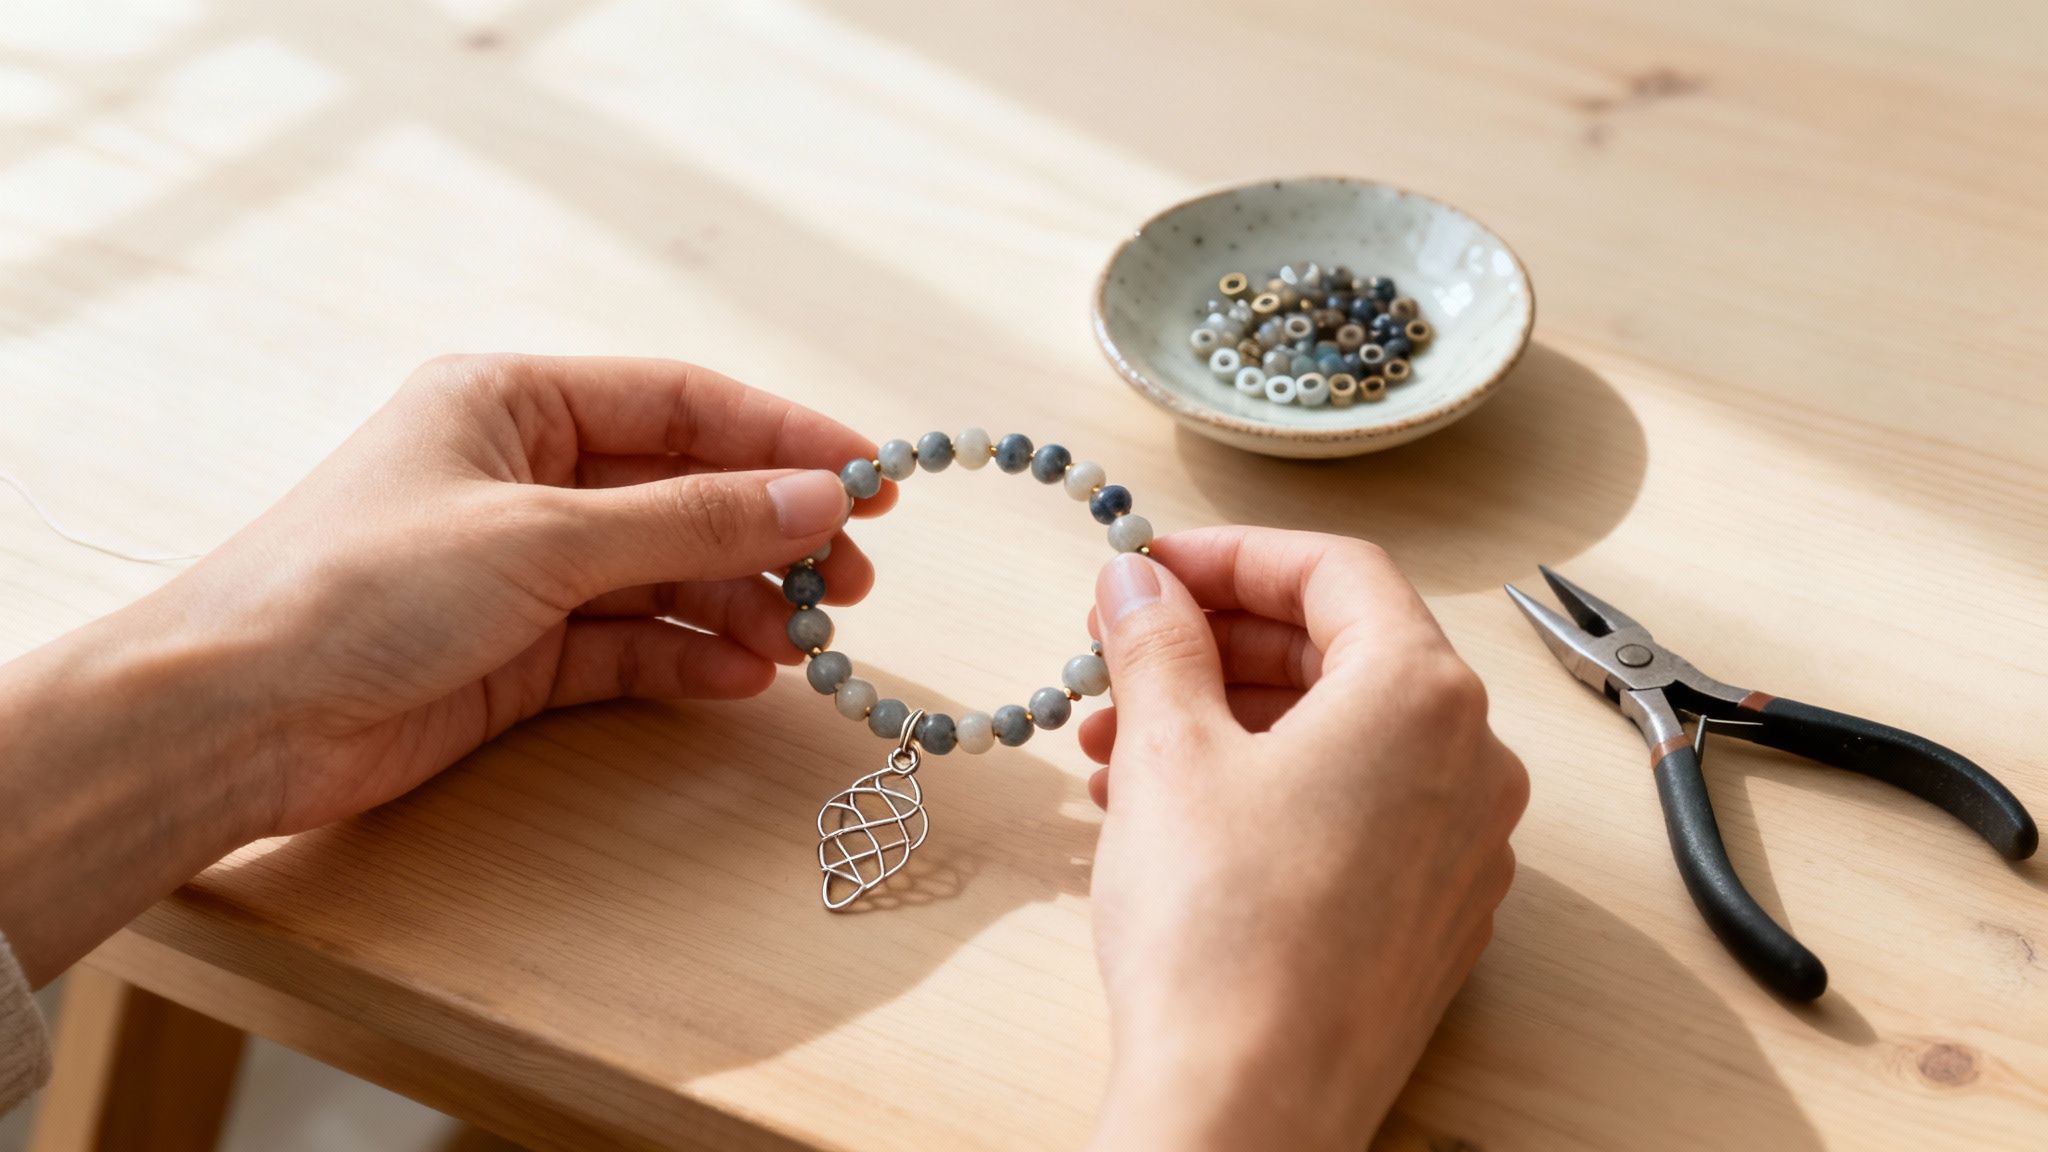
This visual guide shows the simple process of gathering your core tools—the first step before mastering any technique.

This process flow highlights that a simple, focused toolkit is all you need to get started with pliers, cutters, and your chosen beads.
Beading And Stringing For Classic Designs
Beading is often the first technique people learn when they want to create their own jewelry, and for good reason. It’s meditative, allows for endless creativity with color and pattern, and the results are immediate and satisfying.
While simply stringing beads on an elastic cord is a great start, learning to finish a piece professionally with a clasp is a game-changer. The key to a secure, store-bought look lies in using crimp beads or tubes. These tiny metal beads are flattened with crimping pliers to hold your beading wire and clasp firmly in place, preventing your masterpiece from accidentally coming apart.
Let’s walk through making a beaded bracelet:
Measure and Cut: Cut a piece of flexible beading wire about two inches longer than your desired bracelet length. This extra bit gives you room to work.
Attach the Clasp: Thread a crimp bead onto one end of the wire, followed by one half of your clasp. Loop the wire back through the crimp bead, creating a small loop that holds the clasp.
Secure the Crimp: Use your crimping pliers to squeeze the crimp bead shut. Give it a gentle tug to ensure it’s tight.
String Your Beads: Now for the fun part. Thread your chosen beads onto the wire in your desired pattern.
Finish the Other End: Once you're done, repeat the crimping process on the other end with the second half of the clasp. Just be sure to leave a little slack so the bracelet isn't too stiff.
For those who enjoy working with beads, you can take your skills even further. Our guide on how to make beaded rings offers an easy step-by-step tutorial that builds on these basic stringing skills.
Basic Wire Wrapping For Elegant Dangles
Wire wrapping is a beautiful technique that lets you turn any bead or stone into a focal point, like a pendant or an earring dangle. It involves using wire to create secure loops and decorative wraps without any soldering. The most fundamental skill here is creating a simple loop.
A simple loop is perfect for connecting beads to earring hooks or creating links in a chain. All you need is a headpin (a piece of wire with a flat "head" at one end), a bead, your round-nose pliers, and flush cutters.
Imagine you're making a pair of simple teardrop earrings. You'd slide a bead onto a headpin. Using your pliers, you would then bend the wire at a 90-degree angle just above the bead, trim the excess wire, and curl the remaining tail into a perfect, clean loop. This loop is what connects to your earring hook.
Pro Tip: Consistency is key in wire wrapping, especially for earrings. To make your loops the same size every time, use a fine-tipped marker to draw a small line on your round-nose pliers. By forming every loop at that exact spot, you'll achieve a much more professional and symmetrical look.
Simple Assembly For Instant Gratification
Sometimes you just want to create something beautiful without the intricate detail of wire work or beading. This is where simple assembly shines. This technique is all about combining pre-made components—like chains, charms, and clasps—to create a personalized piece in minutes.
This is arguably the fastest way to create your own jewelry. It’s perfect for making personalized charm bracelets or minimalist necklaces. The primary skill involved is properly opening and closing a jump ring. A common mistake beginners make is pulling the jump ring apart like a clamshell, which distorts its circular shape and weakens the metal.
The correct method is a gentle twisting motion:
Grip: Hold the jump ring with two pairs of pliers (chain-nose or flat-nose work best), with the opening at the top.
Twist: Gently twist one plier forward and the other backward to open the ring sideways.
Connect and Close: Slip your charm and chain onto the open ring, then twist it back into its closed position, ensuring the ends are perfectly flush. You should hear a faint "click" as they meet.
With just a high-quality chain and a unique charm from a curated collection like Panther De Luxe Shop, you can assemble a meaningful necklace in less than five minutes. This approach focuses entirely on curation and design, allowing you to express your style through the components you choose.
Infusing Your Personality Into Every Piece
The real magic behind the decision to create your own jewelry isn't just about bending wire or stringing beads. It’s about making something that speaks. It’s that moment you turn metal, stone, and cord into a wearable extension of who you are.
This is where you move beyond just following instructions. You start embedding your own story into every single design choice, transforming a simple accessory into a treasured keepsake. It's the difference between a necklace that just looks nice, and one that feels like it was made just for you—because it was.
Weaving Meaning With Gemstones And Charms
One of the most powerful ways to get personal with your jewelry is by picking components that carry a deeper meaning. We're talking about going way beyond just choosing a color you like. Think about the stories you want your pieces to tell.
Choosing gemstones for their traditional symbolism is a fantastic way to start. A piece can become a personal talisman when you weave in stones that represent qualities you admire or aspire to.
Rose Quartz for Love: Add this soft pink stone to a bracelet for a friend to show your affection.
Amethyst for Calm: Create a pendant with amethyst to serve as a quiet reminder to find peace on a hectic day.
Tiger's Eye for Confidence: String a few beads of tiger's eye before a big presentation to carry a bit of courage with you.
Birthstones are another deeply personal touch. A necklace featuring the birthstones of your kids, for instance, immediately becomes a meaningful family heirloom. In the same way, choosing charms from a collection like Panther De Luxe Shop can add layers of personality. A tiny compass charm could represent a love of travel, while a simple leaf might speak to your connection to nature.
Making Your Mark With Metal Stamping
If you want to literally spell out your message, metal stamping is an accessible and seriously impactful technique. It involves using steel letter and number stamps to impress words and designs into soft metal blanks. This is how you can add initials, names, significant dates, or even short, inspiring words to your creations.
The process itself is surprisingly straightforward. You just place a metal blank on a steel bench block, position your stamp, and give it one firm, clean strike with a hammer. The result is a crisp, permanent impression. It’s perfect for creating custom pendants, charms for bracelets, or even personalized rings.
Don’t stress about getting perfect alignment on your first try. Honestly, the slight imperfections and variations in stamped letters are a huge part of the charm of handmade jewelry. They're a visible mark of the creator's hand, and that’s what makes each piece truly one-of-a-kind.
Imagine gifting a simple brass cuff bracelet stamped with the coordinates of a meaningful place, like where a couple first met. That’s how you elevate a simple piece into something profoundly personal and cherished.
Expressing Style Through Texture And Materials
Your personality can also shine through in the physical feel and appearance of your jewelry. Mixing different materials and textures is a sophisticated way to create a signature style that’s all your own. The contrast between different elements is what can make a design truly pop.
Think beyond using just one type of material. Play around with combinations to see what resonates with your aesthetic.
Here are a few ideas to get you started:
Sleek and Rustic: Pair a polished sterling silver chain from Panther De Luxe Shop with a hand-wrapped leather cord for a design that balances modern and earthy vibes.
Hard and Soft: Combine the cold, smooth surface of metal beads with the organic texture of wooden or bone beads for a piece that has both visual and tactile interest.
Delicate and Bold: Contrast a fine, delicate chain with a single, large, raw gemstone pendant. This creates a dramatic focal point and a beautiful juxtaposition of scale.
Ultimately, the goal is to experiment. The components you choose are your creative vocabulary. By combining meaningful stones, adding personal marks with stamps, and mixing textures, you start to build a design language that is entirely your own. This is the heart of what it means to create your own jewelry—it's not just about making an object, but about telling your story.
Polishing It Off: Finishing and Caring for Your Jewelry
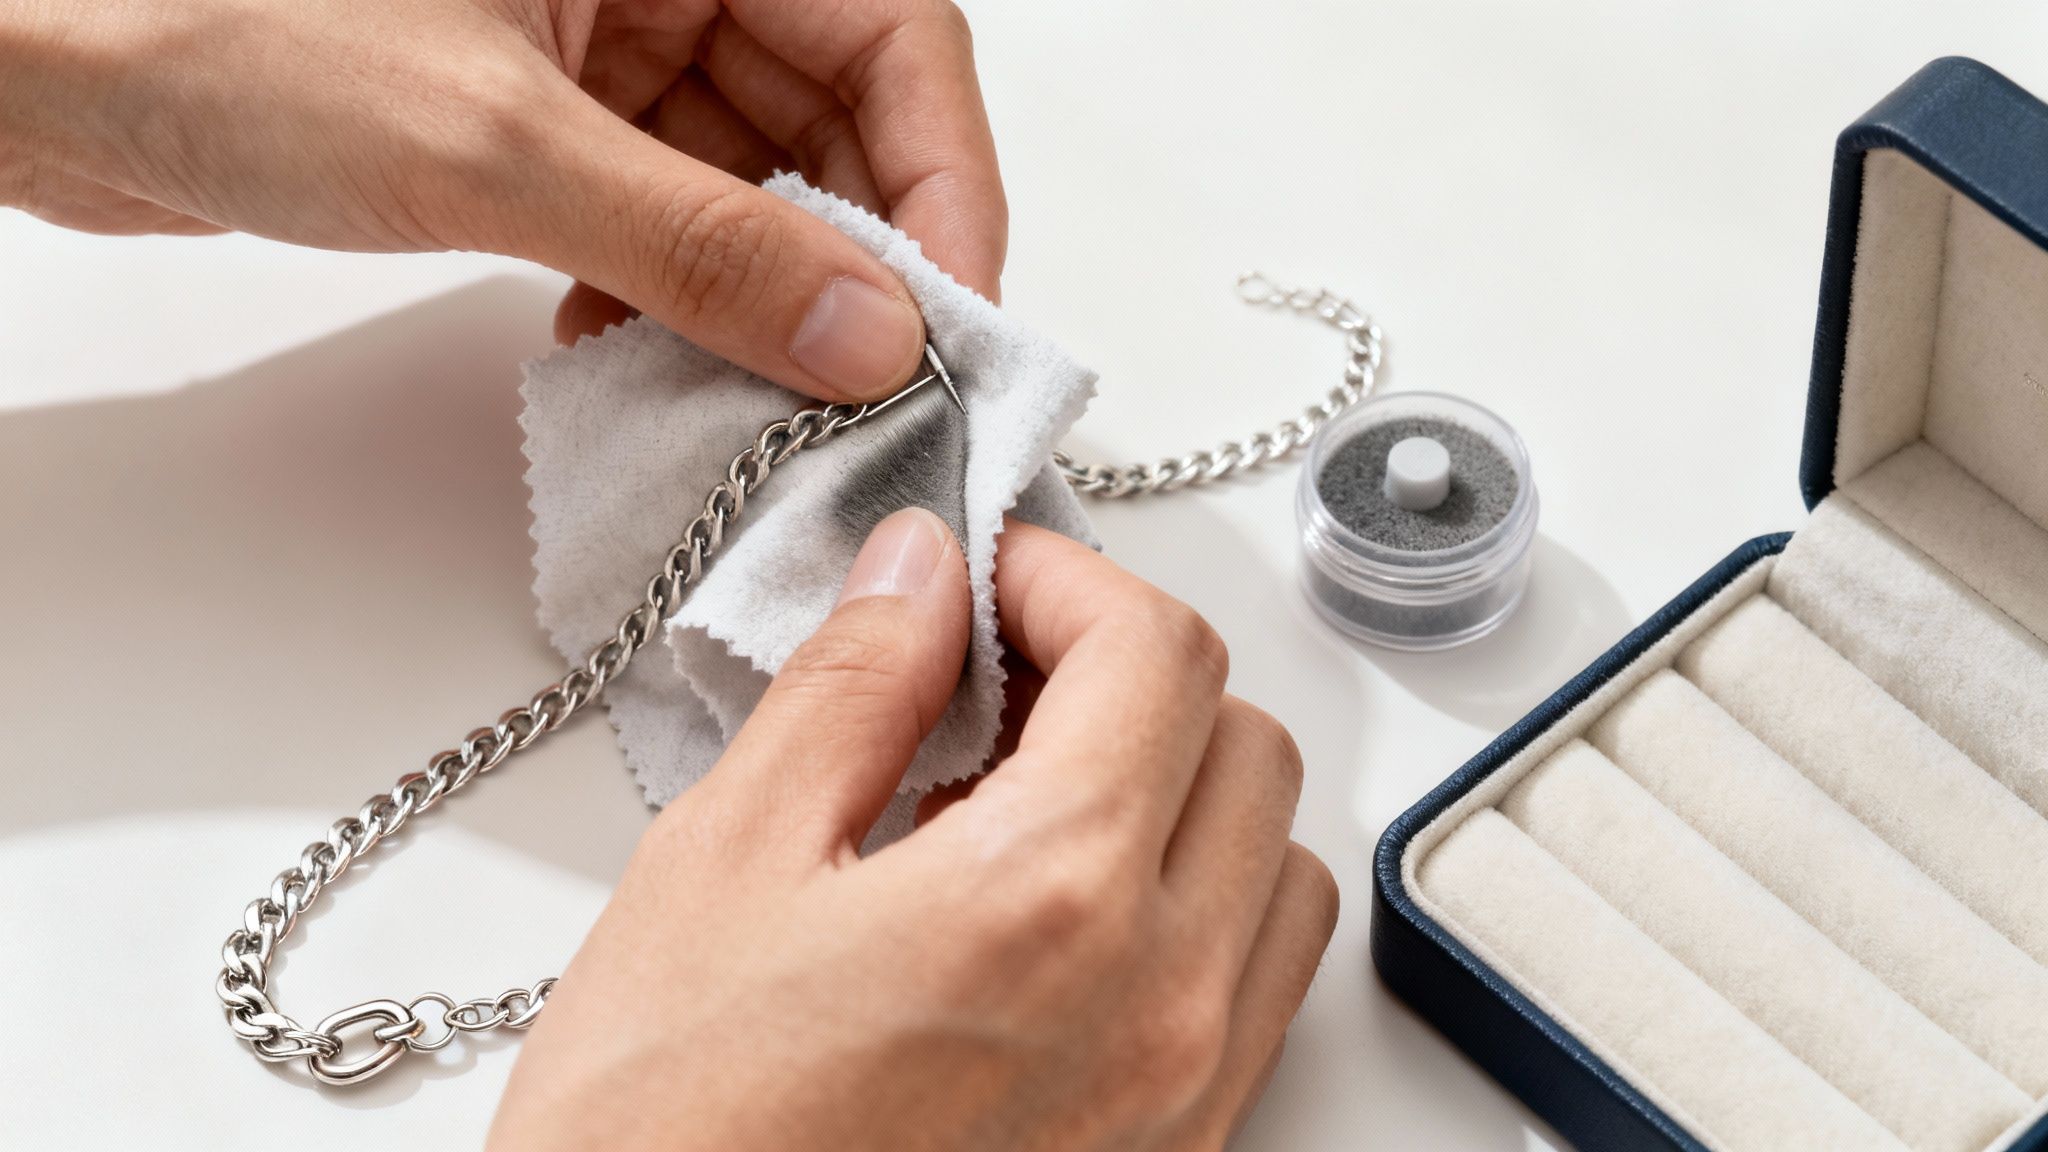
This is the part of the process where your piece truly comes to life. The final touches are what separate something that looks 'homemade' from a piece that feels professionally 'handmade.' It’s where you smooth out the rough edges—quite literally—and add the polish that makes your creation shine. Don't rush this stage; it's just as critical as the assembly itself.
A professional finish is all about the details. After you cut a piece of wire, that end is going to be sharp. Taking a moment to gently file it down with a jeweler's file (or even a standard nail file in a pinch) creates a smooth, snag-free finish that’s comfortable to wear. A quick buff with a polishing cloth can also dramatically elevate metals like sterling silver, bringing out a brilliant luster.
Securing Your Work With The Right Clasp
The clasp isn’t just a mechanism to open and close your piece; it's a vital part of the design, impacting both its security and overall aesthetic. Choosing the right one means it’s easy to wear and won't unexpectedly fall off.
Here are a few reliable options to consider:
Lobster Clasps: These are the workhorses of the jewelry world. Their spring-loaded mechanism makes them incredibly secure, which is why you see them on most necklaces and bracelets.
Toggle Clasps: Made of a bar and a ring, these are both functional and decorative. They’re a fantastic choice for heavier pieces where the clasp itself can become a design element.
Magnetic Clasps: A lifesaver for anyone with dexterity issues. They're super easy to use but are best reserved for lighter pieces, as a strong tug can pull them apart.
Long-Term Care for Lasting Beauty
Once your masterpiece is complete, a little bit of care will keep it looking gorgeous for years to come. Handmade jewelry is often more delicate than mass-produced items, so that extra attention really does go a long way.
Proper storage is your first line of defense. Keep your pieces in a cool, dry place away from direct sunlight. Storing them in individual soft pouches or a lined jewelry box prevents scratching and—everyone's enemy—tangling. For metals prone to tarnish like sterling silver, an anti-tarnish bag is a game-changer.
Pro Tip: Treat your handmade jewelry like the wearable art it is. Avoid contact with harsh chemicals found in perfumes, lotions, and cleaning supplies. A good rule of thumb is to put your jewelry on last when getting ready and take it off first when you get home.
When it comes to cleaning, think gentle. For regular upkeep, a soft, lint-free cloth is usually all you need. For a deeper clean on most metals and hard gemstones, a simple mix of warm water and a few drops of mild dish soap works wonders. You can use a soft-bristled toothbrush to gently scrub away any grime, then just rinse well and dry it completely.
The desire for unique, well-cared-for jewelry has never been stronger. With online jewelry sales projected to soar past USD 105.6 billion, it's clear people crave personalized items. In some markets, nearly 20% of all online jewelry orders now include custom elements like engravings or specific gemstones. You can read more about these fascinating jewelry market statistics and trends. This growing enthusiasm for custom work just highlights how important it is to protect these special creations with the right care.
Common Questions About Creating Your Own Jewelry
Jumping into any new creative hobby brings up a flurry of questions, and making your own jewelry is no different. Getting a handle on these basics from the start lets you skip the hesitation and get right to the fun part—actually creating something beautiful.
Let's walk through some of the most common questions new makers ask. My goal here is to give you practical, straightforward advice to build your confidence and get you started on the right foot.
What Is The Easiest Type Of Jewelry To Make?
When you're just starting out, the best project is one that gives you a quick, satisfying win. The easiest pieces are always the ones that require the fewest tools and technical skills, letting you focus completely on your design and color choices.
Two projects really stand out for beginners:
Beaded Stretch Bracelets: This is the ultimate first project. All you really need is elastic cord, a fun mix of beads, and scissors. You can walk away with a stylish, wearable bracelet in under 30 minutes, which makes for an incredibly rewarding start.
Assembled Charm Necklaces: This one is all about instant gratification. It’s as simple as using pliers to open a jump ring, sliding on a pre-made charm and chain, and then closing the ring back up. It’s a fantastic way to master the essential skill of opening and closing jump rings without any other complex steps.
Both of these are perfect for building a foundational understanding of how jewelry components fit together and giving you that "I made this!" feeling.
How Much Does It Cost To Start Making Jewelry?
It’s a huge myth that you need a massive budget to start making jewelry. The truth is, your initial investment can be surprisingly small, and you can always scale up as your passion and skills grow.
You can get going for much less than you think. A basic, good-quality toolkit with the essential pliers (round-nose and chain-nose) and a pair of flush cutters will run you about $25 to $50. Don't skimp here—good tools make everything smoother and protect your materials from scratches.
Beyond the tools, your material costs are completely up to you. You can start with affordable options like glass beads, fun acrylic charms, and craft wire to get the hang of your techniques. A realistic starting budget to grab a solid set of tools and enough materials for several projects is usually between $75 and $150. The key is to start small, master the basics, and then invest in more specialized tools or precious materials later on.
What Are The Most Common Mistakes Beginners Make?
Every seasoned jewelry maker has a few "I wish someone had told me that sooner" moments. Knowing the common pitfalls right from the start can save you a ton of frustration and help you create durable, professional-looking pieces from day one.
The small details often make the biggest difference. Paying attention to how you finish a piece—from properly securing a jump ring to filing a sharp wire end—is what elevates your work from a simple craft project to a piece of handmade jewelry.
Keep an eye out for these three classic beginner slip-ups:
Using the Wrong Tools for the Job: Grabbing those pliers from the garage toolbox is a classic mistake. Their serrated jaws are designed for grip, which means they will scratch and ruin your delicate wire and components. A proper set of smooth-jawed jewelry pliers is non-negotiable for a clean, professional finish.
Insecurely Closing Jump Rings: This one is a big deal. A tiny gap in a jump ring is an open invitation for your entire piece to fall apart. You should always twist the ring open sideways (never pull the ends apart) and twist it back until the ends meet perfectly flush. You should feel a slight "click" as they line up.
Cutting Wire or Cord Too Short: It’s so easy to underestimate how much length you need for clasps and finishing touches. Always give yourself an extra inch or two to work with. You can always trim the excess, but you can't add more length once it's cut.
And if you find yourself dreaming of turning this creative passion into something more, you might want to check out this great resource on how to start a jewelry business.
Ready to move beyond the questions and start making something amazing? At Panther De Luxe Shop, we offer a curated selection of high-quality chains, charms, and findings to bring your unique vision to life. Explore our collections and find the perfect components for your next project today.
Comments