
Your Guide to How to Repair Jewelry at Home
- alex mark
- Jul 1, 2025
- 16 min read
Diving into jewelry repair can feel intimidating, but you'd be surprised at what you can fix right at your own kitchen table. We've all been there—a favorite beaded bracelet snaps, a necklace clasp gives out, or a chain gets into an impossible knot. The good news is that for many of these common headaches, a few basic tools and a little patience are all it takes.
The real key to success is knowing your limits. It's about confidently tackling the small stuff while recognizing when a piece needs the skilled hands of a professional.
What You Can Realistically Repair at Home
Before you grab a pair of pliers, let's set some realistic expectations. DIY jewelry repair is perfect for simple, common mishaps. We're not talking about intricate soldering or resetting a diamond here. The goal is to build your confidence on achievable projects so you don't accidentally cause more damage to a piece you love.
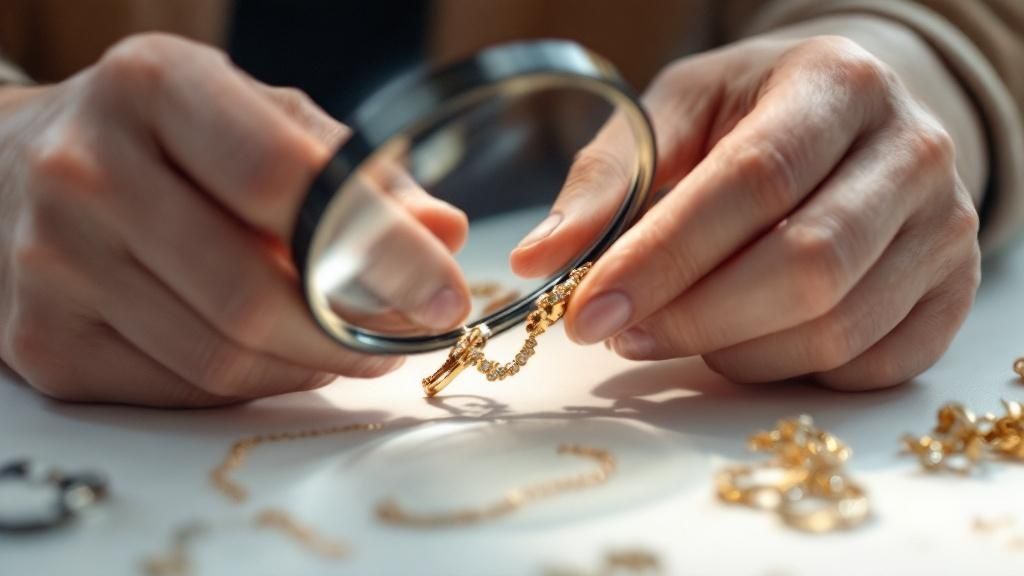
Every successful repair starts with two things: a good look at the damage and figuring out what material you're working with. Sterling silver, gold-plated metal, and costume jewelry all behave differently, so your approach will need to change accordingly.
Identifying Your Jewelry's Material
A quick inspection can tell you a lot. Turn the piece over in your hands and look for tiny stamps, which are called hallmarks. You'll usually find them on the clasp, the back of a pendant, or tucked away on the inside of a ring band.
Sterling Silver: Keep an eye out for a "925" or "STERLING" stamp.
Gold: You'll likely see a marking like "10K," "14K," or "18K."
Platinum: Common stamps are "PLAT" or "950."
If you can't spot any markings, chances are you have costume jewelry on your hands. These pieces are often made from base metals like brass, copper, or zinc alloys and are absolutely perfect for practicing your new repair skills.
It’s always a good idea to work with a clean piece, so a gentle cleaning is a great first step. For some pointers on doing this safely, check out our guide on [how to clean jewelry at home](https://www.pantherdeluxe.com/post/how-to-clean-jewelry-at-home-easy-diy-tips).
Common Problems You Can Definitely Fix
With a small toolkit, you can confidently handle a surprising number of issues. Mastering these basic repairs will save you countless trips to the jeweler for minor problems and give you a real sense of accomplishment.
The most empowering part of learning to fix your own jewelry is realizing just how many common breaks don't require a professional. A simple fix can bring a beloved piece right back into your daily wear.
To help you get started, here's a quick rundown of some of the most frequent jewelry problems, the tools you'll need, and a realistic look at how tricky they are for a beginner.
Quick Guide to Common DIY Jewelry Repairs
Common Problem | Essential Tools | Difficulty Level (Beginner) |
|---|---|---|
Broken Clasp | Needle-Nose Pliers, Jump Rings, New Clasp | Low |
Tangled Chain | Pins or Needles, Baby Oil, Soft Cloth | Low |
Snapped Beaded Bracelet (Elastic) | Elastic Cord, Bead Stopper, Scissors | Low |
Loose Jump Ring | Two Pairs of Needle-Nose Pliers | Low |
Restringing a Simple Necklace | Beading Wire, Crimp Beads, Pliers, Clasp | Medium |
Replacing an Earring Hook | Needle-Nose Pliers, New Earring Hooks | Low |
Focusing on these fixes is the best way to build your skills. Start with something simple, like untangling a chain or re-stringing an elastic bracelet. You'll quickly get comfortable with your tools and the feel of the materials, paving the way for more complex repairs down the road.
Building Your Go-To Jewelry Repair Kit
Trying to fix jewelry without the right tools is a recipe for frustration. A well-stocked kit turns a potential disaster into a satisfying project, but it’s not about buying everything you see. It's about having the right tools for the job.
Think of these as your surgical instruments; precision is everything. Let's go beyond a simple shopping list and get into the why behind each tool. Once you understand what each one does, your repairs will look cleaner, feel stronger, and have that professional touch.
The Essential Pliers Trio
Pliers are the absolute backbone of any repair kit, but this is where many beginners go wrong. You can't just use one pair for everything. Each type has a specific job, and using the wrong one is a fast way to scratch metal or weaken a delicate component.
Needle-Nose Pliers: These are your all-purpose workhorses. Their fine, tapered tips are exactly what you need for gripping and guiding tiny jump rings, fiddly clasp parts, and stubborn chain links. When you're buying a pair, feel the inside of the jaws—you want a smooth surface to avoid marring your metal.
Round-Nose Pliers: You'll spot these by their conical, cone-shaped jaws. Their one and only purpose is to create perfect, uniform loops in wire. This skill is critical if you want to make your own earring hooks or create wire-wrapped connections that look seamless.
Wire Cutters (or Flush Cutters): A sharp, high-quality pair of wire cutters is non-negotiable. They're built to snip wire and headpins, leaving a perfectly flat, "flush" cut on one side. That clean edge makes all the difference for a professional finish that won’t snag on a favorite sweater.
A little pro-tip: invest in a set with comfortable, cushioned grips. After an hour of working on a tricky chain, your hands will thank you.
Unsung Heroes of Your Repair Kit
Once you have your pliers, a few other items can seriously level up your work. These tools handle the details that separate a quick amateur fix from a polished, lasting restoration.
A jeweler's loupe or even a good magnifying glass is a lifesaver. So many jewelry components are incredibly small, and being able to clearly see hallmarks, jump ring openings, and tiny knots is a game-changer. A loupe with 10x magnification is a fantastic starting point for most home repairs.
Also, if you plan on doing any restringing, get a bead board. Even a simple flocked mat will do. The textured surface keeps beads from rolling into oblivion, and most boards have handy channels and rulers to help you lay out your design and keep everything organized.
A simple bead board is one of the best small investments you can make. It prevents the chaos of beads scattering across your table and lets you map out a design before stringing a single one, saving you from frustrating mistakes.
Finishing and Polishing Tools
Once the hard part is done and the piece is structurally sound, it's time to make it look beautiful again. This is where finishing tools come in, helping you clean up your work and restore that original sparkle.
A soft, untreated polishing cloth is a must for buffing away fingerprints and minor tarnish after you’ve handled a piece. For sterling silver that’s seen better days, a specially treated silver polishing cloth can bring back its shine in minutes.
Keep a small set of tweezers in your kit, too. You’ll be surprised how often you reach for them. They're perfect for picking up microscopic beads, placing a tiny stone with precision, or just holding a piece steady while you work. Look for a fine-point, non-magnetic pair if you can.
Finally, get yourself a small compartmentalized box for your findings—all those little clasps, jump rings, and crimp beads. Staying organized doesn't just save you time; it keeps you from losing those tiny, essential parts right when you need them most.
Fixing Broken Chains and Clasps Like a Pro
It happens to the best of us. That delicate chain you love catches on a sweater, or a trusty clasp just gives up one day. These are, without a doubt, the most common jewelry emergencies I see. The great news? They're often the most straightforward to fix yourself. With a bit of patience and the right moves, you can get your favorite pieces back into your collection without needing a jeweler.
This guide is all about giving you the hands-on skills to tackle these little mishaps. We’ll get into everything from picking the right replacement clasp to the proper way to handle jump rings—the real workhorses of most jewelry.
The Key to a Solid Chain Repair
In almost every case of a broken chain or clasp, the hero of the story is the humble jump ring. It’s that small, unsoldered circle of metal connecting the clasp to the chain. Honestly, learning how to open and close one correctly is the most important skill you can have for basic jewelry repair.
So many people make the classic mistake of pulling a jump ring’s ends apart, creating a “C” shape. This instantly weakens the metal and makes it nearly impossible to close securely. The right technique preserves the ring’s strength and perfect circle.
The secret is to never pull the ends straight apart. Instead, you twist them sideways. This maintains the ring's tension and shape, letting you close it perfectly without leaving a gap that can snag or pull open later.
Picture the opening of the jump ring at the 12 o'clock position. Grip one side of the ring firmly with a pair of needle-nose pliers. With a second pair of pliers, grab the other side and gently twist—one hand moves toward you, the other away from you. This creates a neat side opening, just wide enough to slip onto a chain link or clasp. To close it, just reverse the motion until the two ends meet perfectly flush. You should hear a tiny "click" as they line up.
Choosing and Replacing a Clasp
When a clasp fails, the first thing to do is figure out what kind you're working with. You'll almost always run into one of two types on bracelets and necklaces:
Spring Ring Clasps: These are the small, circular ones with a tiny lever that opens a little internal gate. They're very common but can be a real pain to operate if you have long nails or limited dexterity.
Lobster Claw Clasps: Shaped just like their name suggests, these are typically stronger and much easier to open and close. They make a fantastic and simple upgrade if you're tired of fumbling with a spring ring.
Once you have your new clasp, the swap is a breeze. Just use that two-plier twisting technique to open the jump ring attached to the old, broken clasp. Slide the old one off, slip the new one on, and twist the jump ring securely shut. For more detailed steps, you can dive into our [complete DIY guide to fixing a broken necklace chain](https://www.pantherdeluxe.com/post/fix-broken-necklace-chain-complete-diy-repair-guide).
Putting a Simple Broken Chain Back Together
But what if the chain itself snapped in the middle? For basic chains like cable, curb, or Figaro styles (anything made of individual links), the fix is usually as simple as adding a new jump ring.
Find the two broken ends of the chain. If the last links on each side are still in good shape, you can connect them directly with a new jump ring that matches the chain's size. Twist open your jump ring, thread both end links onto it, and twist it closed, making sure the ends are perfectly aligned.
If a link is bent or stretched out of shape, you might need to snip it off with wire cutters and attach your jump ring to the next intact link in the chain.
After any repair, the final touch is a good cleaning and polish to bring back that original shine. This visual guide shows how the pros get that perfect, finished look.
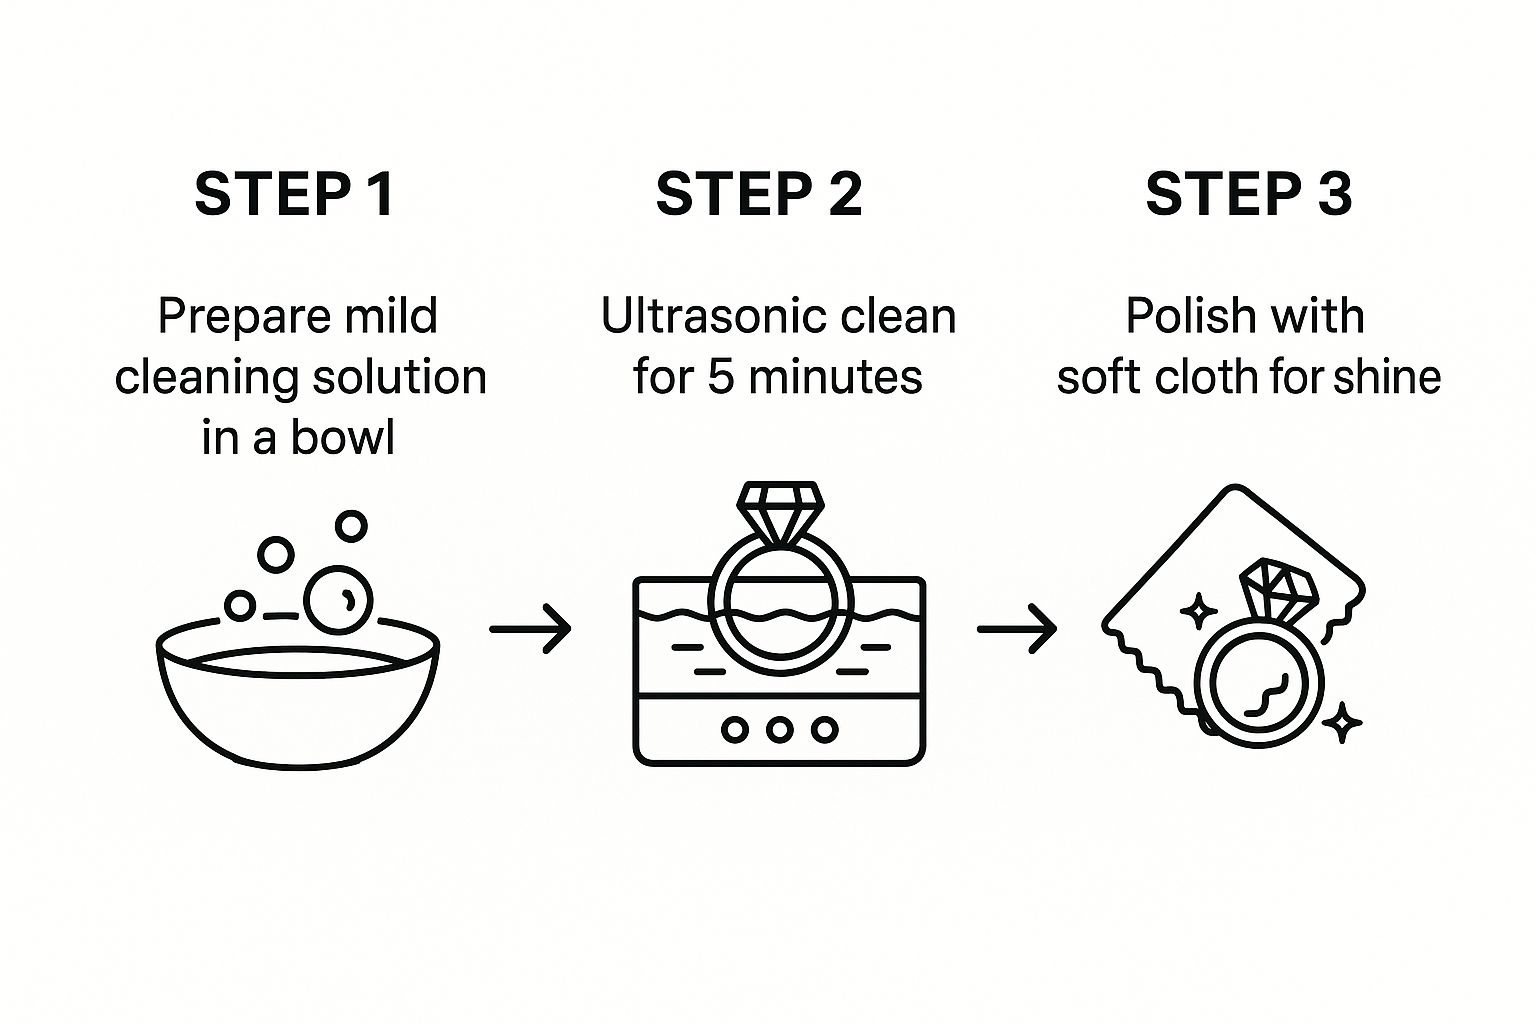
As you can see, a great finish really comes down to a thorough cleaning followed by a methodical polish.
Knowing When to Call a Professional
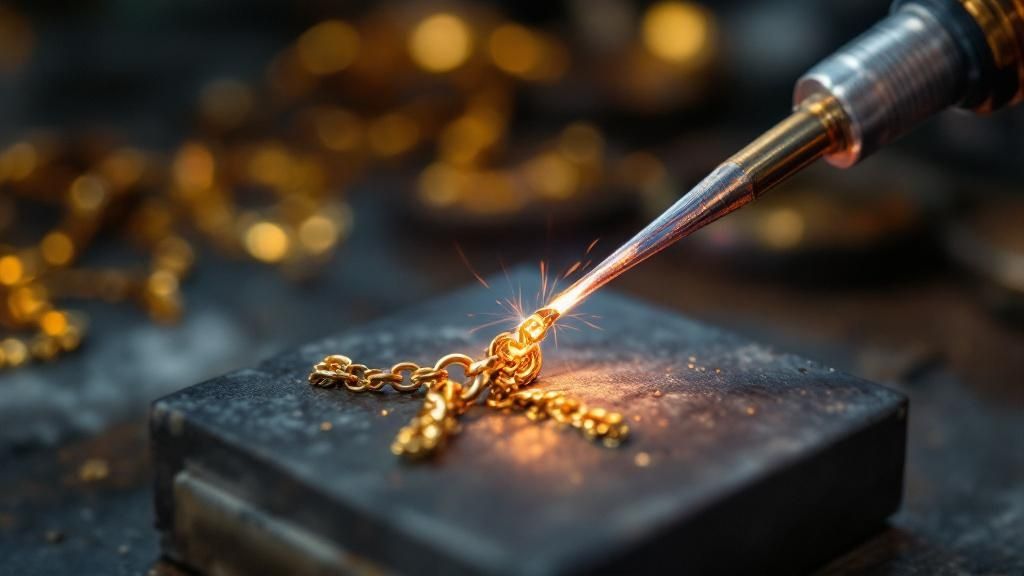
While many repairs are perfectly doable at home, it's just as important to recognize your limits. Highly intricate chains—think snake, herringbone, or rope chains—are built from interlocking plates or woven wires. When they break, a simple jump ring won't cut it. These need to be professionally soldered to be mended seamlessly.
Trying to fix these complex chains yourself can easily lead to permanent kinks and damage. Likewise, if your piece is made from a precious metal like high-karat gold or platinum, it’s always best to trust an expert who can perform an invisible, color-matched solder.
By sticking to simple link and clasp repairs, you can confidently handle the vast majority of everyday jewelry issues that come your way.
Mastering Beadwork and Restringing Techniques
There’s a special kind of dread that hits when you hear the clatter of beads scattering across the floor. A favorite necklace or bracelet, gone. But what feels like a disaster is actually a great opportunity. Learning to restring your own beaded jewelry is an incredibly satisfying and surprisingly calm process.
This isn't just about fixing something broken; it's about taking control and becoming a creator. Once you understand the right materials and methods, you can not only bring an old piece back to life but even start designing something new from the ground up.
Choosing the Right Stringing Material
The stringing material is the unsung hero of any beaded piece. It’s the backbone, and choosing the wrong one is a recipe for another break down the road. The decision really boils down to two things: the weight of your beads and the final look you're after.
Beading Wire: This is the workhorse for most projects today. It's not just one wire, but a tiny cable of steel wires braided together and coated in smooth nylon. It’s incredibly strong and comes in different thicknesses and flexibilities, which makes it ideal for heavier glass or stone beads.
Silk Thread: This is the classic, traditional choice, especially for pearls. Its natural softness is gentle on the delicate nacre of a pearl. When you see pearls knotted between each bead, that’s almost always silk cord—it’s the professional way to keep them from rubbing against and damaging each other.
Elastic Cord: Perfect for those casual, stretchy bracelets you can just slide on. If you go this route, look for a good quality, multi-strand elastic. The cheap stuff will stretch out and lose its shape (or just snap) after a few wears.
For most of your everyday restringing jobs with stone or glass beads, a medium-flexibility beading wire is a safe, reliable bet. It's forgiving to work with and holds up beautifully.
The real secret to a durable beaded piece isn't the beads themselves—it's the unseen foundation. Selecting the correct stringing material for the weight and type of bead is the single most important decision you'll make in the restringing process.
Prepping for a Seamless Restringing Job
Before you even think about cutting your new string, get organized. This will save you a world of headaches. A bead board is fantastic, but even a folded towel on your table will do the trick to keep your beads from rolling away.
Try to lay out the beads in their original pattern as best you can. Now is the perfect time to give them a quick wipe-down with a soft cloth and check for any chips or damage. It's so much easier to spot a flawed bead now than after you've already strung it.
Rushing this prep stage is a rookie mistake that almost always leads to frustration. The desire to preserve treasured pieces is a huge driver of the jewelry market. In fact, the global jewelry market is projected to hit about $348 billion in 2025. The United States makes up around 25% of that consumption, which points to a massive number of jewelry owners who will eventually need these kinds of repair skills. For more on these trends, you can check out the insights on CaratTrade.com.
Securing the Ends for a Professional Finish
How you finish the ends is what separates a quick-fix from a repair that looks truly professional. The idea is to create a secure loop for attaching your clasp. For beading wire, the industry-standard method uses crimp beads.
A crimp bead (or its cousin, the crimp tube) is just a small, soft metal bead you'll use to lock the wire in place. It's a simple process, but it does require a bit of finesse.
First, thread a crimp bead onto your wire, followed by one half of your clasp.
Now, loop the tail end of the wire back through that same crimp bead. This forms a little loop that traps the clasp.
Gently pull the wire to make the loop snug against the clasp, but leave just enough slack so it can move freely. You don't want it to be rigid.
Using crimping pliers (or needle-nose pliers in a pinch), squeeze the crimp bead flat. This pressure locks the wire securely inside.
Once the crimp is tight, you can snip off the little tail of excess wire and start stringing your beads. When they’re all on, just repeat the exact same crimping process on the other end with the second half of the clasp. Always give your finished piece a gentle tug to make sure everything is secure. Getting this technique down is a fundamental skill for anyone serious about jewelry repair.
Knowing When to Call a Professional Jeweler
Learning to repair your own jewelry is incredibly rewarding, but the most important skill you can develop is knowing when to stop. Recognizing your limits—and when to put down the pliers—is what separates a smart DIYer from someone who ends up with a broken heart and a permanently damaged heirloom.
This isn't about giving up. It’s about protecting the pieces you love. Some jobs just require specialized tools, years of hands-on experience, and a level of precision you can't achieve at the kitchen table. Attempting a complex repair yourself can quickly turn a fixable problem into an irreversible one, often destroying the piece's value in the process.
The Clear Red Lines for DIY Repair
A few repairs should always, without question, be left to a professional. These tasks usually involve heat, intricate knowledge of metallurgy, or a high risk of damaging precious stones. It's a gamble you simply don't want to take.
Soldering of Any Kind: This is the absolute number one rule. Whether it’s a broken rope chain or a snapped ring band, the only real fix is soldering. A jeweler uses a high-heat torch to fuse the metal, creating a bond that’s as strong as the original piece. No glue or home kit can come close.
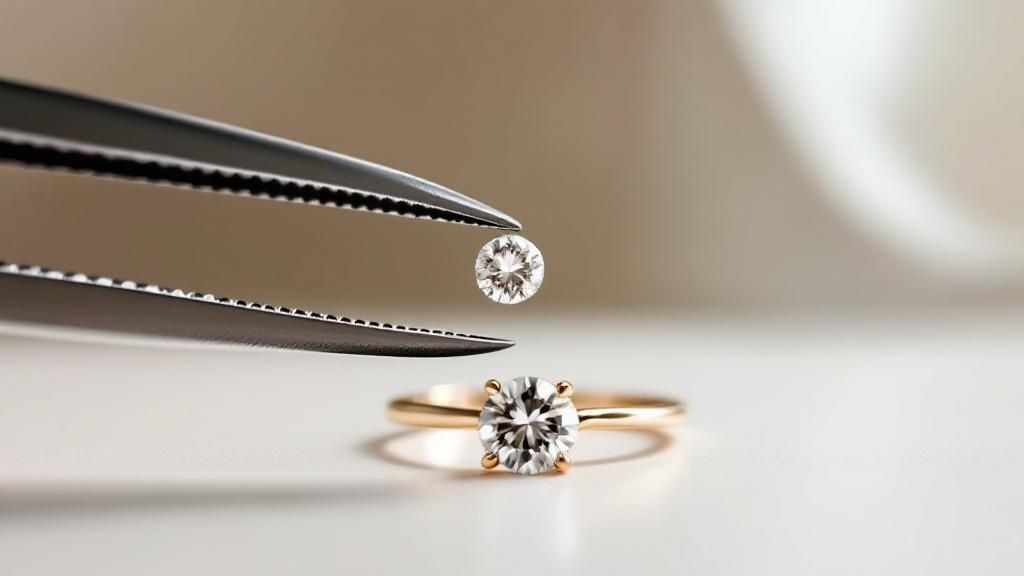
Prong Repair or Retipping: Those tiny metal claws holding your gemstone are called prongs. If one is bent, broken, or worn thin, your stone is at risk. A jeweler has to meticulously rebuild or reinforce that prong to make sure your diamond or sapphire doesn't pop out and disappear forever.
Ring Resizing: Properly changing a ring's size means cutting the band to add or remove metal. It requires precise measurements and soldering to get it right, all while keeping the ring perfectly round and structurally sound. For less permanent fixes, our guide on [safe DIY methods for resizing a ring at home](https://www.pantherdeluxe.com/post/how-to-resize-a-ring-at-home-safe-diy-methods-that-work) has some useful tips.
Working on Antique or Fragile Pieces: Heirloom jewelry is a different beast entirely. It can have delicate filigree, old-world stone settings, and metals that have grown brittle over decades. An expert knows how to handle these materials without causing a catastrophe.
Trusting a professional with high-stakes repairs isn't just about fixing the problem—it's about preserving the piece's value, story, and structural integrity for years to come.
Finding a Reputable Jeweler You Can Trust
Once you've decided a repair is beyond your skill set, the next challenge is finding the right person for the job. Not every jewelry store has a master jeweler on-site, so a little homework goes a long way. I always suggest starting with local, independent jewelers who have been in the community for a while. Their reputation is built on craftsmanship and trust, not just sales.
The demand for these skilled artisans is growing. In fact, the jewelry repair service market is on track to hit $1.5 billion in 2025. This growth includes big names like Zales and Jared, but also the independent craftspeople who do the truly specialized work. You can read more about this trend in a report on jewelry repair services.
Questions to Ask Before Handing Over Your Jewelry
When you walk into a shop, don't hesitate to ask questions. A true professional will be happy to explain their process and put your mind at ease.
Here are a few things I always recommend asking:
Can I get a detailed quote? A good quote breaks down the cost of labor and any materials, like gold or new stones.
Is the work done on-site? It’s good to know if your cherished piece is staying in the building or being shipped off somewhere else.
What is the expected timeline? Get a clear, realistic estimate of how long the repair will take.
Do you guarantee your work? A reputable jeweler will always stand behind their repairs for a reasonable amount of time.
Armed with this knowledge, you can feel confident deciding which projects to tackle yourself and when to hand your treasures over to the skilled hands of an expert.
Common Questions About Jewelry Repair
When you're first getting started with jewelry repair, it's natural to have a lot of questions. Staring at a tangled mess of a chain or a clasp that's given up the ghost can feel pretty intimidating. We've been there!
To help you out, I’ve gathered some of the most common questions that pop up for beginners. Think of this as a conversation with a seasoned pro, giving you the real-world advice you need to choose the right materials, find clever workarounds, and make repairs that actually last.
Can I Just Use Super Glue to Fix My Jewelry?
I hear this question all the time, and my answer is almost always a firm no. It's tempting, I get it—it seems like a quick and easy fix. But using super glue on jewelry is a decision that usually ends in regret.
The problem is that super glue becomes incredibly brittle once it dries. Jewelry needs to flex and move with you, and a rigid super glue bond will just snap under the slightest pressure. Even worse, the chemicals in the glue can permanently ruin your piece. It can cloud gemstones, corrode metal plating, and leave a hazy film that’s impossible to clean off without causing more damage.
For a simple break, like a chain coming loose from its clasp, the fix is usually mechanical—a fresh jump ring, properly opened and closed. For anything that needs a true permanent bond, a professional jeweler uses solder. Super glue just doesn't have the integrity for the job.
What's the Easiest Jewelry to Practice On?
Jumping straight into repairing a family heirloom is a recipe for stress. You want to build your confidence on something low-stakes first. My go-to recommendation for a first project? A simple beaded bracelet on an elastic cord.
This kind of project is perfect for a few reasons:
You get to practice core skills like handling beads and attaching findings.
The materials are cheap, so making a mistake isn't a big deal.
It helps you get a feel for how jewelry components fit together without the pressure of working on something valuable.
Another fantastic starter project is repairing a single broken link on an old, inexpensive chain. This is the best way to master the two-plier technique for opening and closing jump rings—a skill you'll use constantly. My advice is to stick with costume jewelry or grab a few designated "practice pieces" until you feel totally comfortable with your tools.
How Do I Figure Out What Metal My Jewelry Is Made Of?
Knowing your metal is crucial because it determines everything—from the tools you can use to the way you clean it. The most reliable method is to hunt for a tiny stamp known as a hallmark. Jewelers tuck these into inconspicuous spots, like the inside of a ring, on the clasp, or the back of a pendant.
Here are the common markings you’ll see:
Sterling Silver: Look for "925," "STER," or "Sterling."
Gold: Usually marked by karat, like "10K," "14K," or "18K."
Platinum: Often stamped with "PLAT," "PT," or "950."
If you can't find a mark anywhere, you're most likely dealing with costume jewelry. These pieces are typically made from base metals like brass, copper, or pewter. When in doubt, you can always take it to a local jeweler. They can perform a quick, non-damaging test to identify the metal for you.
What’s the Best Way to Untangle a Knotted Chain?
We’ve all been there—faced with a necklace that looks like a hopeless ball of knots. The secret to fixing it isn't force, but patience and a little bit of lubrication.
First, lay the tangled chain on a clean, flat surface. Using a sheet of white paper underneath can help you see the tiny links more clearly. Next, apply a single drop of mineral oil or even baby oil right onto the knot. This helps the links glide past each other instead of gripping tighter.
Now, take two fine-tipped pins or needles and start gently picking at the knot from the outside, working your way in. Whatever you do, don't pull on the chain! That will only make the knot more compact. Your goal is to gently tease the links apart until you've created enough slack to undo the rest with your fingers. Once it's free, a quick wash with mild soap and water will remove the oil. Just pat it dry with a soft cloth, and it's good as new.
At Panther De Luxe Shop, we believe that the beauty of jewelry lies not just in its shine, but in its story. Explore our collection of timeless pieces designed to be cherished for a lifetime. Visit us to find your next treasure.