
Understanding Diamond Grades: Your Guide to Expert Knowledge
- seanmawhinney
- May 18, 2025
- 15 min read
The Evolution of Diamond Grading Standards
For centuries, evaluating a diamond's quality remained a subjective practice. Descriptions like "bright" or "pure" were common, but imprecise. This lack of standardization made comparing diamonds challenging and often left buyers unsure of what they were purchasing. The 20th century, however, saw a significant shift towards objective, scientific measurements. This evolution not only protected consumers but also established a universal language for understanding diamond quality.
The Birth of the 4 Cs
The move towards standardization began in the 1940s. The Gemological Institute of America (GIA) formally introduced the 4 Cs – Color, Clarity, Cut, and Carat weight – in 1953. Developed by Robert M. Shipley, GIA's founder, the 4 Cs provided a standardized, objective method for assessing diamond quality. This system replaced vague terminology with concrete measurements, enabling buyers to make direct comparisons between diamonds. Learn more about the history of diamond grading here.
From Confusion to Clarity
Before the 4Cs, jewelers often used inconsistent language, potentially misleading customers. For example, the term “blue-white” could describe a range of diamond colors. The GIA’s standardized color scale, ranging from D (colorless) to Z (light yellow or brown), eliminated this ambiguity. This scale offers a clear benchmark for evaluating color, promoting transparency and informed purchases.
Empowering Consumers Through Knowledge
The evolution of diamond grading has empowered consumers. Understanding the 4 Cs allows buyers to prioritize the characteristics they value most, whether it's a colorless diamond (D color grade), a flawless clarity grade, or an ideal cut for maximum brilliance. Standardized grading also enables price comparisons across different retailers, ensuring buyers receive fair value. The link provided references custom cabinetry, seemingly unrelated to diamond grading. It's important to maintain relevant links to enhance user experience. Instead, consider including a link to a reputable resource on diamond education.
The Ongoing Refinement of Standards
Diamond grading standards continue to evolve alongside technological advancements. Improvements in imaging technology, for example, now allow for more accurate assessments of clarity characteristics. This ongoing refinement ensures the 4 Cs remain a reliable tool for evaluating diamond quality in today’s market. Understanding this evolution gives consumers not only an appreciation for these gems, but also the knowledge to make informed decisions.
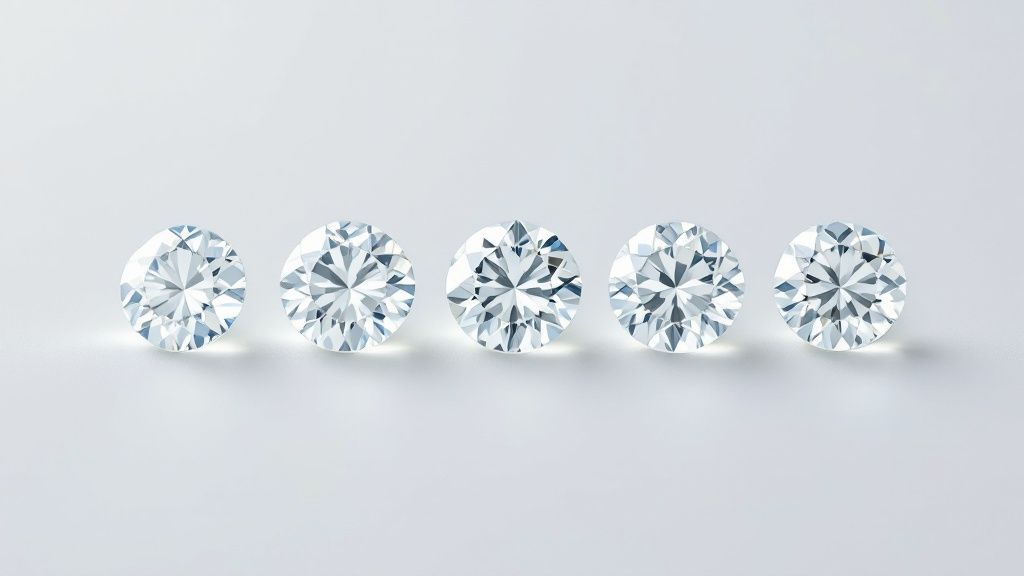
Diamond Color: Beyond What Meets the Eye
Diamond color, while often subtle, plays a significant role in a diamond's overall beauty and value. Many focus on carat weight or cut, but understanding color nuances can be key to finding the perfect balance between brilliance and budget. The industry standard grades diamond color on a D-to-Z scale. This scale represents a spectrum, with D as completely colorless and Z indicating a light yellow or brown tint.
Decoding the D-to-Z Scale
The D-to-Z scale measures the subtlety of color. Diamonds graded D, E, and F are considered colorless and command premium prices due to their rarity. As you move down the scale, tints become progressively more noticeable.
A G or H graded diamond might appear colorless to the untrained eye. However, a side-by-side comparison with a D-graded stone reveals a slight difference. Further down the scale, tints become readily apparent, impacting the diamond's appearance and price. Understanding this scale is vital for making informed decisions.

The image above shows a precision scale weighing a diamond, highlighting the meticulous detail in evaluating these stones. Just as slight weight differences register on the scale, so do minute color variations affect a diamond's grade.
Setting and Lighting: Impact on Color Perception
Setting and lighting significantly influence a diamond's color appearance. A yellow or rose gold setting can mask slight tints in I, J, or K graded diamonds, making them appear whiter than in white gold or platinum. Lighting conditions also play a key role. Natural daylight reveals color nuances more than incandescent lighting, which can make lower-color grade diamonds seem more colorless.
This knowledge allows buyers to use setting and lighting to maximize perceived color. A well-cut diamond also affects color appearance. Maximizing brilliance and light return can mask slight color tints. As diamond grading standards evolve, understanding search intent is crucial. You may find this article on Semantic SEO helpful.
The Sweet Spot of Value and Beauty
For many, the G-to-J color range offers a balance between near-colorlessness and attractive pricing. These diamonds appear white to the naked eye in most settings, especially with a good cut. This range offers significant savings compared to D, E, or F grades, allowing buyers to prioritize carat weight or clarity.
A one-carat H color diamond can offer substantial savings over a one-carat D color diamond, while still appearing colorless in a typical setting. The color grading scale, established by Richard T. Liddicoat in 1953, uses letters from D (colorless) to Z (light yellow or brown). This system avoids confusion with previous terminology and provides an absolute scale. Learn more about the history of diamond grading here. You might also be interested in: Our blog categories.
To further illustrate the nuances of diamond color, let's examine the following table:
Diamond Color Grade Comparison: A comprehensive breakdown of diamond color grades, their visual characteristics, and relative value.
Color Grade | Description | Visual Appearance | Value Impact | Best For |
|---|---|---|---|---|
D | Colorless | Absolutely no hint of color | Highest Value | Those seeking absolute perfection and willing to pay a premium |
E | Colorless | Virtually no color, slight traces may be detected by experts | Slightly lower value than D | Excellent value for near-colorless brilliance |
F | Colorless | Minute traces of color may be visible under close examination | Lower value than D and E | A good balance of colorlessness and value |
G | Near-Colorless | Colorless to the untrained eye, slight tint noticeable when compared to higher grades | Noticeably lower value, offering excellent value for money | Excellent for those seeking near-colorless appearance at a more affordable price |
H | Near-Colorless | Faint tint visible upon close inspection | Lower value than G, providing a budget-friendly option for near-colorless diamonds | Ideal for those prioritizing carat size or other characteristics over absolute colorlessness |
I | Near-Colorless | Noticeable tint, especially in larger stones | Lower value than H | Suitable for those who prioritize size and are comfortable with a slight tint |
J-K | Faint Yellow | Noticeable tint, becoming more apparent | Value significantly decreases as tint becomes more prominent | Best for yellow gold settings which can mask the tint |
L-Z | Very Light to Light Yellow/Brown | Obvious color tint | Lowest value | Ideal for those who prefer a warmer toned diamond |
This table highlights the key differences in visual appearance and value impact across the color grades, enabling buyers to make educated choices based on their preferences and budget. Choosing the right color grade can greatly impact the overall beauty and value of a diamond.
Diamond Clarity: The Hidden Factors That Matter
While sparkle and size often steal the show, diamond clarity plays a vital role in a diamond's value and overall appearance. Understanding clarity means exploring the microscopic world within the diamond, examining the tiny imperfections that make each stone unique. This knowledge empowers you to choose a diamond that perfectly balances beauty and budget.
Understanding Diamond Inclusions and Blemishes
Clarity refers to the absence of inclusions and blemishes. Inclusions are internal characteristics, like tiny crystals or feathers, formed within the diamond during its creation. Blemishes, however, are external imperfections on the diamond's surface. These can include scratches or extra facets. While often invisible to the unaided eye, these characteristics can impact a diamond's brilliance and structural integrity.
Think of a diamond as a pristine lake. Inclusions are like pebbles or leaves within the water, while blemishes are like ripples on the surface. Some inclusions are barely noticeable, like a small pebble in a deep lake. Others, like a large branch, can significantly impact the clarity.
The Clarity Grading Scale: From Flawless to Included
The Gemological Institute of America (GIA) grades diamond clarity on a scale ranging from Flawless (FL) to Included (I3). FL diamonds have no inclusions or blemishes visible under 10x magnification, making them exceptionally rare and high-quality. As we move down the scale, the number and visibility of inclusions increase.
Internally Flawless (IF): These diamonds have no inclusions visible under 10x magnification, though minor blemishes may be present on the surface.
Very, Very Slightly Included (VVS1 and VVS2): These diamonds have minute inclusions that are difficult even for trained gemologists to detect under 10x magnification.
Very Slightly Included (VS1 and VS2): These diamonds have minor inclusions that are somewhat easier to see under 10x magnification.
Slightly Included (SI1 and SI2): These diamonds have noticeable inclusions under 10x magnification. Some may be visible to the naked eye.
Included (I1, I2, and I3): These diamonds have obvious inclusions visible to the naked eye, which may affect the diamond’s brilliance and transparency.
Diamond clarity grading, a key component of the 4 Cs, was standardized by GIA in 1953. The scale initially ranged from Flawless to I2 (Included), with "I" originally standing for "Imperfect." Learn more about diamond clarity here.
The Eye-Clean Standard: Balancing Beauty and Value
The eye-clean standard offers a practical balance between clarity and cost. An eye-clean diamond shows no inclusions visible to the unaided eye. While not technically flawless, these diamonds offer exceptional beauty at a more accessible price. This makes them a compelling choice for those prioritizing visual appeal without overspending.
For example, a VS2 or SI1 clarity grade often meets the eye-clean standard, offering significant savings compared to higher grades like VVS1 or VVS2. Understanding this distinction allows buyers to make informed choices aligned with their budget and preferences.
Inclusion Position and Type: Impact on Brilliance
Not all inclusions are the same. The location and type of an inclusion can significantly impact a diamond's brilliance. An inclusion directly under the table (the flat top facet) will be more visible than one on the pavilion (the angled facets on the bottom). Likewise, a dark crystal inclusion is more noticeable than a tiny white feather.
Understanding how inclusion type and position influence brilliance is vital for making informed decisions. This knowledge helps buyers select diamonds that maximize sparkle, even with minor inclusions. The interplay between clarity and other factors, such as cut, highlights the importance of understanding diamond grades.
Diamond Cut: Unlocking Extraordinary Brilliance
The magic of a diamond's sparkle isn't just about its size or clarity. The cut, often overlooked, is the most important of the 4 Cs. It dramatically influences how light interacts with the stone. Two diamonds of equal color, clarity, and carat weight can appear vastly different based on cut quality alone. This section explores how precise angles transform a rough stone into a breathtaking gem.
Understanding Diamond Cut Grades
The Gemological Institute of America (GIA) grades diamond cut on a five-point scale: Excellent, Very Good, Good, Fair, and Poor. An excellent cut maximizes brilliance, fire, and scintillation. Brilliance is the white light reflected back to the eye. Fire describes the colorful flashes you see, while scintillation refers to the pattern of light and dark areas, creating the “sparkle.”
A diamond with a poor cut can appear dull, even with high grades in other areas. A well-cut diamond, however, will dazzle with intense sparkle, reflecting light back with exceptional brilliance.
The Anatomy of a Brilliant Cut Diamond
A diamond’s facets, its many polished surfaces, are strategically angled to maximize light return. The crown (top) and the pavilion (bottom) work in tandem to manipulate light. Light enters through the table, the large flat facet on top, travels to the pavilion, and is reflected back through the crown as brilliance. This precise interplay of angles creates a diamond’s captivating sparkle.
Think of a diamond as a miniature hall of mirrors. The facets’ angles act like mirrors, bouncing light inside the stone. A perfectly cut diamond reflects nearly all light that enters, creating an explosion of brilliance. Check out our guide on Panther De Luxe products.
Cut vs. Shape: A Critical Distinction
Understanding the difference between cut and shape is essential. Shape refers to the diamond's outline from above (round, oval, pear, etc.). Cut describes the proportions, symmetry, and polish, which affect light performance.
Two round diamonds can share the same shape but have dramatically different cuts. One, with ideal proportions, may sparkle intensely. The other, with a deep or shallow cut, could appear dull, losing light from its sides.
Identifying a Well-Cut Diamond
Several factors indicate a well-cut diamond:
Bright, White Light Return: Strong white light reflection signifies excellent brilliance.
Colorful Flashes of Light (Fire): Observe the diamond under various lighting to appreciate the rainbow flashes.
Even Scintillation (Sparkle): Look for a consistent pattern of bright and dark areas, creating a lively sparkle.
Avoid diamonds with a fish-eye effect (a dark ring around the center) or a dull appearance, indicating a poor cut.
Prioritizing Cut for Maximum Beauty
While all 4 Cs are important, prioritizing cut often results in the most beautiful diamond. A smaller, well-cut diamond can outshine a larger, poorly cut one. The superior cut maximizes light return, creating a more dazzling display.
By focusing on cut, you select a diamond that truly sparkles, captivating the eye and maximizing its beauty, whatever its size. Understanding diamond cut empowers you to choose a truly exceptional gem.
Carat Weight: Strategic Sizing Decisions
Beyond simply thinking "bigger is better," understanding carat weight involves strategic decisions impacting a diamond's visual impact and price. Savvy buyers use their carat weight knowledge to find exceptional value. This means understanding how carat weight relates to perceived size and manipulating that perception with clever diamond shape and setting choices.
The Price Cliff Phenomenon
One key concept is the "price cliff." Diamond prices jump at popular carat weight benchmarks, like 0.50, 0.75, 1.00, and 1.50 carats. A 0.90-carat diamond can be significantly less expensive than a 1.00-carat diamond, even though the size difference is minimal. This allows savvy buyers to maximize visual impact while minimizing cost.
By opting for a slightly smaller diamond, just below a benchmark, you can save substantially without sacrificing visual appeal. This frees up your budget for other factors like cut or color.
Maximizing Perceived Size
Two diamonds of identical carat weight can appear drastically different in size depending on their shape. Oval, marquise, and pear shapes tend to appear larger than a round brilliant cut of the same carat weight due to their elongated shape and larger surface area.
Imagine two equal-weight pieces of dough. One is a tight ball, the other a thin oval. The oval appears larger despite the same weight. This demonstrates how shape impacts perceived size. 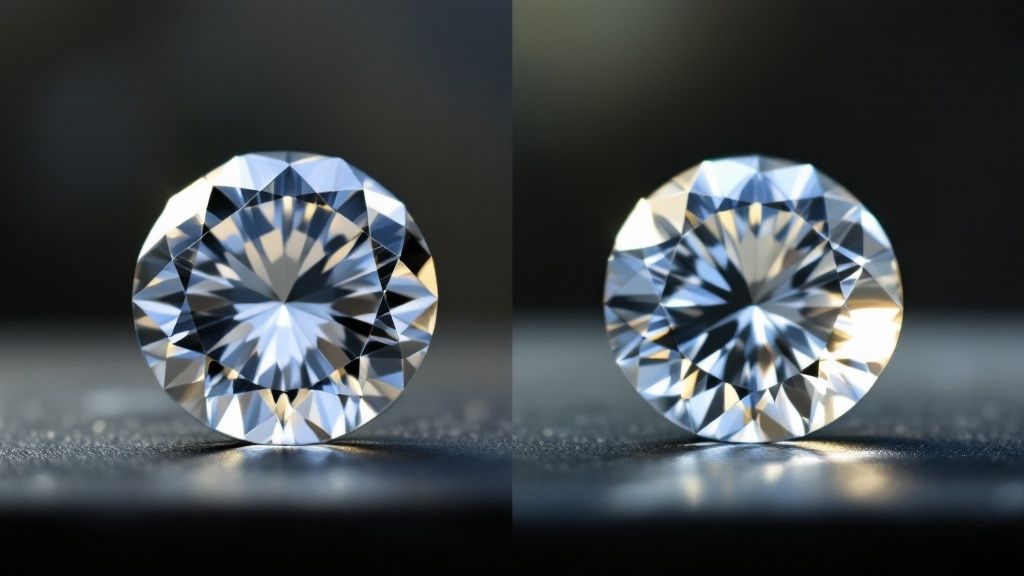
The Sweet Spot: Balancing Size and Savings
Finding the "sweet spot" means balancing desired size and budget. This might mean a slightly smaller carat weight in a shape maximizing perceived size or a setting enhancing the diamond's presence.
A halo setting, with smaller diamonds surrounding the center stone, creates the illusion of a larger diamond. A slimmer band can also make the diamond appear proportionally larger.
Setting's Impact on Size Perception
Settings drastically alter a diamond's perceived size. A bezel setting, encircling the diamond with metal, can make it seem smaller. A prong setting, using small metal claws, maximizes brilliance and perceived size by allowing more light to enter.
Think of the setting as a frame. A bulky frame overshadows a painting; a delicate frame enhances it. The right setting significantly impacts a diamond’s perceived size.
Strategic Sizing for Maximum Value
Understanding the interplay of carat weight, shape, and setting enables strategic decisions that maximize visual impact without overspending. Consider these strategies:
Explore slightly below popular carat weights: Look at diamonds just shy of the half and full carat marks.
Consider elongated shapes: Oval, marquise, or pear shapes offer a larger appearance per carat.
Choose settings wisely: Opt for settings that enhance, not diminish, the diamond’s presence.
By applying these strategies, you can make informed decisions about carat weight and select a stunning diamond within your budget. Understanding diamond grades helps you navigate the complexities of diamond buying with confidence.
Diamond Certification: Separating Facts From Marketing
Not all diamond certificates are created equal. This directly impacts a diamond's value and your confidence in its purchase. Understanding a diamond's grade depends heavily on the credibility of the grading laboratory. Even identical diamonds can receive varying grades from different labs. This makes certification a crucial step in understanding a diamond's true quality.
Why Certification Matters
A diamond certificate, also called a grading report, offers an unbiased evaluation of a diamond's 4 Cs: cut, clarity, carat, and color. This document details the specific characteristics of a diamond, enabling informed comparisons and building confidence for purchasing decisions. Reputable labs employ advanced equipment and highly trained gemologists to carefully analyze each stone, ensuring accuracy and objectivity. This objective assessment protects buyers from potentially misleading descriptions and inflated pricing.
Key Players in Diamond Certification
Several grading laboratories operate within the diamond industry. However, certain labs hold greater respect and significantly influence diamond pricing. The Gemological Institute of America (GIA) sets the industry standard. It's renowned for stringent grading practices and consistent evaluations. Other reputable labs include the American Gem Society (AGS) and the International Gemological Institute (IGI).
The GIA issued the first diamond grading reports in 1955, establishing a standard for the industry. Their collaboration with De Beers in the 1950s helped popularize the 4 Cs concept globally through advertising campaigns. This fundamentally changed how diamonds were marketed, and this grading system remains central to diamond valuation today. Learn more about the history of diamond grading here. You might also be interested in: Our blog post sitemap.
Decoding the Certificate
Understanding the details on a certificate is essential. Key information to look for includes:
Grading Laboratory: Ensure the certificate originates from a recognized lab like GIA or AGS.
4 Cs Grades: Compare these grades across different diamonds to make an accurate value assessment.
Clarity Characteristics Plot: This diagram provides a visual map of the diamond's inclusions and blemishes.
Fluorescence: This describes how the diamond reacts to ultraviolet (UV) light.
Cut Grade (for round brilliants): This crucial assessment details the diamond's proportions, symmetry, and polish.
Certification as a Negotiation Tool
The details within a diamond certificate offer valuable leverage during price negotiations. Understanding how a diamond's specific grades influence its value equips you to justify a lower price or confidently compare offerings from different retailers. This empowers buyers to make informed purchases and ensures you receive the best possible value for your investment.
Balancing Prestigious Certification and Value
While GIA certification is highly regarded, other respected labs may provide comparable assessments at a reduced cost. Balancing the prestige of a GIA certificate with budget limitations is an important consideration. The GIA's reputation offers peace of mind for some, while others may find a different lab's certification offers sufficient assurance at a more appealing price.
Warning Signs in Diamond Certification
Be aware of these red flags when reviewing diamond certificates:
Unfamiliar Grading Laboratory: Approach certificates from unknown labs with caution.
Discrepancies Between Certificate and Diamond: If the diamond's appearance seems inconsistent with the certificate description, seek a second opinion from a qualified gemologist.
Missing Information: A comprehensive certificate should detail all the diamond’s relevant characteristics. Incomplete information should raise concerns.
By understanding diamond grades and certification, you gain essential knowledge for making informed and confident decisions in the diamond market.
Making Diamond Decisions With Absolute Confidence
Understanding diamond grades is key to developing smart buying strategies that align with your budget and personal preferences. This section provides a personalized framework to help you make informed decisions tailored to your unique needs. We'll explore how different diamond shapes influence grading priorities, uncover value-driven grade combinations, and learn the art of strategic compromise.
Balancing the 4Cs: A Personalized Approach
There's no single "perfect" diamond grade combination. Your ideal diamond is the one that best reflects your individual priorities. Are you looking for maximum sparkle, the largest possible size, a colorless appearance, or the best overall value? Each priority requires a different approach to the 4Cs – Cut, Color, Clarity, and Carat.
For example, if sparkle is your top priority, focus on an Excellent or Very Good cut grade. You might consider compromising slightly on color or clarity to maximize brilliance. If size is paramount, you could opt for a slightly lower color or clarity grade to afford a larger carat weight.
Shape and Grading: A Strategic Partnership
Different diamond shapes require different grading priorities. Round brilliant cuts are designed to maximize sparkle, so cut quality is paramount. However, for elongated shapes like oval or pear shapes, carat weight and length-to-width ratio are prioritized to maximize perceived size. Understanding how shape influences the visual impact of each of the 4Cs is essential.
Consider two diamonds of equal carat weight: a round brilliant and an oval. The oval will appear larger due to its elongated shape. This knowledge allows you to choose a shape that maximizes the visual impact of your selected grades.
Strategic Compromise: Maximizing What Matters Most
Mastering the art of strategic compromise allows you to unlock exceptional value. Identify which of the 4Cs are most important to you and where you are willing to compromise. Perhaps a colorless appearance is a must-have, but minor inclusions are less of a concern. This might lead you to prioritize a higher color grade and accept a slightly lower clarity grade.
This personalized approach ensures you get the most out of your budget, allowing you to invest in the qualities that matter most to you. It's about finding the best possible combination for your specific desires, rather than simply chasing the highest grades across the board.
Navigating the Nuances of Diamond Grading
Understanding diamond grades empowers you in several important ways:
Confident Jeweler Conversations: You'll be able to confidently discuss your priorities and understand the trade-offs involved in selecting different grades.
Effective Retailer Comparisons: Accurately compare diamonds across different retailers to ensure you are getting a fair price.
Informed Decision-Making: Make an informed decision you're proud of, knowing your diamond perfectly aligns with your vision and budget.
To help guide your decision-making process, we've created a Diamond Grade Priority Matrix.
To help you prioritize, let’s look at the table below.
Diamond Grade Priority Matrix
The Diamond Grade Priority Matrix offers a starting point for prioritizing diamond grades based on your budget and what is important to you.
Budget Range | For Maximum Sparkle | For Maximum Size | For Colorless Appearance | Best Overall Value |
|---|---|---|---|---|
Lower | Good Cut, Near Colorless (G-J), SI Clarity | Fair-Good Cut, Faint Color (K-M), I1 Clarity | Good Cut, Near Colorless (G-J), SI Clarity | Good Cut, Near Colorless (H-I), SI1-SI2 Clarity |
Mid-Range | Very Good Cut, Near Colorless (G-H), VS Clarity | Good Cut, Near Colorless (I-J), SI Clarity | Very Good Cut, Colorless (F-G), VS Clarity | Very Good Cut, Near Colorless (H), VS2 Clarity |
Higher | Excellent Cut, Colorless (D-F), VS-VVS Clarity | Excellent Cut, Near Colorless (G-H), VS Clarity | Excellent Cut, Colorless (D-E), VVS Clarity | Excellent Cut, Colorless (F-G), VS1-VS2 Clarity |
This matrix provides general guidelines. The best combination for you will always depend on your individual preferences.
Understanding diamond grades empowers you to navigate the diamond buying process with confidence. This knowledge transforms a potentially overwhelming experience into an enjoyable and empowering one, leading you to a diamond you'll treasure for a lifetime.
Ready to find the perfect diamond? Explore our exquisite collection at Panther De Luxe Shop and discover the diamond of your dreams.
Comments