
How to Polish Silver Naturally for a Perfect Shine
- Luke Zucco
- Aug 16, 2025
- 12 min read
Ever wondered why that beautiful silver teapot or your favorite necklace starts to look dull and dark over time? It’s not just grime. It's a natural chemical process called tarnishing, and understanding it is the key to restoring your silver's shine without resorting to harsh chemicals.
Why Silver Tarnishes and How to Reverse It Naturally
When you pull out that heirloom flatware and find it covered in a dark, dingy film, you're seeing chemistry in action.
Silver is a reactive metal. When exposed to the air, it has a chemical rendezvous with sulfur compounds, primarily hydrogen sulfide. This creates a new compound on the surface: silver sulfide (Ag₂S), which is that blackish layer you see. This is why a silver piece left out on a shelf will darken much faster than one kept in a sealed, anti-tarnish bag.
Believe it or not, this tarnish layer is incredibly thin. We're talking just 10 to 100 nanometers thick, but it's enough to completely obscure the metal's brilliant luster. As the layer builds, you might even see it shift through colors—from yellow to blue before finally settling on black. You can get a much deeper scientific look into this process from the Canadian Conservation Institute.
The Simple Science Behind Natural Cleaning
So, how do household ingredients fix this? Instead of aggressively scrubbing away the silver sulfide—which also removes a tiny bit of your actual silver—these natural methods use gentle chemistry to reverse the tarnishing process itself.
There are two main ways this works:
Gentle Abrasives: Think of a simple paste made from baking soda and water. The particles in the baking soda are just abrasive enough to physically lift the tarnish off the surface without leaving scratches. It’s like a gentle exfoliation for your silver, revealing the clean metal underneath.
A Clever Chemical Reaction: This is where the famous aluminum foil and baking soda bath comes in. This method creates a mini electrochemical cell right in your bowl. The aluminum foil acts like a magnet for the sulfur atoms, literally pulling them off the silver and onto the foil. The tarnish is transferred, not scrubbed away.
This scientific approach is precisely why these home remedies are so brilliant for delicate or antique pieces. They preserve the silver instead of stripping it away, ensuring your treasured items can be passed down for generations.
Once you get the "why," the "how" becomes much easier. A quick paste polish is perfect for a simple silver ring you want to wear tonight. But for that ornate candelabra with all its nooks and crannies? The chemical bath is a lifesaver.
Using Gentle Abrasives for a Hands-On Polish
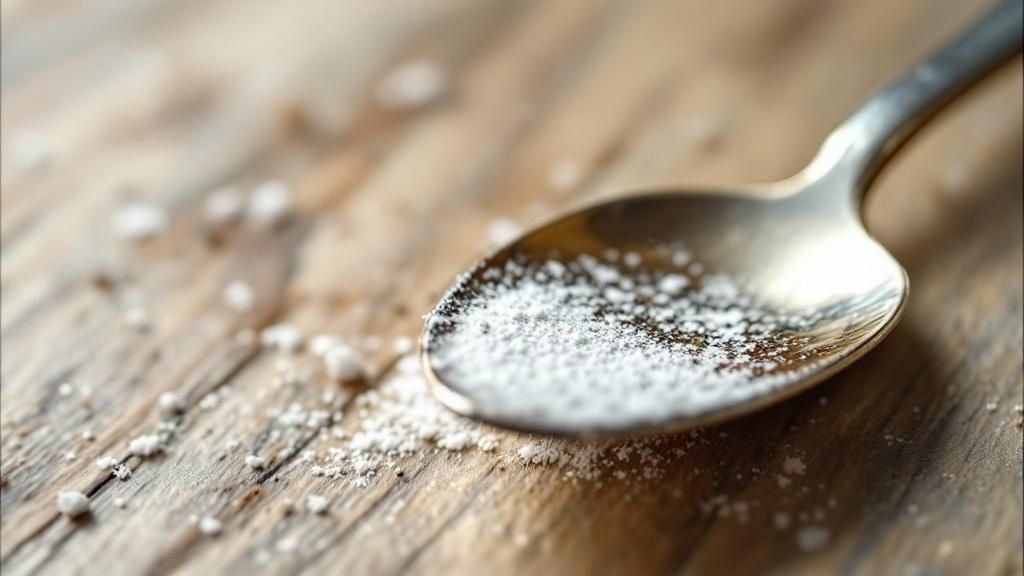
Sometimes, the best way to tackle tarnish is to get your hands dirty—metaphorically, of course. For those sturdy pieces like your everyday silverware or a simple silver tray, a gentle abrasive paste gives you direct control for a quick, satisfying shine. My go-to for this method is a classic kitchen staple: baking soda.
It couldn't be simpler to make. Just mix about two parts baking soda to one part water in a small bowl. You're looking for a consistency that feels like toothpaste—thick enough to stick to the silver without being dry and crumbly.
This simple paste works by physically rubbing the tarnish right off the surface. It's a tried-and-true method, and research backs it up. Studies show that a brief, controlled polish with a mild abrasive is incredibly effective. However, it's also a good reminder not to overdo it; one study found that polishing for over six minutes can start to wear away the silver itself. You can dig deeper into the science of abrasive polishing at the American Institute for Conservation.
Perfecting Your Polishing Technique
Now that you have your paste, your technique is what will deliver that flawless, scratch-free finish. It's tempting to rub in circles—it’s what most of us instinctively do—but this can leave behind tiny, circular scratches known as "swirl marks."
Instead, always polish in straight, back-and-forth lines. If you're working on a fork or spoon, just follow the length of the handle. This simple trick ensures that any microscopic lines left behind are uniform and practically invisible.
Pro Tip: For those beautifully detailed pieces with intricate patterns, like a filigree pendant or an ornate picture frame, a soft-bristled toothbrush is your secret weapon. Dip it into the paste and gently scrub into all the nooks and crannies to lift the tarnish that a cloth can't reach.
Alternatives for More Delicate Pieces
Baking soda is a powerhouse for most sterling silver, but some items need an even softer touch. If you're working with delicate heirlooms or silver-plated objects where the silver layer is quite thin, you can whip up a similar paste using cornstarch and water. It's far less abrasive than baking soda but still does a great job on light tarnish.
You’ve probably also heard about using toothpaste. I'd advise caution here. Many modern toothpastes have whitening agents, micro-beads, and silica that are far too harsh for silver and can leave permanent scratches. If you're ever in a real bind, a plain, white, non-gel toothpaste is a last-resort option, but the baking soda or cornstarch pastes are always a safer bet.
For Sturdy Items: The baking soda paste is perfect for flatware and solid silver pieces.
For Delicate Items: A cornstarch paste offers a gentler clean for plated silver and fragile antiques.
For Jewelry: These same principles are great for smaller items. For more specific advice, check out our complete guide on how to clean silver jewelry at home.
No matter which paste you use, the final step is non-negotiable. Rinse the item thoroughly under warm running water to get rid of every last bit of residue. Then, immediately dry it with a clean, soft cloth—microfiber is excellent for this—to prevent water spots and reveal that brilliant, mirror-like shine.
The No-Scrub Chemical Bath Method
Got a heavily tarnished silver tea set? Or maybe a delicate filigree bracelet where scrubbing just isn't an option? I’ve been there. The thought of damaging intricate details or spending an hour polishing can be a real headache. This is where a bit of kitchen chemistry comes to the rescue. The no-scrub chemical bath is a game-changer for restoring shine, especially for those complex pieces.
This whole process relies on a simple electrochemical reaction you can set up right on your counter. You're basically creating a tiny battery that encourages the tarnish (which is just silver sulfide) to jump from your silver onto a piece of aluminum foil. It feels more like a fun science experiment than a chore.
Setting Up Your Silver Bath
You’ll be surprised at how few things you need to pull this off. It’s all common household stuff.
Here’s your supply list:
A bowl or dish big enough to fully submerge your silver (glass or ceramic is ideal).
A sheet of aluminum foil.
Baking soda (plan on one to two tablespoons per liter of water).
Boiling water.
Non-metal tongs for fishing out your silver.
First, line your dish with the aluminum foil, making sure the shiny side is up. Now, place your tarnished silver pieces right on top of the foil. It's crucial that each item is touching the foil, as this contact is what makes the magic happen. Sprinkle the baking soda over the silver.
The Science in Action
Here comes the fun part. Carefully pour the boiling water into the dish, making sure the silver is completely covered. You’ll probably see some bubbling and might even smell something like rotten eggs—don't worry! That's just the sulfur leaving your silver, which means it's working.
Let everything soak for about 5 to 10 minutes. The exact time depends on how bad the tarnish is. You can literally watch the tarnish disappear from your silver and reappear as dark smudges on the foil. It's incredibly satisfying.
This is a classic reduction reaction. For those who love the science behind it, the warm, alkaline solution (from the baking soda and hot water) turns the aluminum foil into a sacrificial anode. The aluminum oxidizes, releasing electrons that convert the black silver sulfide back into pure, gleaming silver. The Canadian Conservation Institute offers a great deep dive into the chemistry if you're curious.
This visual guide from She Knows is a great cheat sheet for this method and others.
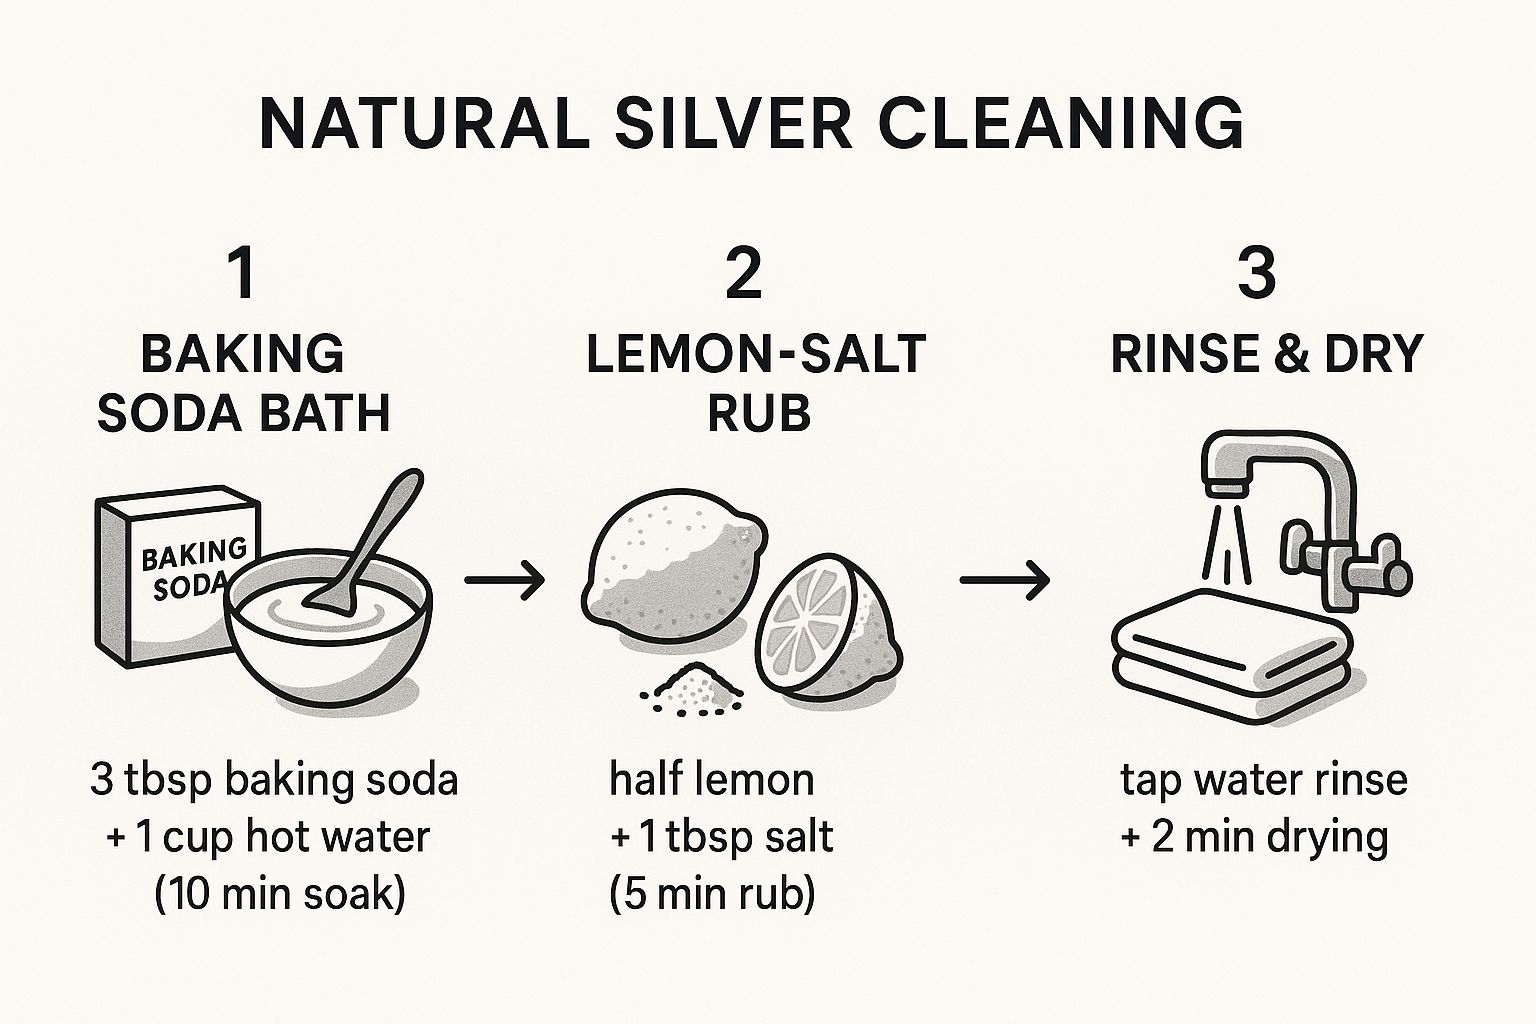
As the infographic shows, a few simple ingredients and a little bit of time are all it takes to get fantastic results.
A Quick Word of Caution: This method is brilliant for solid sterling silver. However, I’d strongly advise against using it on pieces with porous gemstones like turquoise, pearls, or opals, as the hot water and chemical reaction can easily cause damage. Also, keep in mind that if you have an antique with a deliberate dark patina (that "aged" look in the crevices), this bath will strip it away completely.
Once your silver looks bright and shiny again, use your tongs to carefully lift it out of the hot water. Give each piece a good rinse under cool running water, then immediately dry it thoroughly with a soft, lint-free cloth. This final buff is key to preventing water spots and getting that perfect, dazzling shine.
Comparing Natural Silver Polishing Methods
Not sure which of the natural methods is right for your specific piece of silver? This quick table breaks down the two main techniques to help you decide.
Feature | Gentle Rub Method (Baking Soda Paste) | Chemical Bath Method (Aluminum Foil) |
|---|---|---|
Best For | Light to moderate tarnish, smooth surfaces, targeted cleaning. | Heavy tarnish, intricate designs, large batches. |
Effort Level | Low to medium; requires gentle manual rubbing. | Very low; a "set it and forget it" soak. |
Time | 2-5 minutes per piece. | 5-10 minutes for the entire batch. |
Control | High degree of control over specific areas. | All-over, uniform cleaning; less targeted. |
Cautions | Be gentle to avoid fine scratches on plated items. | Avoid with porous gems or intentional patinas. |
Both methods are fantastic, but as you can see, they serve slightly different purposes. The paste gives you hands-on control for specific spots, while the bath is the ultimate solution for hands-off, deep cleaning.
Keeping That Shine: How to Prevent Future Tarnish

Getting that brilliant shine back is incredibly satisfying, but the job isn't quite over. Learning how to polish silver is one thing; making that luster last is the real goal. What you do right after polishing is critical for keeping tarnish at bay.
The Crucial Rinse and Dry
First things first, you have to get every last bit of that cleaning paste off your silver. Rinse each piece thoroughly under warm running water to wash away any remaining baking soda, toothpaste, or other cleaning agents. If you leave any residue behind, it can ironically speed up the tarnishing process all over again.
Once rinsed, grab a soft, lint-free cloth—microfiber is perfect for this—and dry each piece completely. Whatever you do, don't let your silver air dry. Tap water contains minerals that leave behind unsightly spots, and those spots can give new tarnish a foothold. A final, gentle buff with the dry cloth is what really brings out that spectacular, mirror-like finish.
Smart Storage for Lasting Brilliance
The way you store your silver makes a huge difference in how fast it retarnishes. The main enemy here is the air itself, specifically the sulfur compounds that are always present. Your mission is to limit your silver's exposure to open air as much as possible.
The absolute best way to do this is by using anti-tarnish bags or cloths. These are specially treated to absorb those damaging sulfur gases before they ever reach your silver. For a full set of cutlery, a classic felt-lined chest is still one of the most effective solutions.
Don't have special bags? No problem. You can easily create your own anti-tarnish environment with a couple of household staples.
Chalk: Just toss a few pieces of regular white chalk into your silverware drawer or jewelry box. Chalk is surprisingly porous and does a fantastic job of absorbing both moisture and sulfur from the air.
Silica Gel Packets: You know those little packets that come in new shoe boxes or purses? Start saving them! They are desiccants designed to suck up humidity, which is a major catalyst for tarnishing.
Proper storage isn't just about preventing tarnish—it's about preservation. By controlling the environment, you reduce the need for frequent, aggressive polishing, which helps maintain the integrity and value of your cherished pieces over time.
If you're looking for more in-depth strategies for your smaller items, you can find a wealth of expert tips on how to prevent jewelry from tarnishing.
Know the Environmental Culprits
Finally, it pays to be aware of the everyday things that can sabotage your hard work. Certain common materials release sulfur compounds and should be kept far away from your silver.
The biggest offenders in most homes include:
Rubber (like rubber bands)
Wool and some types of felt
Certain adhesives and paints
Foods like eggs, onions, and mayonnaise
Simply keeping your silver away from these items is a powerful preventative step. When you combine a careful post-polish routine with smart storage and a little environmental awareness, you'll keep your silver gleaming for months, not just days.
Common Silver Polishing Mistakes to Avoid
It feels great to bring a tarnished piece of silver back to life with a simple, natural polish. But one wrong move can cause damage that’s impossible to undo. Even with the best intentions, it's surprisingly easy to scratch, strip, or permanently dull your favorite pieces.
The key to keeping your silver beautiful for the long haul is knowing what not to do.
One Size Does Not Fit All
One of the most common blunders I see is people treating all their silver exactly the same. A solid sterling silver fork is tough and can handle a pretty vigorous cleaning. A delicate, silver-plated serving dish? Not so much.
Grabbing an abrasive cleaner like steel wool or a scouring pad to scrub a plated item is a recipe for disaster. You'll literally strip the thin silver layer right off, exposing the base metal underneath. Once that happens, the piece is effectively ruined.
Handling Delicate and Embellished Silver
Water and heat can also be your enemy, especially if you're trying the chemical bath method. While dunking a solid silver spoon is perfectly fine, it can be catastrophic for pieces with certain decorations.
Never, ever submerge items that have soft or porous gemstones.
Here are a few that are particularly vulnerable:
Turquoise: This stone is like a sponge and will soak up chemicals, causing it to discolor.
Pearls: The delicate surface (the nacre) is easily damaged by hot water and harsh ingredients.
Opals: These stones actually contain water, and a sudden temperature change can cause them to crack.
Amber: This isn't a stone at all, but a soft organic resin that chemicals and heat can easily ruin.
My rule of thumb is simple: if the piece has glued-on parts, a carefully preserved antique patina, or any of those soft, porous stones, just don't submerge it. Stick with a gentle paste method where you can carefully target the silver and avoid the delicate areas. It gives you total control.
Step Away From the Dishwasher
I know it’s tempting. You see a pile of tarnished silverware and think, "Why not just run it through the dishwasher?" Please don't. This is honestly one of the worst things you can do to your silver.
The combination of intense heat and harsh dishwasher detergents (which are often full of phosphates) is incredibly corrosive. Not only will the dishwasher fail to remove the tarnish, but it will likely cause pitting and leave your silver with a dull, cloudy film that’s a nightmare to fix.
These same principles apply to smaller items, too. For your favorite rings and necklaces, you can find more specific advice in our guide with tips to clean silver jewelry at home.
By steering clear of these common mistakes, you can be confident that your polishing efforts will leave you with a brilliant shine, not a costly regret.
Common Questions on Polishing Silver the Natural Way
When you start looking into polishing silver without harsh chemicals, a few questions always come up. It's smart to be cautious, especially when you're dealing with heirloom pieces or your favorite jewelry. Let's tackle some of the most common concerns so you can get that brilliant shine with confidence.
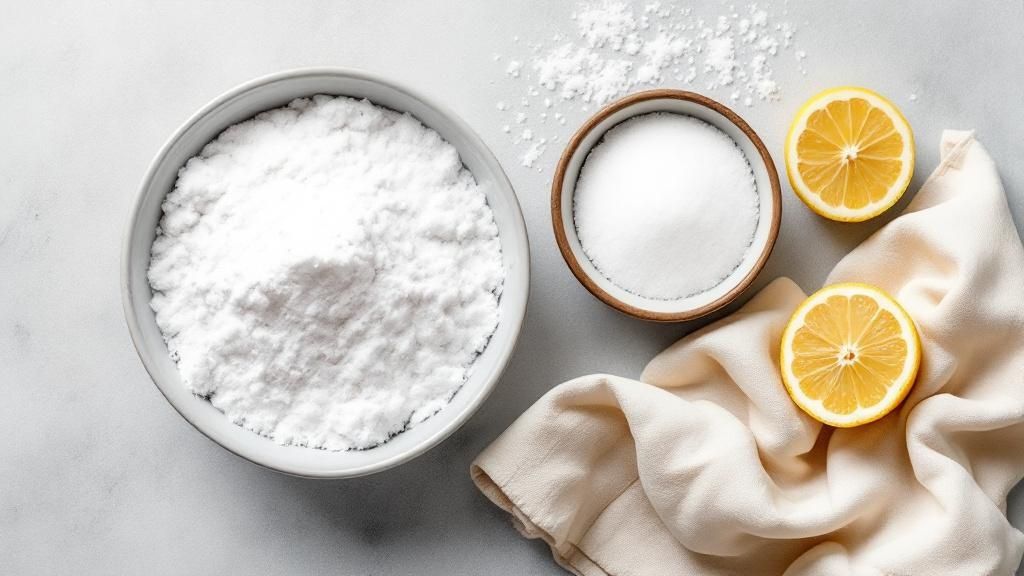
Lots of people wonder about using kitchen staples like lemon juice or vinegar. While they’re fantastic for a ton of other cleaning jobs around the house, they are a huge no-no for silver. The acid is just too aggressive and can actually etch the surface of the metal on a microscopic level. Over time, this can leave your silver looking dull or even pitted. It's much better to stick with the gentler, alkaline-based methods like the ones using baking soda.
So, how often do you really need to break out the polish? Honestly, there isn't a hard and fast rule. It really comes down to the environment your silver lives in.
Things you use daily: Cutlery or a favorite bracelet might need a quick buff every couple of months.
Pieces stored away: If you keep your silver in anti-tarnish bags or a proper chest, you might only need to polish it once or twice a year.
The real trick is to catch tarnish early. It's far kinder to your silver to give it a gentle cleaning when you first notice that faint yellowish hue, rather than waiting until it turns black and requires a much more intensive scrubbing session.
Is the Aluminum Foil Trick Always a Good Idea?
That aluminum foil and baking soda bath can feel like a magic trick, but it isn't the right solution for every single piece. It works brilliantly and is perfectly safe for solid sterling silver and most modern silver-plated items. That said, there are a few important times when you should absolutely skip it.
Never use this method on antique pieces that have a deliberate patina. You know that beautiful, dark oxidation in the recessed areas that gives a piece character and depth? This chemical bath is so effective it will strip that patina away completely, which can seriously devalue an antique, both aesthetically and financially.
The biggest red flag is for silver set with certain gemstones. Never, ever submerge pieces with soft, porous stones like pearls, turquoise, opals, or amber. The hot water and the chemical reaction can cause permanent damage, from clouding and discoloration to outright cracking.
"Why Does My Silver Tarnish So Quickly?"
It’s incredibly frustrating to spend time polishing your silver to a mirror shine, only to see it start to dull again in a few weeks. If this sounds familiar, the problem is almost certainly the air around it. Fast-developing tarnish is a direct result of exposure to airborne sulfur compounds, often combined with high humidity.
In a typical home, culprits include cooking fumes (especially from foods like onions and eggs), nearby industrial pollution, or even contact with everyday items like wool sweaters or rubber bands. The best defense is good storage. Keep your silver in a dry, enclosed space—a felt-lined drawer or a sealed bag works great. For extra protection, toss in a piece of chalk or a silica gel packet. They are fantastic at absorbing both moisture and sulfur gases right out of the air, which will slow down the tarnishing process to a crawl.
At Panther De Luxe Shop, we believe in preserving the beauty of your most treasured pieces. Explore our curated collections and discover timeless jewelry designed to shine for years to come. Visit us at https://www.pantherdeluxe.com.