
How to Fix a Bracelet Clasp: Easy DIY Repair Tips
- Luke Zucco
- Jul 24, 2025
- 14 min read

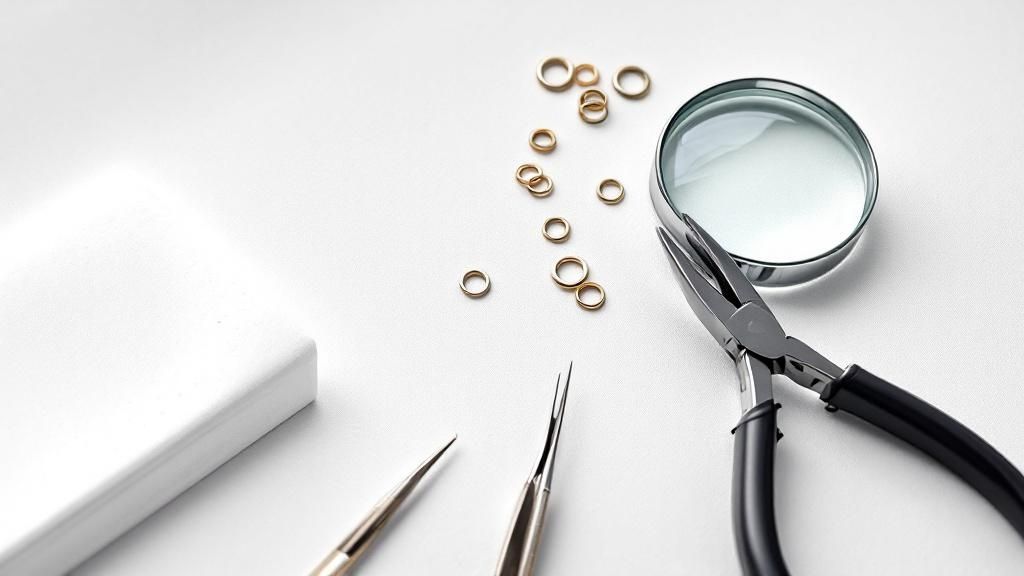
Before you can breathe new life into a broken bracelet, you need to gather a few essential tools. Trust me, trying to force a delicate piece of metal back into shape with your fingers or a pair of clunky garage pliers is a fast track to a much bigger problem. A simple fix can quickly become a permanent break.
Having the right gear on hand from the start makes the whole process smoother and, frankly, less frustrating.
Your Go-To Bracelet Repair Kit
Jumping into a repair without the right setup is like trying to paint a masterpiece with a toothbrush. You might get some color on the canvas, but the result won't be what you envisioned. A few specific items will give you the confidence to tackle most common clasp issues with the precision of a pro.
Your workspace is just as critical as your tools. Find a spot with great lighting—a desk by a window or a table with a bright lamp works perfectly. Lay down a soft cloth or a beading mat. This little trick does two things: it protects your table and, more importantly, it stops those tiny, round components from gleefully rolling away into oblivion. You can't fix what you can't see, and jewelry parts are famously small.
The Tools of the Trade
For nearly any clasp repair you'll encounter, a couple of specific pliers are non-negotiable. These are specialized tools, much more delicate than what you'd find in a standard hardware kit.
Needle-Nose Pliers: Think of these as your primary workhorses. Their super-fine tips are designed for gripping and carefully manipulating small jump rings, loops, and clasp parts. You absolutely need one pair, but having two makes opening and closing jump rings a breeze and is much safer for the metal.
Nylon-Jaw Pliers: This is your secret weapon for preventing ugly scratches. The soft nylon jaws let you get a firm grip on a finished piece without marring or denting the surface. They’re perfect for straightening bent components or just holding the bracelet steady while you work on the clasp with your other pliers.
An Old Jeweler's Trick: When you need to open a jump ring, never pull the ends straight apart. That's how you lose its perfect circular shape and weaken the metal. Instead, grip each side of the split with a pair of pliers and twist—one hand moving forward, the other back. This preserves the ring's integrity, making it easy to twist back into a secure, closed position.
Your Clasp Repair Toolkit Breakdown
Here's a quick look at the tools you'll need for basic fixes versus more advanced repairs.
Tool | What It Does | When You'll Need It |
|---|---|---|
Needle-Nose Pliers (x2) | Gripping and manipulating tiny parts, opening/closing jump rings. | Essential for almost all clasp repairs. |
Nylon-Jaw Pliers | Gripping finished jewelry without scratching or marring the surface. | Highly Recommended for protecting your piece's finish. |
Magnifying Glass/Visor | Enlarges your view for precision work on tiny components. | Game-Changer for spring rings, lobster claws, and tiny screws. |
Soft Beading Mat | Provides a non-slip, protective surface and catches small parts. | Essential for setting up a proper workspace. |
Small Dish/Container | Securely holds tiny screws, springs, or jump rings. | Highly Recommended to avoid losing critical parts. |
Jeweler's Screwdriver Set | For tiny screws found in some watch or box clasps. | Advanced Repairs involving screw-in components. |
Having these basics on hand means you're ready for whatever comes your way.
Setting Yourself Up for Success
With your pliers ready, a few more items will round out your kit and make the repair feel less like a chore. Magnification can be a lifesaver, helping you spot hairline cracks or tiny misalignments your naked eye would easily miss. Even a simple magnifying glass or a good pair of reading glasses can make a huge difference.
It’s also a great idea to give the bracelet a quick, gentle cleaning before you start. Grime and skin oils can make the parts slippery and hard to grip. A clean piece is simply easier to work on. If you need some pointers, you can learn more about [how to clean jewelry at home](https://www.pantherdeluxe.com/post/how-to-clean-jewelry-at-home-easy-diy-tips) with our straightforward guide.
Finally, grab a small dish or a magnetic parts tray. This is where you’ll put any tiny screws, springs, or jump rings as you take them off. It’s a simple habit that will save you from the dreaded hands-and-knees search for a microscopic part that has vanished into your carpet forever.
What Kind of Clasp Are You Fixing?
Before you can fix anything, you have to play detective. The very first step is figuring out exactly what kind of clasp is on your bracelet. Every clasp is built differently, which means each one has its own unique quirks and common points of failure.
Get this part right, and you’re already halfway to a successful repair. Misidentify the clasp, and you might waste time trying a fix that was never going to work in the first place. Think of this as your field guide to the tiny mechanisms that keep your favorite jewelry secure.
Lobster and Spring Ring Clasps
Chances are, you've seen these a thousand times. Lobster and spring ring clasps are the workhorses of the jewelry world, found on countless bracelets and necklaces because they're generally reliable and don't get in the way.
The lobster clasp looks just like its namesake's claw. A tiny, spring-loaded lever opens the "claw" so you can hook it onto a ring. Simple and effective. Its Achilles' heel is that internal spring. After years of opening and closing, it can get tired, making the lever feel loose. When that happens, the clasp might not snap shut completely, putting your bracelet at risk.
A spring ring clasp works in a similar way. It’s a hollow circle with a tiny pin that retracts when you pull back on a little lever. The weakness here is, again, the spring. It can break, or sometimes gunk and grime can jam the mechanism, leaving it stuck open or making it a pain to use.
Toggle and Box Clasps
You'll often find these types of clasps on bracelets that are a bit more substantial or have a more decorative flair. They're a statement in themselves.
A toggle clasp is a two-part system: a "T-shaped" bar and a matching open ring. You just slide the bar through the ring sideways, and the tension of the bracelet holds it in place. It's elegant. The most common problem isn't a mechanical one, but a structural one—the small jump ring connecting the bar or circle to the chain can get stretched out and open up.
The box clasp, on the other hand, is all about security and a clean look. One side is a small box, and the other is a folded "tongue" of metal that slides into it and clicks shut. Its main vulnerability is that very tongue. Over time, it can get bent out of shape, losing its tension and that satisfying "click" that tells you it's secure.
A healthy box clasp gives you both an audible and a tactile "click" when it closes. If you can't hear or feel that anymore, the tongue has probably lost its tension. It's a clear warning sign that it needs adjusting before it fails completely.
Magnetic Clasps
These have become incredibly popular, especially for people who find tiny levers frustrating. Magnetic clasps are the definition of easy—two halves with powerful little magnets just snap together.
But that convenience comes with its own set of potential issues. The adhesive used to secure the magnet inside its casing can sometimes fail, letting the magnet pop right out. Another problem is that the magnet itself can weaken over time, especially if it's exposed to high heat or gets banged around a lot. Eventually, the connection just isn't strong enough to be trusted.
Fixing The Most Common Culprits: Lobster and Spring Ring Clasps
Alright, let's roll up our sleeves and get to the heart of the matter. We're going to tackle the two clasps you'll encounter most often: the trusty lobster clasp and its close relative, the spring ring. If you can master these two, you'll be able to handle the vast majority of bracelet repairs that come your way. Forget theory; this is about dealing with the real-world frustrations of a clasp that's given up the ghost.
This is where a good pair of needle-nose pliers becomes indispensable. Both of these clasps work with a simple spring mechanism, which, ironically, is also their most frequent point of failure. Whether the little lever feels sticky, the gate isn't closing all the way, or the whole thing just feels weak, the solution is often much simpler than you'd expect.
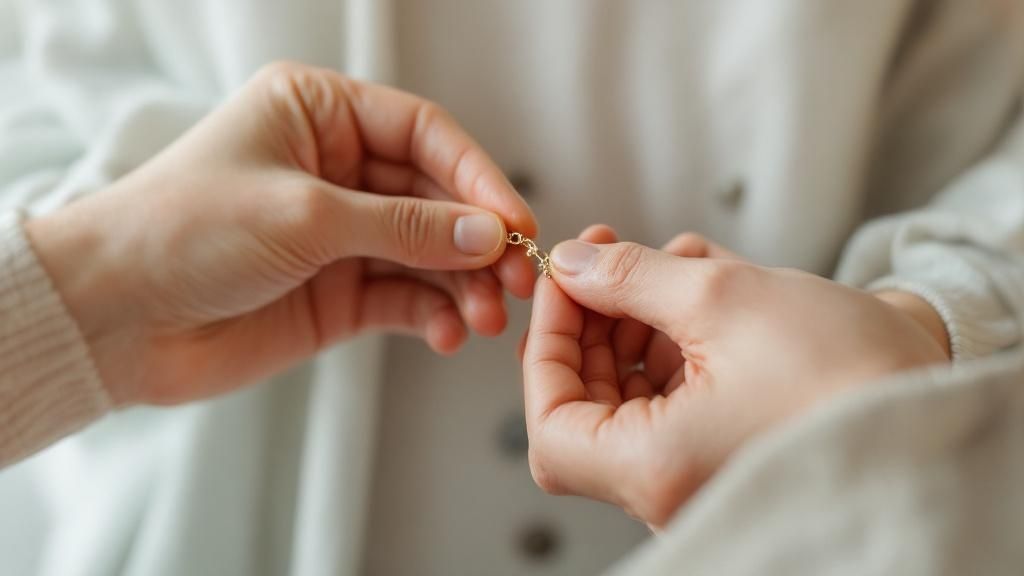
Take a look at how delicate this work can be. You need a steady hand.
As you can see, precision is everything. Using the right tools with a gentle touch is the only way to avoid making the problem worse.
What to Do About a Lazy Spring or Stuck Lever
First, you have to play detective. What's the clasp actually doing wrong? If the lever is gummy or sluggish, the culprit is almost always gunk. Think lotion, soap residue, or natural skin oils that have built up over time. Often, a quick bath in warm, soapy water and a gentle scrub with an old toothbrush is all it needs to spring back to life.
But what if cleaning doesn't do the trick? If the "snap" is gone from your lobster clasp's lever, or if a spring ring's gate is hanging open, the internal spring has likely worn out. In my experience, trying to fix the spring itself is a fool's errand. The clasp is a sealed unit, and getting inside without specialized equipment usually destroys it. At this point, replacement is the way to go.
My Two Cents: Whatever you do, don't try to force a stuck lever. You're far more likely to snap the lever clean off or wreck the internal spring for good. If it's still stuck after a gentle cleaning, take that as a sign of a deeper, internal problem.
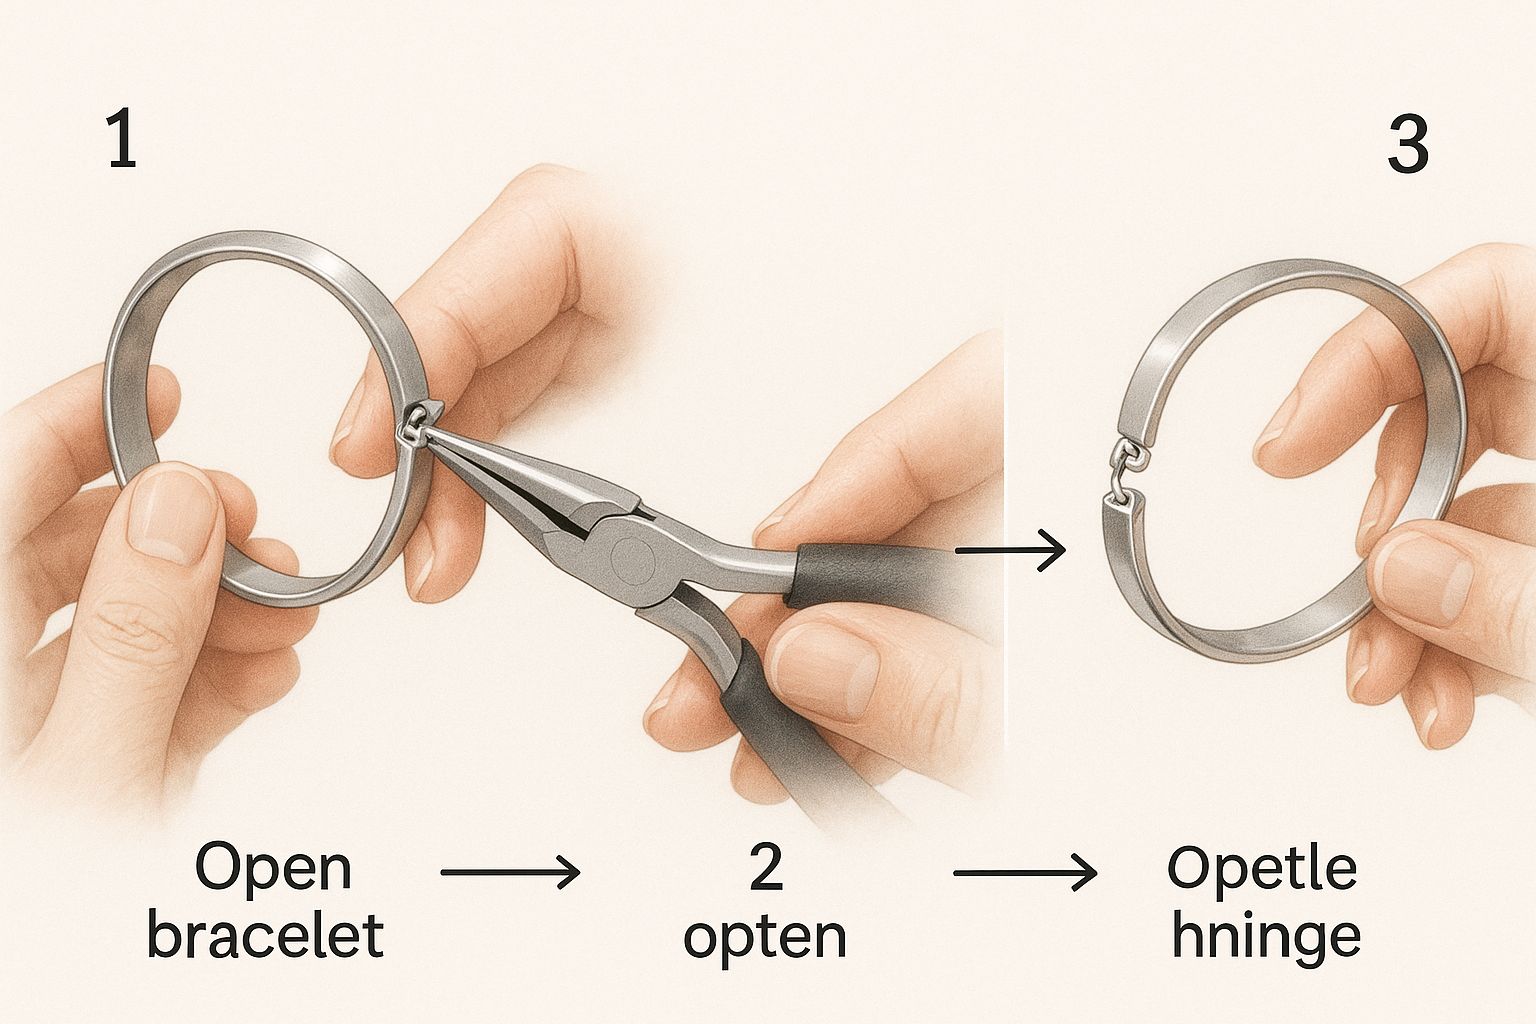
The Right Way to Open a Jump Ring
Nine times out of ten, a clasp repair involves a jump ring—that little metal circle that connects the clasp to the bracelet. How you handle this tiny piece is the difference between a lasting repair and one that will fail again in a week. So many people get this wrong.
Here’s the only way to do it:
Don't pull it apart! Never, ever pull the ends of the ring straight away from each other into a "C" shape. Doing this ruins the metal's temper and shape, creating a weak spot that will never close securely again.
Use the twist. Get a firm grip on either side of the split with two pairs of needle-nose pliers. Now, gently twist your wrists in opposite directions—one hand pushing forward, the other pulling back. This opens the ring sideways without distorting its perfect circle.
Reverse to close. Once you've slipped the new clasp on, just reverse the motion. Twist the ends back together until they are perfectly flush. You should feel a tiny, satisfying little "click" as they align.
This simple twisting technique maintains the ring's integrity and tension, giving you a secure, professional-grade connection. If you're getting serious about this stuff, you might want to check out our complete guide on how to repair jewelry at home.
Knowing When to Call It and Replace the Clasp
Sometimes, a clasp is just done for. A simple fix isn't on the table if the metal itself has a crack, a piece has physically broken off, or the spring is completely dead. In these cases, replacement isn't just the best option; it's the only safe one.
You're not alone in this; bracelets are the second-largest category for repairs in the entire jewelry market, right after rings. A huge chunk of those repairs are for faulty clasps, which makes sense given how much wear and tear they endure. The good news is that people are choosing to fix their beloved pieces instead of tossing them, which is driving growth in the jewelry repair industry.
Replacing a clasp is no big deal once you know the jump ring trick. Just find a new clasp that's a similar size and style. Then, twist open the jump ring, take off the old, broken clasp, slide on the new one, and twist that ring shut. You're done.
Tackling Toggle, Box, and Magnetic Clasps
Once you get past the standard spring rings and lobster claws, you’ll find clasps that are as much a part of the bracelet's design as the beads or links. Toggle, box, and magnetic clasps look fantastic, but they come with their own unique set of quirks. Don't worry, though—fixing them is usually simpler than you think once you know what you’re looking at.
The real secret to fixing these more complex clasps is to figure out exactly what’s wrong before reaching for your tools. Is the clasp loose because of a tension problem, or did a piece of it break? Is an adhesive failing? Knowing the root cause makes the difference between a quick fix and a trip to the jeweler.
Restoring a Loose Toggle Clasp
The beauty of a toggle clasp is its simplicity: a bar slides through a ring and gravity holds it in place. Ironically, the most common issue isn't with the bar or the ring itself. It’s almost always the jump ring that connects one of those pieces to the bracelet chain. A little bit of wear and tear can pull that tiny ring open, creating a gap for the chain to escape.
Fixing this is a familiar task if you've worked with jump rings before.
Grab each side of the jump ring's opening with a different pair of needle-nose pliers.
Gently twist your hands in opposite directions—one toward you, one away—to open the gap just enough to slide the chain or toggle piece back on.
Carefully twist it back into place, making sure the two ends are perfectly aligned and touching.
If the toggle bar has fallen off completely, it's the same exact process. Your goal is a tight, seamless connection that can handle the stress of being worn every day.
Adjusting a Box Clasp for a Secure Click
You know a box clasp is working when you hear that satisfying "click" as it closes. If that click is gone, it means the little metal tongue inside has lost its tension and isn't locking securely anymore. This happens all the time from the metal fatiguing after being opened and closed hundreds of times.
The repair here requires a very light touch. Open the clasp and place it on a flat surface. Take your needle-nose pliers and gently apply a tiny bit of upward pressure to the tip of the tongue. Go slow—too much force, and it could snap right off.
Pro Tip: Make one small bend, then close the clasp to test it. Keep repeating this with tiny, gradual adjustments until you get that crisp "click" back. It's much safer to make five tiny bends than one big one that breaks the piece.
Dealing with Faulty Magnetic Clasps
Everyone loves magnetic clasps for how easy they are to use, but that convenience can fail in two ways. Either the magnet itself comes unglued, or its magnetic force weakens over time.
If the magnet has just popped out of its metal housing, you’ve got an easy fix. A small dot of strong, two-part epoxy is all you need to glue it back in securely.
However, if the magnetic pull feels weak, the clasp can't be trusted. This can be caused by exposure to extreme heat or a hard drop. Unfortunately, a weak magnet can't be "recharged," so your only safe bet is to replace it. The good news is that most are attached with simple jump rings, making it a quick swap.
Knowing When to Call a Professional Jeweler
While tackling a simple clasp repair on your own can be incredibly satisfying, knowing your limits is just as important. Some situations are simply best left to a professional jeweler. The real goal is to prevent a small, fixable issue from snowballing into a costly or even irreversible disaster.
Recognizing the warning signs is everything. Pushing your DIY skills too far, especially with a valuable or sentimental piece, can lead to permanent damage. A professional has specialized tools and years of hands-on experience to handle delicate work that you just can't replicate at home.
Red Flags That Signal You Need an Expert
Certain problems go far beyond what a pair of pliers and a steady hand can solve. If you run into any of these issues, it's time to put the tools down and find an expert. The risk of doing more harm than good is just too high.
Cracked or Broken Metal: If the metal of the clasp itself or the link connecting it is actually fractured, it’s going to need soldering. This is a highly precise skill involving torches and high heat, which can easily damage nearby stones or warp the metal if you don't know what you're doing.
Repairs Near Gemstones: Trying to fix a clasp that's set right next to a precious gem is a recipe for anxiety. One slip of the pliers could chip a stone, and any heat from soldering could cause it to crack or change color permanently.
Priceless Family Heirlooms: When a piece carries immense sentimental value, don't take the chance. A professional repair ensures the structural integrity of your treasured heirloom, and that peace of mind is a priceless investment.
Specialized or Antique Clasps: If the clasp is unusual, antique, or has a complex internal mechanism, a jeweler will have the expertise to disassemble it safely and source the correct—and often rare—replacement parts.
My Two Cents: The moment a repair involves heat (soldering), poses a risk to gemstones, or concerns a piece with irreplaceable sentimental value, stop. A professional's fee is a small price to pay to protect your jewelry's long-term value and integrity.
The jewelry repair market is surprisingly large, which tells you just how many people value maintaining their pieces. In fact, this market was valued at around USD 7 billion in 2022 and is projected to grow significantly. This growth really highlights a shift in consumer awareness toward proper jewelry care and away from a throwaway culture. You can read more about this trend and its impact on the industry over at Verified Market Reports.
A great jeweler doesn't just fix the immediate problem; they restore the piece to its original strength and beauty. It’s similar to how getting a ring professionally sized ensures a flawless, comfortable fit. If you're curious about that kind of precision, check out our guide on [how to determine your ring size at home](https://www.pantherdeluxe.com/post/how-to-determine-ring-size-at-home-easily). This same level of attention to detail is what you're paying for when you trust a pro with your favorite bracelet.
Answering Your Bracelet Repair Questions
When you're in the middle of a delicate jewelry repair, questions are bound to come up. Getting the right answers can be the difference between a quick, successful fix and a trip to the jeweler. Let's walk through some of the most common things people wonder about when fixing a bracelet.
Can I Just Use Super Glue on My Clasp?
It's a tempting thought, isn't it? A quick dab of glue and you're done. But the short, direct answer is a hard no. Please, step away from the super glue.
Household adhesives are a disaster waiting to happen for jewelry. They create a brittle bond that can't handle the movement and stress of being worn, so it will inevitably snap again. Worse, the glue can permanently damage the metal's finish and seep into the clasp's tiny moving parts, seizing them up for good. A professional will have a much harder (and more expensive) time trying to fix it later.
How Can I Stop My Clasps from Breaking Again?
Honestly, the best repair is the one you never have to do. A little proactive care can save you a ton of frustration down the road. It all boils down to building a few simple habits.
Here’s what I recommend to my clients:
Do a Quick Monthly Inspection: Take a minute to look over the bracelets you wear most often. Is the clasp still clicking shut securely? Are the jump rings completely closed, with no gaps? Catching a small problem early is key.
Store Them Properly: Tossing bracelets into a jumbled jewelry drawer is a recipe for disaster. Tangled chains put a ton of stress on weak points like clasps. Keep them separate in a soft-lined box or individual pouches.
Be Mindful of When You Wear Them: Always take your bracelets off before you hop in the shower, go for a swim, or hit the gym. Harsh chemicals from pools and even soaps can slowly degrade the metal, making it more prone to breaking.
A great rule to live by: jewelry should be the last thing you put on and the first thing you take off. This simple habit protects it from lotions, perfumes, and the general wear and tear of your day.
Treating your jewelry with a bit of intention goes a long way. While knowing how to fix a bracelet clasp is a fantastic skill, not having to use it is even better.
At Panther De Luxe, we believe jewelry is meant to be worn, loved, and passed down. We craft our pieces with that lifetime of enjoyment in mind. Find your next heirloom in our stunning collections at https://www.pantherdeluxe.com.
Comments