
The Best Way to Untangle a Necklace Without Damage
- alex mark
- Jul 6, 2025
- 10 min read

The secret to untangling a necklace isn't brute force—it's using a lubricant like baby powder and a pair of fine-tipped tools, like sewing needles. This combination is surprisingly effective because it cuts down on the friction between delicate chains, letting you gently tease knots apart without breaking anything. Honestly, patience is your most valuable asset here. Yanking on the chain will only tighten the knot and lead to heartbreak.
Your Guide to Gently Untangling Knotted Necklaces
We've all been there. You reach for your favorite necklace, only to find it's become a frustrating, tangled bird's nest. Before you even think about pulling on those delicate chains and risking a broken link, take a deep breath. There are much better ways to handle this. The key is to work smart, not hard.
This guide will walk you through the most effective techniques I've learned over the years, starting with a simple approach that just requires a bit of patience and a couple of things you probably already have at home. It’s a total game-changer, even for those super-fine chains that seem to tie themselves in impossible knots.
Setting Yourself Up for Success
The right setup can make or break this entire operation. Find a flat, well-lit surface to work on. A jewelry mat, a soft cloth, or even a mousepad works perfectly to keep the necklace from sliding around.
First things first: if you can, unclasp the chain. This one small step immediately releases tension on the knot and stops it from cinching tighter while you work.
Getting your tools together ahead of time saves a lot of fumbling later. Jewelry care specialists at MyMotek Jewelry have found that adding a tiny bit of powder to the knot can make the job over 50% easier. It just helps the chains stop gripping each other so tightly, which is a lifesaver for thin, delicate pieces.
Pro Tip from Experience: If you don't have baby powder, a single drop of baby oil, mineral oil, or even olive oil will do the trick. The idea is to add just enough lubrication to help the metal links slip past one another.
Your Essential Detangling Toolkit
Gather these simple items before you begin. Having them ready makes the process smoother and safer for your jewelry.
Tool | Purpose |
|---|---|
Well-Lit Surface | Lets you see the tiny details of the knot without straining your eyes. |
Two Needles or Pins | Act like precise extensions of your fingers to gently wiggle links apart. |
Baby Powder or Oil | Reduces friction, helping the tangled chains glide free from each other. |
Soft Cloth | Perfect for cleaning any lubricant residue off the necklace when you're done. |
With these tools on hand, you're ready to tackle even the most stubborn tangles without causing any damage.
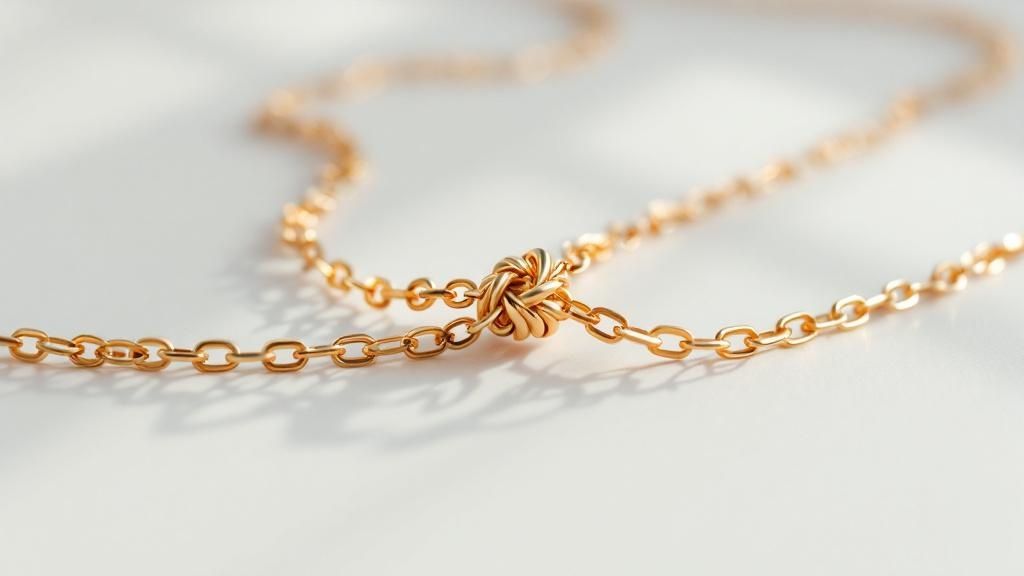
The Lubricant Method for Delicate Chains
When you're dealing with a frustrating knot, especially in a fine or delicate chain, friction is the real villain. This is precisely when a little bit of lubricant can feel like a magic trick. By making the metal links slick, you help them glide past each other instead of catching and gripping. It’s a go-to method for jewelers because it’s so effective yet gentle on the piece.
First things first, find a clean, well-lit spot to work. A white piece of paper on a flat table is perfect for contrast. Before you do anything else, unclasp the necklace. This is a crucial step that immediately releases tension on the knot, making your job much easier and preventing it from tightening further.
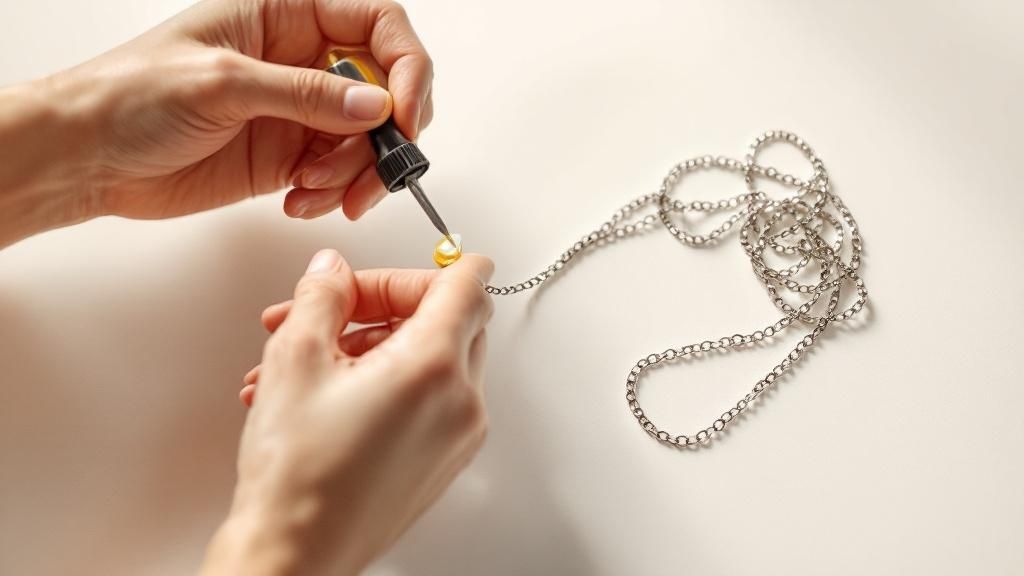
Applying the Lubricant
You don't need much. A tiny sprinkle of baby powder or literally a single drop of baby oil or olive oil is perfect. Apply your chosen lubricant directly onto the knot itself—don't douse the whole necklace. You want to target the specific area where the chains are tangled.
Using your fingertips, gently massage the lubricant into the knot. You're trying to help it work its way into all the tiny crevices. As you do this, you should feel the knot begin to loosen up almost instantly. This little bit of prep work makes a world of difference.
This visual guide shows the core steps for getting your necklace untangled without causing any damage.

As the graphic shows, success hinges on being methodical. It's about having the right setup, creating a stable workspace, and gently working the knot apart.
Using Tools for Precision Work
With the knot now lubricated and slightly loosened, it's time to bring in some tools for the fine-detail work. I find that two sewing needles or straight pins work best. A good pair of fine-tipped tweezers can also do the job. Think of them as extensions of your fingers, allowing you to get into spaces your own hands can't.
Carefully insert the tips of your pins or needles into the center of the knot. The idea here is to gently wiggle and tease the links apart. You’re not prying or pulling. Instead, work from the inside of the tangle outward, creating tiny gaps and slowly pulling individual loops free.
Patience is your most important tool here. If you rush and start pulling, you’ll only make the knot tighter. Even worse, you could snap a delicate link. Work slowly, and if you get frustrated, it's okay to step away for a few minutes. Let the lubricant do the hard work.
Once your necklace is completely knot-free, you'll want to clean off the residue. A quick, gentle wash with some mild soap and warm water will remove any lingering oil or powder. Your necklace will be back to its sparkling, tangle-free self and ready to be worn again.
Dealing with Seriously Stubborn Knots
So, you’ve tried the oil, you’ve been patient, but that knot is just not budging. We’ve all been there. When you’re facing a truly monstrous, tangled mess that seems practically welded together, it's time to bring out the big guns. These next-level techniques can often provide the breakthrough you need, saving your favorite necklace from a costly trip to the jeweler.
Sometimes, untangling a necklace is less about brute force and more about thinking differently. A little bit of cleverness can be the difference between a tangled-up piece and one that’s ready to wear again.
The Vibration Method
This might sound a bit strange, but trust me, it works. Gentle, consistent vibration can do wonders for a tight knot. You'll need something small that vibrates—the handle of an electric toothbrush or a small handheld massager is perfect for this.
First, lay your necklace on a hard, flat surface. Then, turn on your vibrating tool and press it firmly against the surface, right next to the knot. The key is not to touch the necklace directly. The vibrations will travel through the table and jiggle the chains, often loosening the links just enough to create an opening. It’s a fantastic hands-off approach that minimizes any risk of pulling or damaging the chain.
Expert Tip: Think of vibration as doing the initial tedious work for you. It subtly shifts the chains and creates those tiny gaps that are so hard to make with a pin alone, making the rest of the process much, much easier.
Using a Stronger Lubricant
When you suspect that built-up grime or friction is the real enemy, a more powerful lubricant might be what you need. Baby oil is a great starting point, but a glass cleaner like Windex can be surprisingly effective. Its formula is literally designed to cut through oily buildup, making it an incredibly slick lubricant.
Just apply a tiny amount directly to the knot with a cotton swab. You should never spray it right onto your jewelry. Let it soak in for a minute or two before you go back in with your pins to gently work the knot apart. You’ll be surprised at how smoothly the chains glide past each other.
Good For: Solid gold, platinum, sterling silver, and diamonds.
Avoid On: Anything porous like pearls, opals, or turquoise. Stay away from using it on costume jewelry or plated metals, too, as the chemicals can cause some serious, irreversible damage.
After you’ve successfully freed your necklace, make sure you give it a good wash with mild soap and warm water. You want to get all that chemical residue off to keep your piece safe and sparkling.
How to Keep Your Necklaces From Tangling
While knowing how to untangle a necklace knot is a handy skill, let's be honest—it's much better to avoid the mess in the first place. A little proactive care goes a long way and saves you from the headache of tedious, reactive repairs. You'll not only save time but also protect your delicate chains from the kind of stress that can lead to breaks.
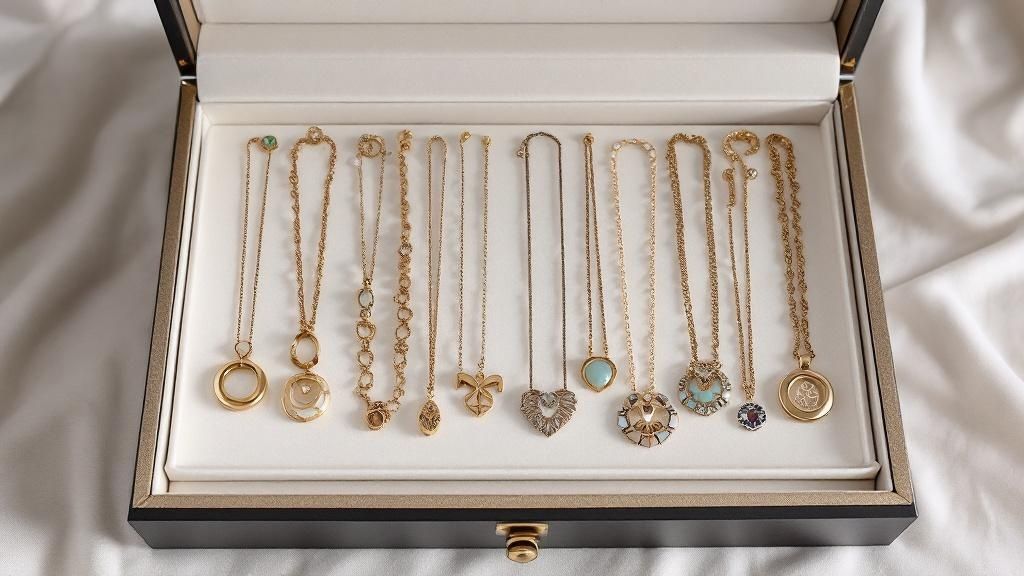
The biggest culprit behind tangled necklaces? Tossing them all together into a single dish or drawer. It’s a recipe for disaster. When multiple chains are piled up, they inevitably twist and knot. The golden rule for keeping your jewelry in great shape is simple: keep each piece separate.
Smart Storage Solutions at Home
For the jewelry you wear most often, a dedicated storage solution is a game-changer. I personally love using a hanging necklace organizer. It lets each chain drape naturally, using gravity to keep everything straight and visible. This is especially fantastic for those long, fine chains that seem to tangle just by looking at them.
Another great option, particularly if you have a larger collection, is a set of velvet-lined trays. The soft fabric does more than just prevent scratches; its texture provides a bit of friction, stopping necklaces from sliding into a jumbled heap. In fact, jewelry retailers report that up to 40% of customer complaints involve tangled necklaces. Switching to specialized storage like this can cut those incidents by as much as 70%.
Pro Tip: Before you put any necklace away, always fasten the clasp. This creates a closed loop, which makes it much harder for the chain to knot up on itself or with other pieces. It's a tiny step that makes a huge difference.
Travel Hacks for Tangle-Free Trips
Traveling is prime time for necklace tangles. The jostling of a suitcase can turn a beautiful chain into a bird's nest in seconds.
Here's a clever, low-cost trick I swear by: thread your necklace through a simple drinking straw and then fasten the clasp. The straw acts as a perfect, rigid sleeve, keeping the chain straight and protected. You can even cut the straw to fit shorter necklaces.
If you travel often, investing in a dedicated travel jewelry case is absolutely worth it. Look for ones with features designed for organization:
Small, individual pouches
Loops with snaps for securing chains
Padded compartments to keep everything snug and separate
Taking a few moments to pack your jewelry properly means you'll arrive at your destination with pieces that are ready to wear, not in need of rescue. For more great advice, be sure to check out our complete guide on jewelry care tips to keep all your favorite items looking their best.
When to Call a Professional Jeweler
While you can conquer most tangles with patience and a bit of lubricant, some knots are simply better left to the experts. Knowing when to wave the white flag is just as crucial as knowing how to start. Pushing your luck with a stubborn, complex tangle can quickly turn a frustrating situation into a costly repair.
Sometimes, the risk of doing more harm than good just isn't worth the satisfaction of a DIY win. A professional jeweler has the right tools and years of hands-on experience to tackle these delicate situations without causing any damage.
Red Flags That Signal It's Time for Help
If you're looking at an incredibly tight, dense knot, especially on a piece that's valuable or sentimental, that's your cue to step back. Trying to force it will almost certainly make the knot even tighter. Certain types of chains are also notoriously difficult once they're tangled up.
Pay special attention if you're dealing with these tricky styles:
Herringbone Chains: These beautiful, flat chains are incredibly prone to kinking. One wrong bend or twist, and the damage can be permanent.
Snake Chains: Much like herringbone styles, these can easily get dents or kinks that are impossible to smooth out at home.
Extremely Fine Chains: It doesn't take much to snap a very delicate chain. Even a little bit of pressure in the wrong spot can break it.
The most important takeaway is this: If you feel your efforts are only tightening the knot, or you sense any resistance that might kink or break the chain, stop immediately. A jeweler can often sort out the mess in minutes for a minimal fee, while a broken chain is a much bigger and more expensive problem.
Trying to force a tangle can also lead to scratched gemstones or damaged settings. At the end of the day, knowing when to get professional help is a huge part of being a responsible jewelry owner. This, combined with smart prevention, is the secret to great jewelry care. Learning **how to store your fine jewelry properly** is the best first step to avoid these headaches in the first place.
Your Top Questions About Untangling Necklaces, Answered
Even with the best tips in hand, you might still run into a few tricky situations or have specific questions about your jewelry. I get it. Here are some quick answers to the most common questions I hear about getting those pesky knots out.
Can I Use Olive Oil to Untangle My Necklace?
Technically, yes, but I really don't recommend it. While olive oil can work as a lubricant when you have nothing else, it's a bit too thick and sticky for this job.
The real problem comes later—it’s a real pain to clean off completely. Any residue left behind acts like a magnet for dirt and dust, which will quickly dull your necklace's sparkle. Your best bet is to stick with something lighter like baby oil or a lubricant specifically made for jewelry. The cleanup is a breeze.
How Do I Untangle a Giant Mess of Multiple Necklaces?
Ah, the dreaded multi-necklace knot. We’ve all been there. Tackling this beast requires patience and a smart strategy. Don't just dive in.
First things first, unclasp every single necklace. This immediately releases a surprising amount of tension. Then, grab your baby powder or a tiny drop of oil and work it into the entire knotted mass to get things moving.
Now for the most important part: find the end of just one necklace and focus only on freeing that one. Trying to fix everything at once is a recipe for disaster. Once you’ve liberated one chain, set it aside and pick your next target.
This one-at-a-time approach is crucial. It stops you from accidentally making one knot tighter while you're busy working on another—a classic mistake that can make the tangle even worse.
Will These Methods Harm My Gold or Silver Jewelry?
If you're gentle, the powder-and-pin technique is completely safe for solid metals like gold, sterling silver, and platinum. They can handle it.
However, you need to be extra careful with plated jewelry. That top layer of metal is thin, and too much rubbing with a pin can wear it away. Always use a delicate touch.
And don't forget the final step! Once your piece is finally free, it's time for a good cleaning to remove any leftover oil or powder. For a deeper dive into making your pieces shine, take a look at our guide on [how to clean gold jewelry](https://www.pantherdeluxe.com/post/how-to-clean-gold-jewelry-tips-for-a-stunning-shine).
At Panther De Luxe, we believe jewelry should bring you joy, not a headache. We design our necklaces and accessories to be loved and worn, tangle-free, for years. Find your next favorite piece today!
Comments