
How to Photograph Jewelry: Professional Shots That Sell
- seanmawhinney
- May 29, 2025
- 15 min read
Building Your Photography Kit Without Breaking the Bank
Creating stunning jewelry photography doesn't require a fortune on equipment. By understanding your tools and making smart upgrades, you can achieve professional results on a budget.
Starting Simple: Your Smartphone and Clever Lighting
Your smartphone can be a surprisingly powerful photography tool, especially with the right lighting. Natural light near a window works wonders. Position your jewelry next to the window, not directly in front, to soften shadows.
Enhance natural light with DIY diffusers and reflectors. A white sheet softens light, while mirrors or aluminum foil can reflect light onto the jewelry. These simple tools create a more even and appealing look.
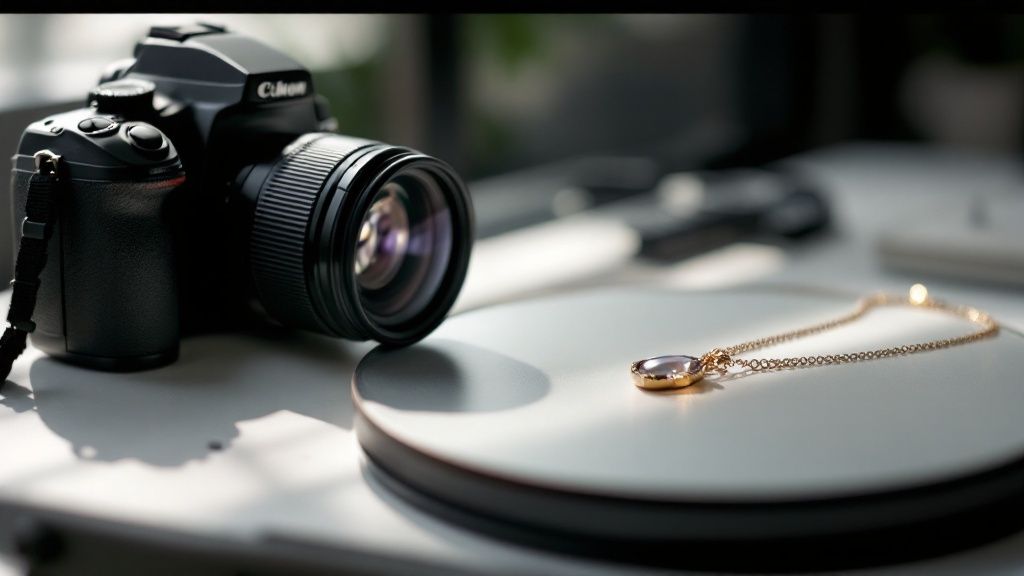
Leveling Up: DSLRs and Macro Lenses
While smartphones are great for starting, a DSLR camera offers greater creative control. You can customize aperture, shutter speed, and ISO for more precise images. The photography market, valued at $105.2 billion in 2023, makes professional equipment more accessible than ever. Find more statistics here.
A macro lens is crucial for DSLR jewelry photography. It captures intricate details and textures up close, showcasing the sparkle and craftsmanship of each piece. You'll see details a standard lens would miss.
Camera Settings for Jewelry Photography
The chart below visualizes the optimal camera settings for jewelry photography, balancing sharpness, depth of field, and light sensitivity.
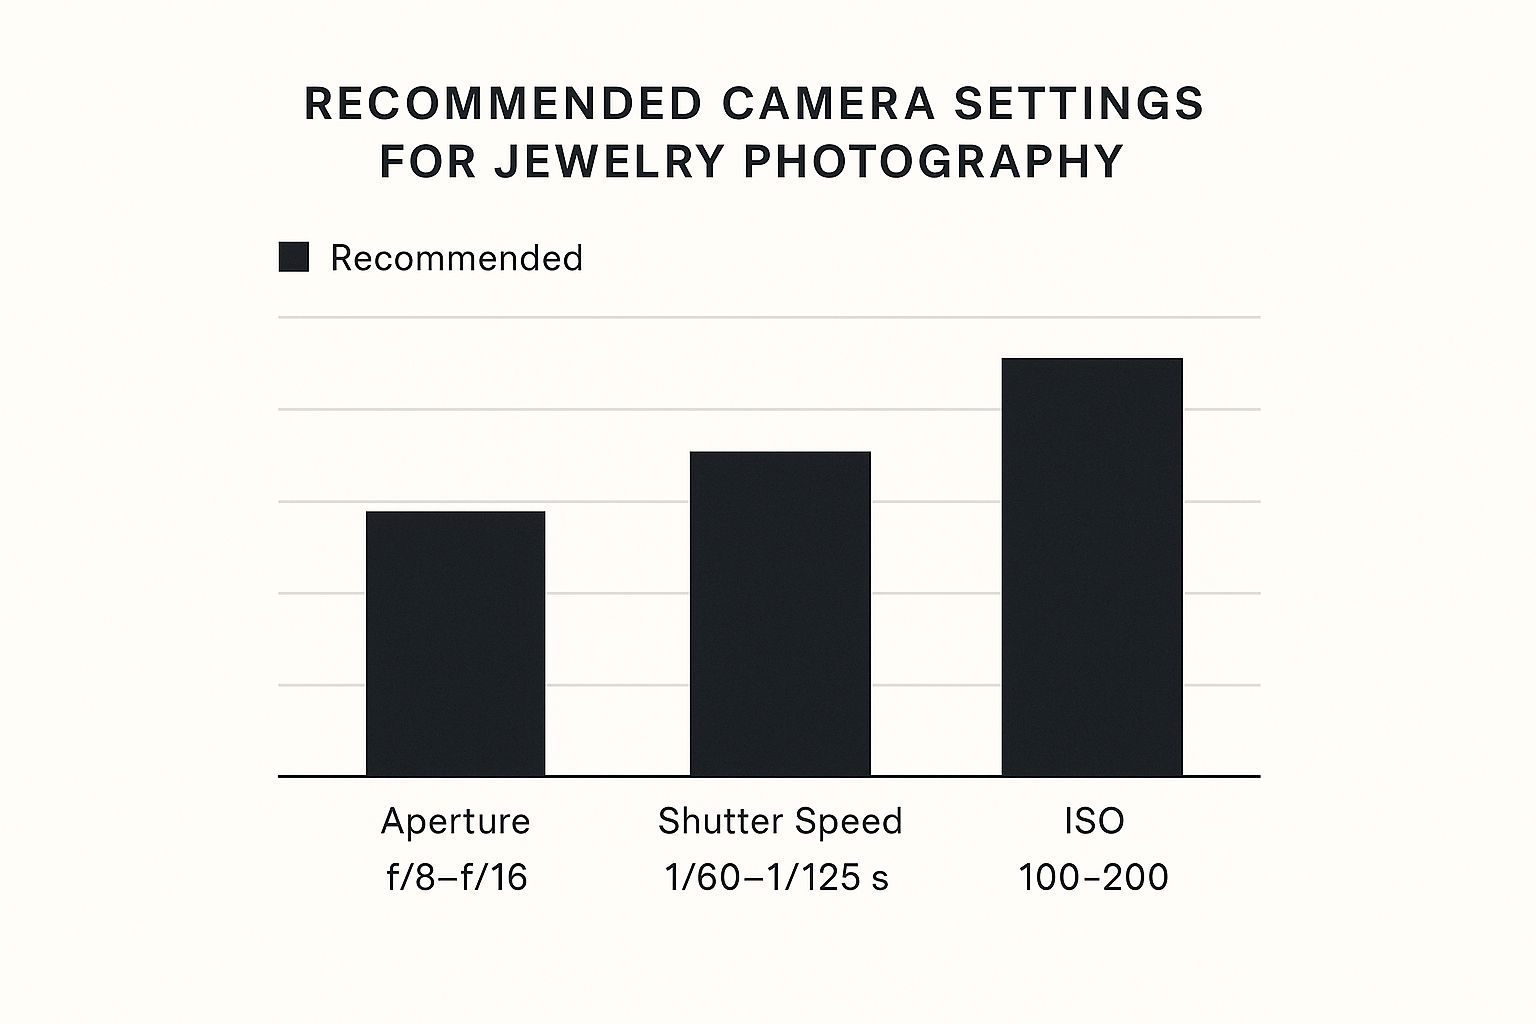
An aperture between f/8 and f/16 provides ample depth of field, while a shutter speed of 1/60 to 1/125th of a second avoids motion blur. A low ISO (100-200) minimizes noise and preserves image quality.
Stabilization and Backgrounds: The Finishing Touches
Stabilization is key for sharp jewelry photos, particularly with macro photography. A tripod is essential to prevent even the slightest movement that could blur details.
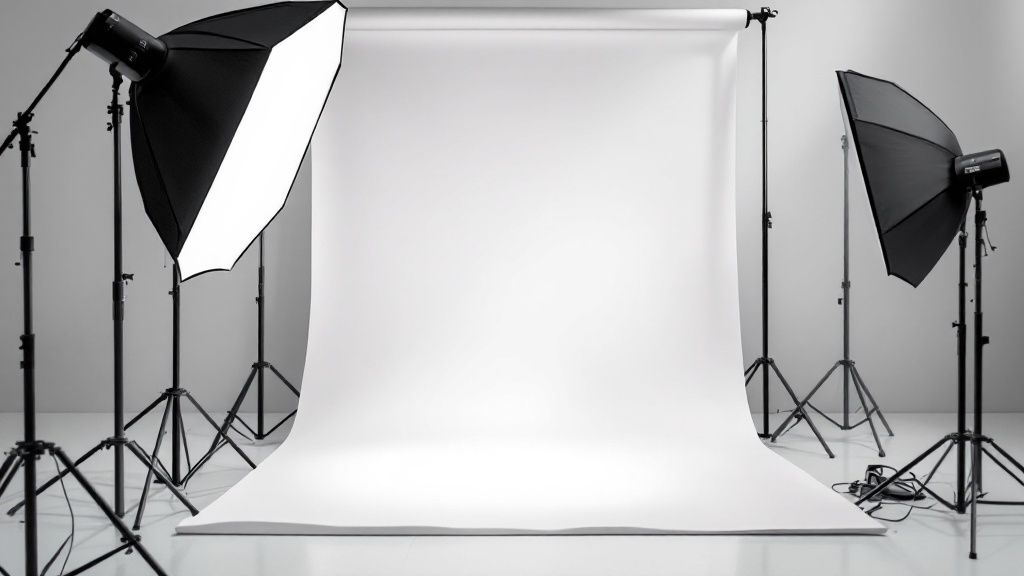
Finally, choose a clean background. White or neutral colors are best for showcasing the jewelry. A sweep creates a seamless backdrop, but a large sheet of white paper also works effectively.
To explore ethical jewelry options, check out: Top Ethical Jewelry Brands for 2025
To further assist you in choosing the right equipment, let's compare budget-friendly options with professional setups.
The table below, "Equipment Comparison: Budget vs Professional Setup", compares essential photography equipment at different price points, outlining the key differences to help you make informed decisions based on your needs and budget.
Equipment Type | Budget Option | Professional Option | Key Differences |
|---|---|---|---|
Camera | Smartphone with a good camera | DSLR Camera | DSLRs offer greater control over settings and interchangeable lenses, while smartphones offer convenience and portability. |
Lens | Smartphone lens | Macro lens | Macro lenses are specifically designed for close-up photography, providing significantly greater detail and magnification than standard smartphone lenses. |
Lighting | Natural light with DIY diffusers and reflectors | Studio lighting setup | Studio lighting allows for precise control over light direction and intensity, while natural light is cost-effective but less controllable. |
Stabilization | DIY stabilization solutions | Tripod | Tripods offer superior stability, minimizing blur, especially crucial for macro photography, compared to improvised solutions. |
Background | White paper or poster board | Sweep | Sweeps create a professional, seamless background, while DIY options are a cost-effective alternative. |
This comparison highlights the trade-offs between affordability and advanced features. While professional equipment delivers superior results, budget-friendly options can be very effective when used creatively. Choosing the right equipment depends on your specific photography goals and budget.
Mastering Light For Every Type Of Jewelry Piece
After assembling your photography kit, lighting is where your jewelry photography truly comes alive. Different materials react uniquely to light, and understanding these nuances is crucial for capturing stunning images. This is where you’ll learn how to transform ordinary jewelry shots into captivating displays of brilliance and artistry.
Illuminating Metals: Gold, Platinum, And Silver
Photographing reflective metals like gold and platinum presents a unique challenge: managing hot spots and preserving details in shadows. Imagine trying to photograph a mirror—you wouldn't shine a light directly at it. Similarly, direct, harsh light creates distracting bright spots on metallic jewelry, obscuring its texture and beauty. The key is diffusion.
Softboxes: These enclose your light source, diffusing it evenly and minimizing harsh reflections.
DIY Diffusers: A simple white sheet or even a piece of parchment paper placed in front of your light source can soften the light effectively.
Multiple Light Sources: Use two or more diffused lights positioned at different angles to fill in shadows and create a balanced, three-dimensional look.
This approach avoids overexposure and reveals the subtle details that define high-quality jewelry.
Capturing Sparkle: Diamonds And Gemstones
Diamonds and colored gemstones require a different approach. The goal is to capture their fire (the dispersion of light into spectral colors) and brilliance (the overall intensity of reflected light). Think of a prism splitting white light into a rainbow—this is the effect you want to showcase.
Pinpoint Lighting: A small, focused light source strategically placed can accentuate a gemstone’s brilliance.
Dark Backgrounds: A black or dark gray backdrop enhances the contrast and makes the sparkle pop. This isolates the jewelry and draws attention to its brilliance.
Reflector Cards: These bounce light back onto the gemstone, adding extra highlights and sparkle. Position them opposite your light source for optimal effect.
This careful manipulation of light brings out the inherent beauty of these precious materials. Interestingly, the demand for skilled jewelry photography persists, with project rates in 2025 reaching as high as $500, reflecting the expertise needed to capture these fine details. Explore this topic further.
Balancing Mixed Materials: Pearls, Leather, And Fabric
Jewelry often incorporates a mix of materials, creating a complex lighting challenge. Pearls, for instance, have a soft, lustrous sheen that requires gentle illumination, while leather or fabric elements need careful exposure to reveal their texture. Imagine photographing a silk scarf next to a metal pendant—each material requires a specific lighting approach.
Layering Light: Use a combination of diffused and direct light to balance the different reflective properties of each material. Diffused light creates a soft overall illumination, while targeted direct light highlights specific areas.
Exposure Bracketing: Take multiple shots at different exposures and combine them in post-processing to capture the full dynamic range of the scene. This ensures that details in both highlights and shadows are preserved.
Custom White Balance: Ensure accurate color representation by adjusting your white balance to match your light source. This is especially important for capturing the true colors of gemstones and other materials.
By mastering these techniques, you can create jewelry photos that highlight the unique qualities of each material, resulting in compelling images that capture attention and drive sales. This sets the stage for the next step in your journey: selecting the perfect camera settings to complement your lighting setup.
Camera Settings That Actually Make a Difference
Now that we’ve covered lighting, let’s explore the camera settings that will truly elevate your jewelry photography. Understanding the interplay of aperture, ISO, and shutter speed is key to capturing professional-quality images. These core settings will transform your photos from simple snapshots into carefully crafted displays of brilliance.
Aperture: Controlling Focus and Depth of Field
Aperture, measured in f-stops, dictates the amount of light entering your lens. Think of it like the pupil of your eye. A wider aperture (smaller f-number like f/2.8) allows more light in. For jewelry, a higher f-stop (such as f/8 to f/16) is generally recommended.
This higher f-stop creates a greater depth of field, keeping more of the jewelry piece in sharp focus. For instance, when photographing a ring, a higher f-stop will ensure both the diamond and the band are crisp and clear.
ISO: Balancing Light and Noise
ISO measures your camera's sensitivity to light. A lower ISO value (like ISO 100) is best in well-lit environments. It produces clean images with minimal noise (graininess). However, in darker settings, you might need to raise the ISO.
Keep in mind that higher ISO values can introduce unwanted noise. It becomes a balance between achieving proper brightness and maintaining image quality.
Shutter Speed: Avoiding Blur
Shutter speed determines how long your camera's sensor is exposed to light. A fast shutter speed (like 1/250th of a second) freezes motion. This is excellent for eliminating blur caused by camera shake or slight movements.
Slower shutter speeds can create motion blur, which may be artistic in certain contexts, but is generally undesirable for capturing sharp jewelry details. When using a tripod, a good starting point for jewelry photography is between 1/60th and 1/125th of a second.
Focusing Techniques for Macro Jewelry Work
Focusing accurately on intricate jewelry can be challenging. Use your camera's manual focus mode and magnification tools for precise control. Focus stacking, a technique involving multiple shots at different focus points combined in post-processing, is highly effective.
Focus stacking ensures every detail, from gemstone facets to metal texture, is perfectly sharp. This technique is especially useful in macro photography where the depth of field is shallow. It's like creating a composite image with every part in optimal focus.
White Balance: Achieving Accurate Colors
White balance ensures colors in your photos appear true-to-life. Different light sources have different color temperatures. Using the right white balance (like Tungsten for indoor incandescent lighting or Cloudy for overcast days) avoids color casts.
Incorrect white balance can make white gold look yellowish or silver appear bluish. Consider the jewelry's metal. Warm white balance can enhance the richness of gold, while cooler settings complement silver.
Shooting jewelry effectively is a strategic approach, crucial not just for aesthetics, but also for business success. The jewelry market is projected to reach $370 billion by 2025, with nearly half of U.S. jewelry purchases occurring online. High-quality images are crucial for capturing market share and driving sales in this competitive landscape. Discover more insights about jewelry industry statistics. Mastering these camera settings allows you to showcase the intricate beauty and brilliance of your jewelry, attracting customers and distinguishing your work. This expertise then informs your styling and composition choices, further enhancing your jewelry's visual appeal and marketability.
Styling and Composition Secrets That Drive Sales
Mastering lighting and camera settings is crucial for jewelry photography. However, styling and composition are what truly elevate an image, transforming it from a simple product shot into a captivating narrative. These elements resonate with potential buyers, driving sales and fostering brand loyalty. This is how you unlock the real potential of your visual content.
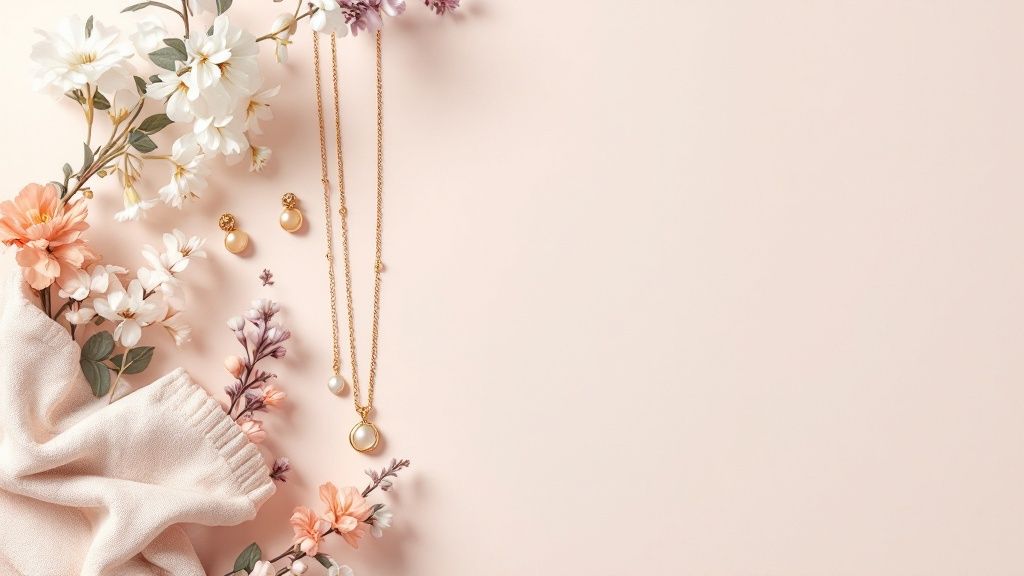
Props and Backgrounds: Setting the Stage
Props and backgrounds are the supporting cast of your jewelry photography. They should complement, not overpower, the main attraction: your jewelry. A minimalist approach, featuring a clean white or neutral background, often works best. This allows the piece to shine.
However, don't shy away from incorporating textures and colors that subtly enhance the jewelry's character. A raw silk backdrop can add a touch of elegance to a pearl necklace. Meanwhile, a piece of driftwood can bring out the rustic charm of a handcrafted silver bracelet. Consider what best reflects the style and mood of each piece.
Composition Techniques: Guiding the Viewer's Eye
Composition is the art of arranging elements within the frame to create visual harmony and guide the viewer's gaze. Negative space, the empty area around the jewelry, is a powerful tool. It gives the piece room to breathe and prevents the image from feeling cluttered.
The rule of thirds is another essential technique. Imagine dividing your frame into a 3x3 grid. Placing key elements along these lines or at their intersections creates a more dynamic and visually engaging composition. This technique draws the eye to the jewelry's most important features.
Balance is also key, particularly when photographing multiple pieces. Varying the heights and sizes of the items creates a more interesting and harmonious arrangement.
Lifestyle Photography: Creating Context and Emotion
While crisp product shots are essential for showcasing details, lifestyle photography injects emotion and context. Showing jewelry worn by a model or styled in a real-life setting allows customers to visualize themselves wearing the piece. This creates a connection and adds aspirational value. You might find inspiration in articles like How to style your outfit with your jewelry.
A simple pendant can evoke powerful feelings when photographed on a model in a cozy setting. This narrative approach transforms the jewelry from a mere object into a desirable accessory, enriching its perceived value.
Maintaining visual consistency across all your product photography is also crucial. This fosters brand recognition and professionalism. A study showed a 72% increase in on-time project completion when complex tasks are broken down into smaller steps. Learn more about research productivity here. Similarly, a consistent styling approach creates a sense of order and elevates the perceived quality of your brand. Establishing a clear style guide for your jewelry photography ensures a unified visual language, ultimately influencing customer perception and purchasing decisions.
Post-Processing That Enhances Without Overdoing It
Taking a great jewelry photo is a significant accomplishment, but it’s only the first step. Post-processing is where the real magic happens. This is your chance to refine your images, bringing out their inherent beauty and preparing them for the world. Think of it like polishing a gemstone – the beauty is already there, but polishing reveals its true brilliance. This section covers how to achieve authentic enhancements, making your jewelry sparkle without creating an artificial look.
Color Correction: True-to-Life Representation
Accurate color is everything, particularly for online jewelry sales. Customers need to see the genuine colors to make informed purchase decisions. Imagine ordering a gold ring online only to receive a piece that looks far less vibrant than it did on screen. This kind of mismatch leads to disappointment and returns. Color correction tools in photo editing software like Adobe Photoshop give you precise control over hues and saturation, ensuring consistent color across different devices and displays.
White Balance Adjustment: Start by adjusting the white balance. This crucial step neutralizes any color casts from your lighting setup, making white areas appear truly white.
Targeted Color Adjustments: If needed, you can fine-tune specific colors. This allows you to subtly enhance the rich tones of gold or boost the vibrancy of a gemstone, always aiming for a natural look.
This careful color correction builds trust with your customers, guaranteeing that what they see online is what they’ll receive in person.
Retouching: Removing Imperfections While Preserving Character
Retouching is the digital equivalent of carefully dusting your jewelry – removing minor flaws without altering the piece itself. Small dust particles, fingerprints, or tiny scratches can detract from the overall impact of your jewelry photos. Retouching tools allow you to erase these blemishes while maintaining the unique character of each piece. For tips on physical cleaning, see this guide: How to clean jewelry at home.
Healing Brush: This tool seamlessly blends surrounding textures to erase minor imperfections, creating a flawless finish.
Clone Stamp: The clone stamp tool copies a clean area of the image and uses it to cover up unwanted spots or blemishes.
The goal is enhancement, not reinvention. Retain the natural textures and characteristics that make each piece special. Over-retouching can create an artificial look, so always strive for realism.
Background Removal and Replacement: Creating a Clean Canvas
A clean, uncluttered background puts the focus where it should be – on your jewelry. Background removal techniques isolate the piece, allowing it to stand out without distractions. A cluttered backdrop competes for attention, drawing the viewer's eye away from the jewelry itself.
Selection Tools: Use precise selection tools to isolate the jewelry from its background.
Background Replacement: Once removed, place the jewelry on a pure white or subtly textured background for a professional presentation.
This clean and polished look elevates the perceived value of your jewelry, creating a sophisticated online showcase.
Sharpening and Contrast Adjustment: Defining Details
Sharpening brings out the intricate details and textures, highlighting the craftsmanship of your jewelry. Contrast adjustment refines the interplay of light and shadow, adding depth and dimension. Think of a close-up of a diamond ring – sharpening accentuates the facets, while contrast adjustment makes the sparkle dazzle.
Sharpening Tools: Use sharpening filters judiciously. Too much sharpening can create a harsh, over-processed look.
Contrast Sliders: Adjusting contrast can dramatically enhance the visual impact of your image.
This final refinement showcases the unique qualities that make your jewelry special. Interestingly, the global photography industry, driven in part by the demand for online retail imagery, is valued at $55.6 billion in 2023, projected to reach $81.83 billion by 2032. Explore this topic further. The demand for high-quality visuals, particularly in jewelry, emphasizes the importance of skilled post-processing.
Batch Processing and File Optimization: Efficiency and Consistency
Batch processing is essential for maintaining consistency and efficiency when working with large jewelry catalogs. This technique applies the same edits to multiple images simultaneously. Think of it as a streamlined workflow for your photo editing.
Preset Creation: Create presets in your editing software for common adjustments like color correction and sharpening.
Batch Actions: Utilize batch actions to apply these presets across entire folders of images, ensuring a unified look and feel.
Finally, file optimization is critical. Choose appropriate file formats and resolutions for different uses. Smaller file sizes are crucial for fast loading times on websites, while higher resolutions are necessary for print marketing. Selecting the right format ensures your images are always presented in their best light.
To illustrate the potential costs associated with professional jewelry photography, consider the following pricing guide:
Jewelry Photography Pricing Guide Professional pricing structure for different types of jewelry photography projects
Service Type | Beginner Rate | Experienced Rate | Premium Rate | Typical Deliverables |
|---|---|---|---|---|
Basic Product Shots on White Background | $25-50 per image | $50-100 per image | $100+ per image | High-resolution images, basic retouching |
Lifestyle Photography | $50-100 per image | $100-250 per image | $250+ per image | Styled images, model or props, advanced retouching |
Macro Photography | $75-150 per image | $150-300 per image | $300+ per image | Extreme close-ups highlighting details, specialized retouching |
360° Photography | $100-200 per product | $200-400 per product | $400+ per product | Interactive 360° view, optimized for web |
Video Production | $250-500 per video | $500-1000+ per video | $1000+ per video | Short product videos or commercials, editing and color grading |
This table provides a general overview, and prices can vary based on factors such as the complexity of the jewelry, the number of images required, and the photographer's location.
As you can see, investing in professional photography can be significant, but the return in terms of increased sales and brand perception can be substantial. Choosing the right photographer and service level will ensure your jewelry is presented in the best possible light.
Key Takeaways for Jewelry Photography Success
This section breaks down the essentials of jewelry photography into practical steps. Whether you're just starting out or you're a seasoned pro, these takeaways offer a helpful guide to capturing stunning jewelry images that get results. Consider this your quick reference for consistent success.
Checklist for Equipment Setup
Having the right equipment organized and at the ready is the first step to a smooth photography session. This checklist helps ensure you have everything you need, minimizing interruptions and maximizing your efficiency:
Camera: Smartphone or DSLR with macro lens (if using a DSLR). This is your tool for capturing the image.
Tripod: Essential for stability and avoiding blurry images, particularly important for macro photography.
Lighting: Natural light source (window) or artificial lighting setup (softboxes, continuous lights). Lighting forms the foundation of your image.
Background: White sweep or neutral backdrop (poster board, paper). A clean background keeps the focus on the jewelry.
Reflectors/Diffusers: White foam board, sheet, or similar materials to manipulate light. These tools allow you to shape and control the light.
Props (Optional): Ring holders, jewelry dishes, or other elements to enhance the scene. These can add context and visual interest.
Cleaning Supplies: Microfiber cloth, polishing cloth, gloves. Essential for keeping your jewelry spotless and free of distracting smudges.
This organized approach sets the stage for a successful shoot, ensuring everything is in place before you start.
Lighting Configuration for Different Materials
Lighting is arguably the most critical element of jewelry photography. Different materials require specific lighting techniques to showcase their unique qualities. Here's a concise guide:
Metals (Gold, Platinum, Silver): Diffused light minimizes harsh reflections and hot spots. Using multiple light sources at varying angles can fill in shadows and bring out the texture.
Diamonds and Gemstones: Pinpoint lighting enhances sparkle and brilliance. Dark backgrounds create contrast and make the gems truly pop. Reflectors add those extra highlights that catch the eye.
Mixed Materials (Pearls, Leather, Fabric): A combination of diffused and direct light balances the different reflective properties of these materials. Experimenting with exposure bracketing and custom white balance can be particularly helpful.
This tailored lighting approach highlights the best in each material, showcasing its inherent beauty and captivating your audience.
Camera Settings for Consistent Results
The right camera settings ensure consistently sharp, professional-looking images. Keep these key parameters in mind:
Aperture: A higher f-stop (f/8-f/16) provides greater depth of field, ensuring the entire piece of jewelry remains in focus.
ISO: Shoot at the lowest possible ISO (100-200) for clean images with minimal noise.
Shutter Speed: A shutter speed between 1/60 and 1/125 of a second helps avoid motion blur, especially beneficial when using a tripod.
Focus: Manual focus with magnification tools offers precise control. Consider focus stacking for exceptional sharpness in macro photography.
White Balance: Adjust the white balance according to your light source to ensure accurate colors, particularly important for metallic jewelry and gemstones.
Mastering these settings gives you greater control and lays the groundwork for stunning results.
Troubleshooting Common Problems
Challenges are a natural part of the learning curve. Here’s how to address some common issues in jewelry photography:
Reflections: If reflections are too strong, adjust your lighting angles, use diffusers, or consider a dulling spray on highly reflective surfaces.
Blurry Images: Make sure your camera is firmly mounted on the tripod. A faster shutter speed or a remote shutter release can also help minimize camera shake.
Uneven Lighting: Use reflectors to fill in shadows and create a more balanced look. Adjust the position and intensity of your light sources for optimal results.
Dull Colors: Double-check your white balance settings. In post-processing, color correction tools can enhance vibrancy without looking artificial.
These simple solutions can help you overcome obstacles and get back to capturing beautiful images.
Goal-Setting and Continuous Improvement
Developing your jewelry photography skills is an ongoing process. Setting realistic goals and regularly practicing your techniques will lead to continuous improvement:
Start Simple: Focus on mastering the fundamental techniques before exploring more advanced concepts like focus stacking or lifestyle photography.
Practice Regularly: The more you practice, the more comfortable you'll become with your equipment and lighting setups.
Seek Feedback: Share your photos and ask for constructive criticism. Fresh perspectives can offer valuable insights.
Analyze Successful Images: Studying the work of professional jewelry photographers can provide inspiration and help you refine your techniques.
Experiment and Evolve: Don’t be afraid to experiment and develop your own unique style.
Building confidence through practice and experimentation is key to realizing your potential as a jewelry photographer.
Elevate your jewelry business with beautiful photography that attracts attention and boosts sales. Explore the collection at Panther De Luxe Shop and discover pieces that deserve to be showcased in the best possible light.
Comments